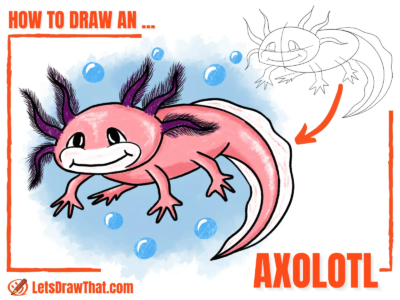
Learn how to draw an axolotl. Step-by-step axolotl drawing tutorial to help you draw a cute and happy axolotl with lovely fluffy gills floating in water.
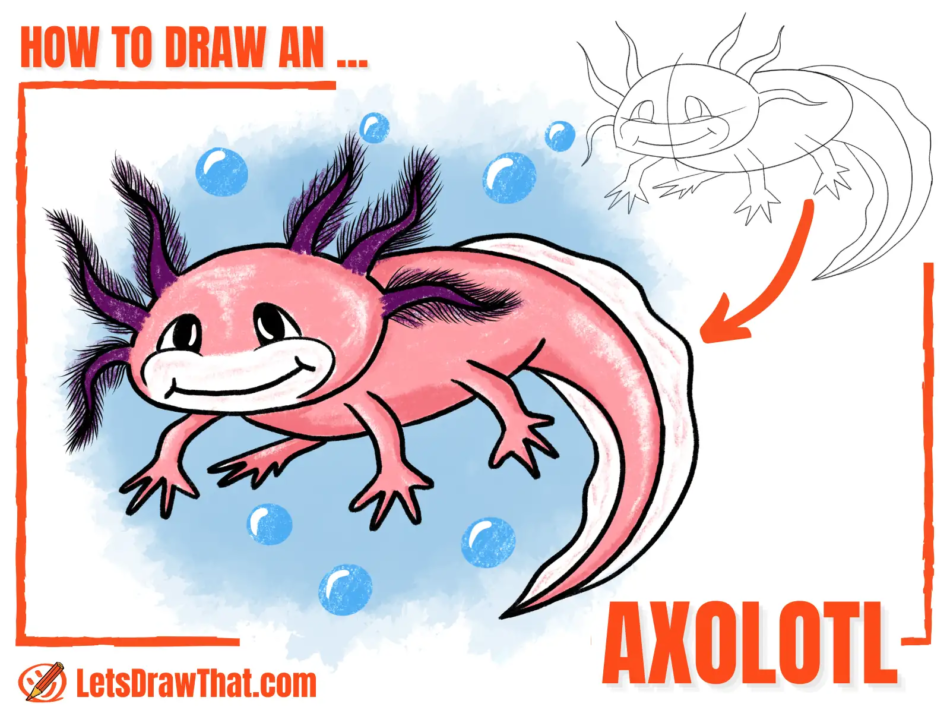
Today, we will learn how to draw an axolotl. Axolotls are quite unique creatures. Sometimes called “Mexican walking fish,” they are not actually fish but rather amphibian salamanders that live their entire lives in water.
They live only in freshwater lakes in the Valley of Mexico. Thanks to the growing Mexican capital and pollution of the few lakes where they live, only very few axolotls are left in the wild. However, due to their funny “walking fish” looks, cute feathered gills, and big, friendly smiles, they have become a very popular pet.
But enough talk, let’s learn how to draw an axolotl.
min
You will need: pencil, fineliner pen, colored pencils, eraser and drawing paper or sketchbook
Disclaimer: LetsDrawThat.com participates in the Amazon Associates Program. If you purchase a product using a link on our website, we earn a small commission, at no extra cost to you. This is one way how you can support this website.

How To Draw An Axolotl: base sketch step by step
Step 1: Sketch the base shape for the head
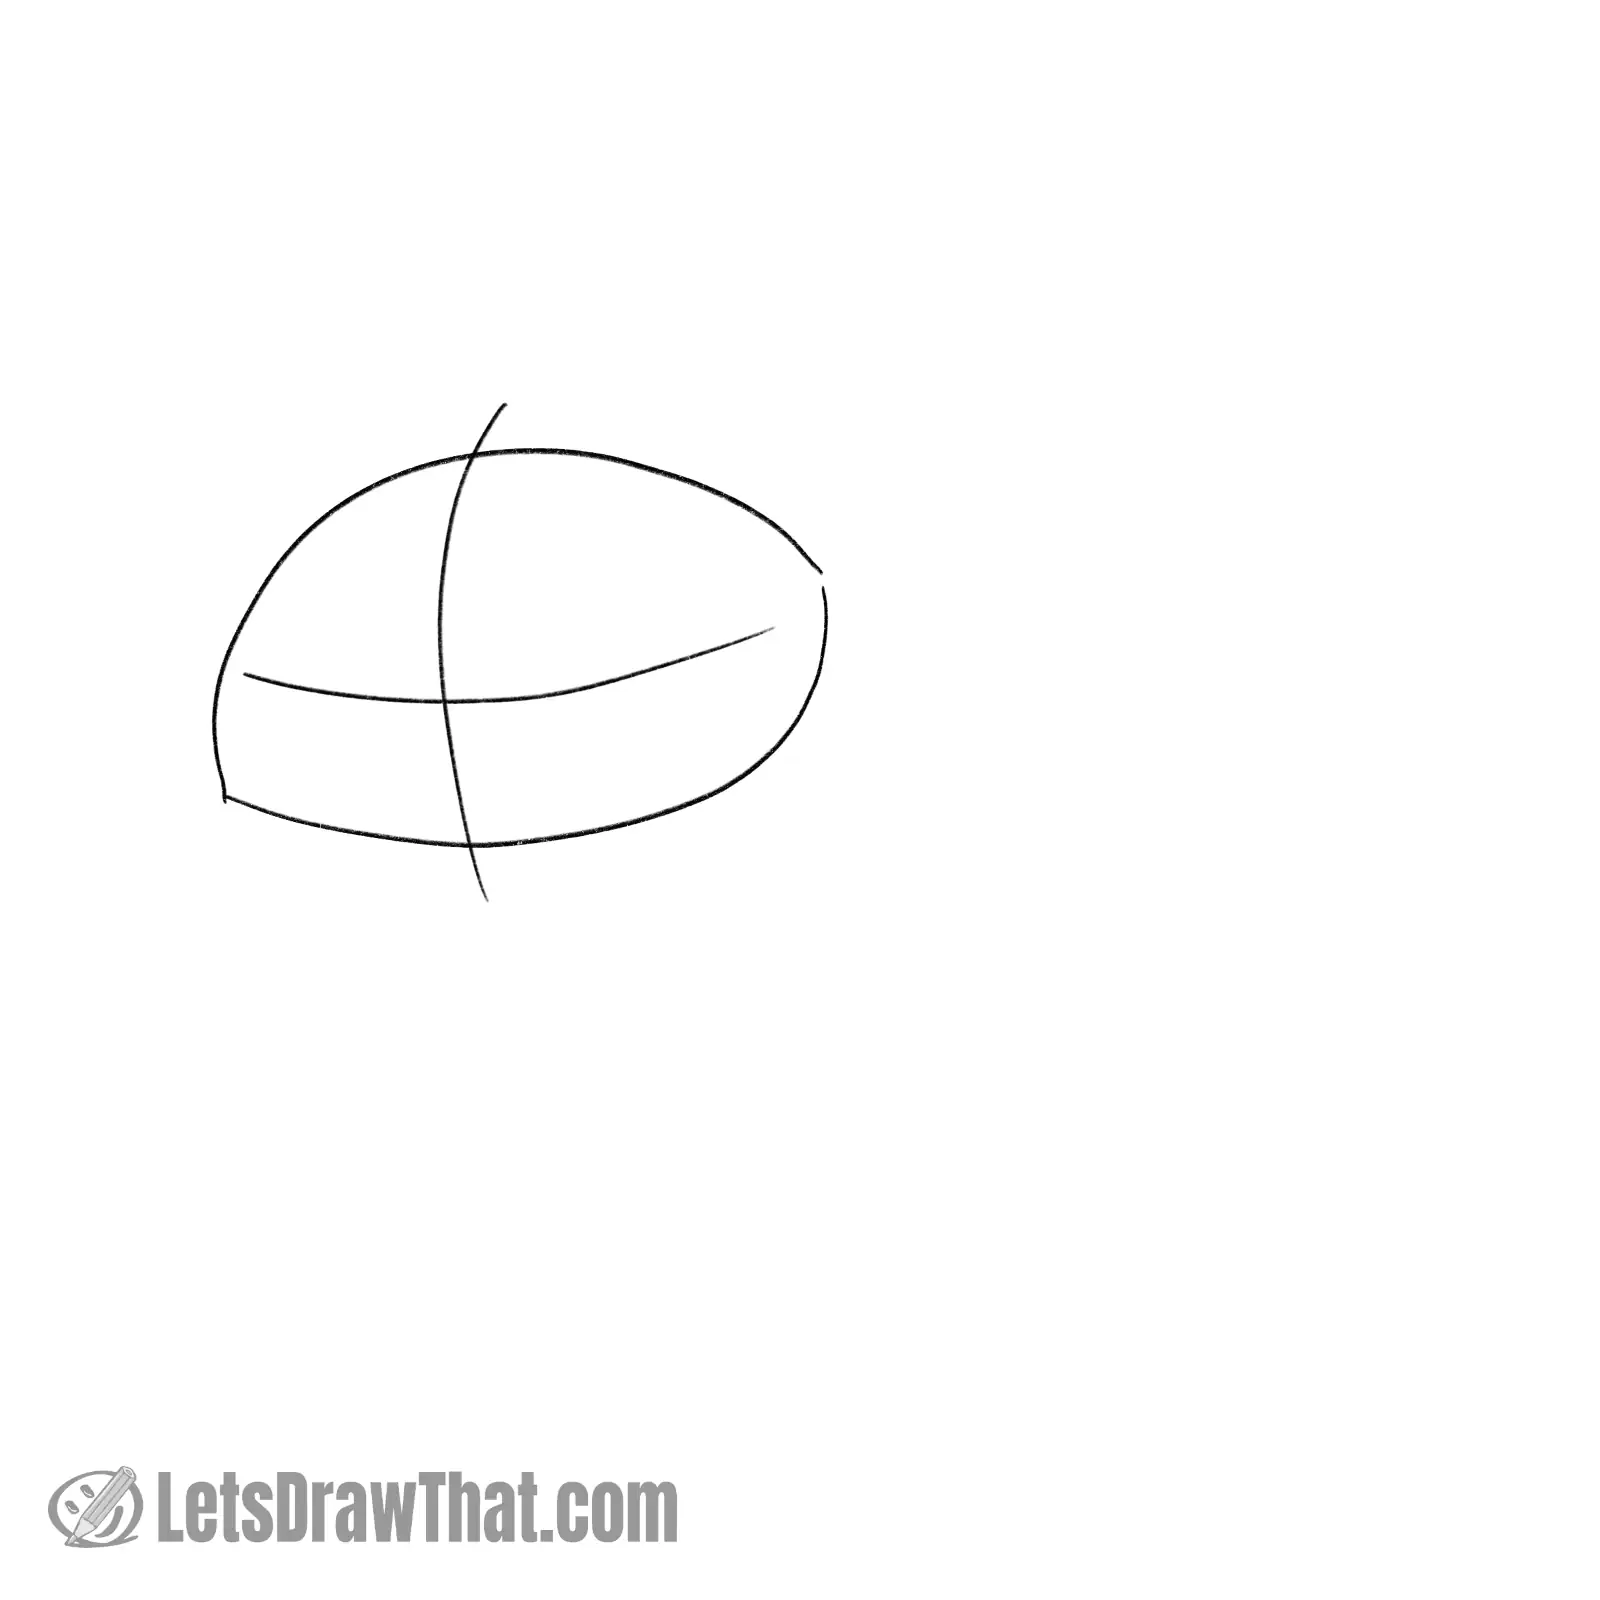
Let’s start our axolotl drawing by sketching its head shape.
You can sketch a simple wide oval and adjust it later. But we have drawn something more like a lentil shape made of two curved lines. There is a sharp corner at the bottom left and a less obvious corner at the top right.
Then, draw the face cross, which will help us place the face features next.
Step 2: Sketch axolotl's eyes and mouth
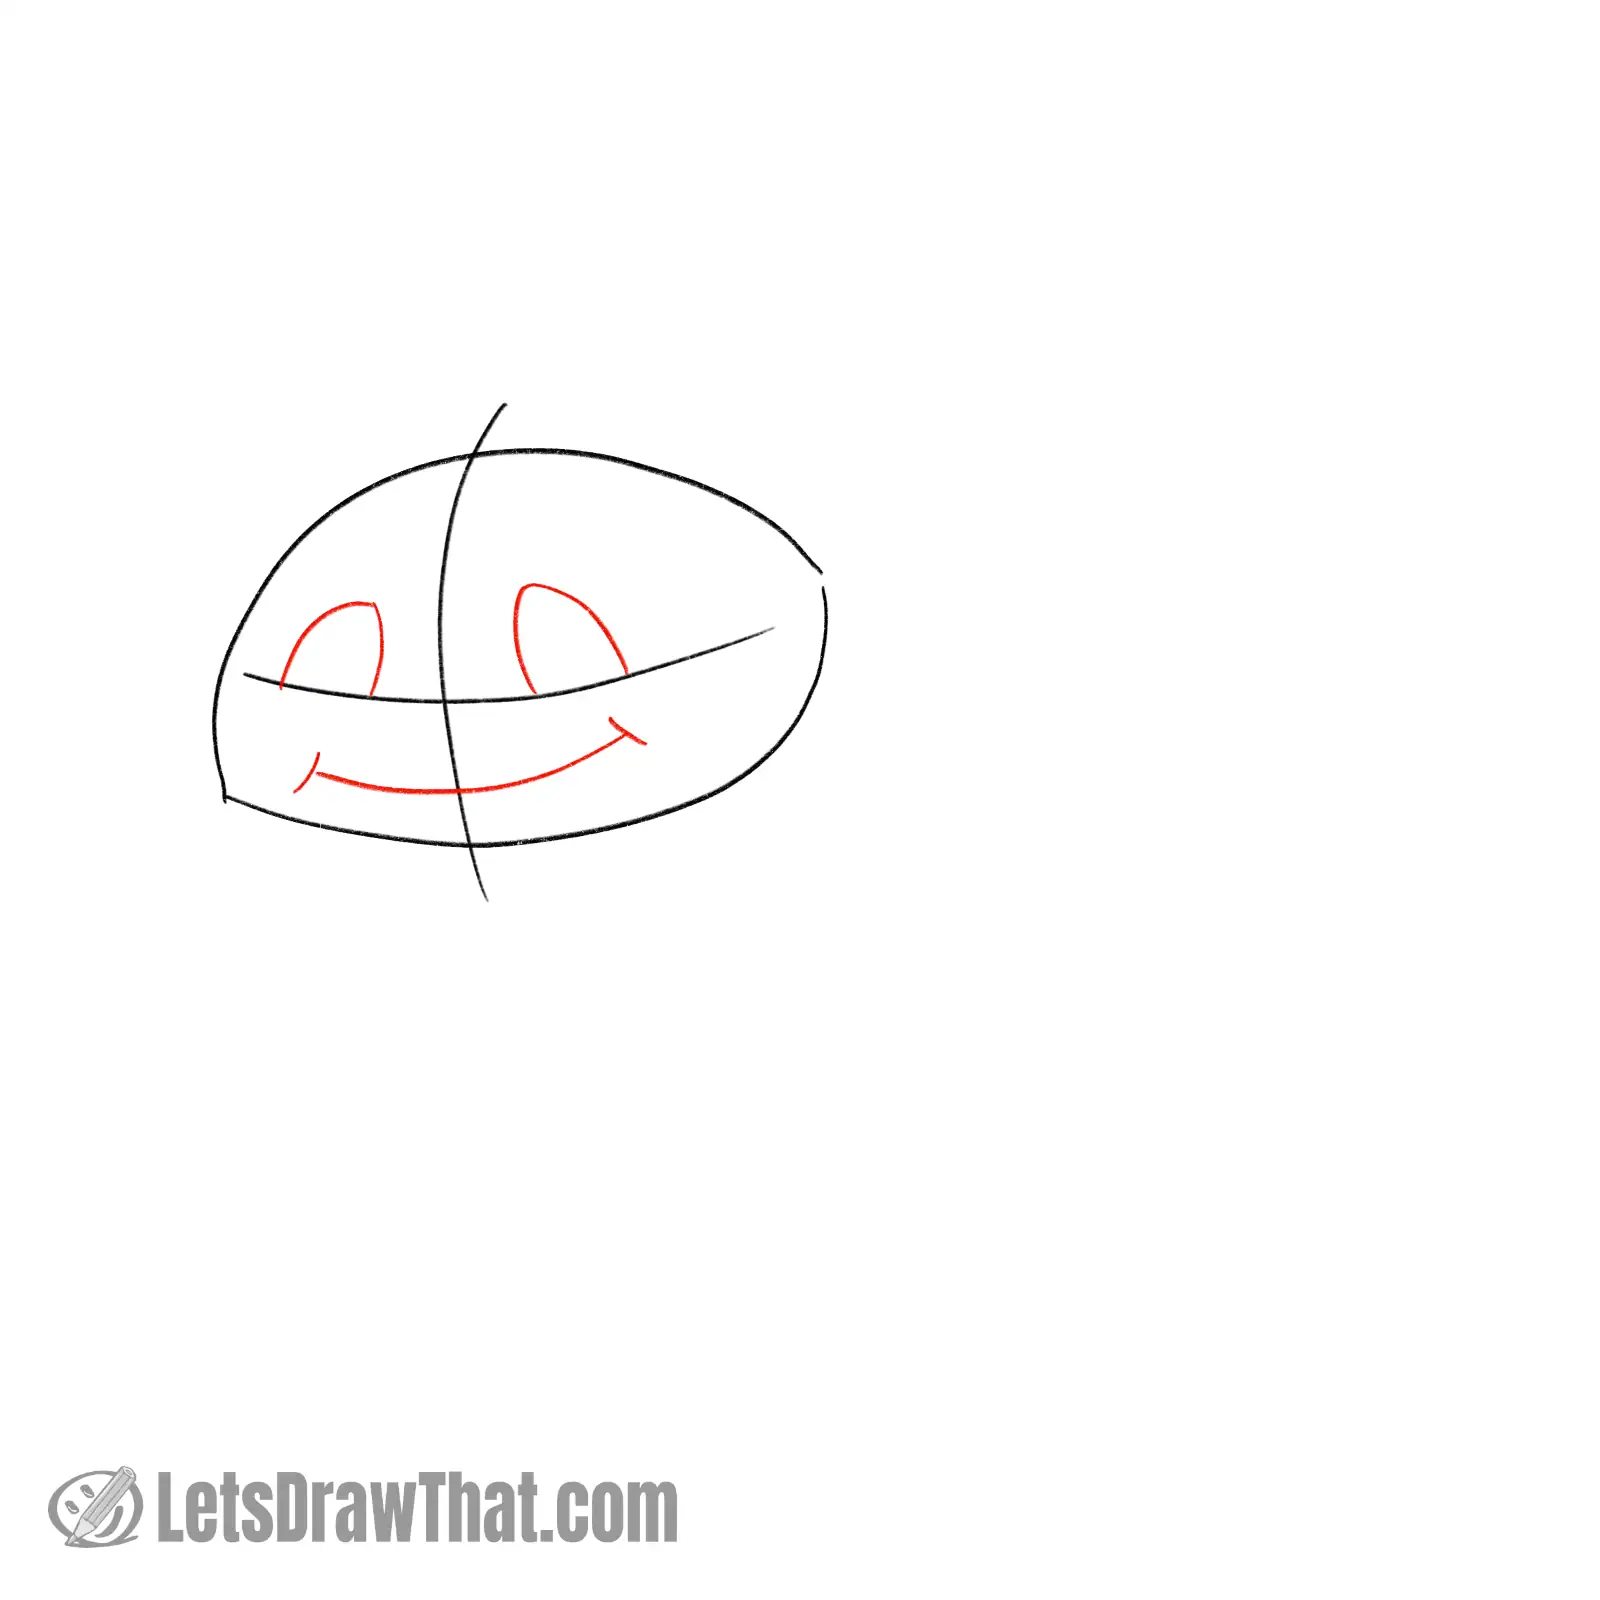
Our axolotl will have large cartoony eyes.
Place the eyes on the horizontal face line. Draw the eyes as two curves each, flatter one on the inside and more bulging out on the outer edge.
Then draw a nice, wide curve for the axolotl’s smiling mouth. End it on both sides with a small cross line for a tiny cheek.
Step 3: Sketch cheeks and pupils in the eyes
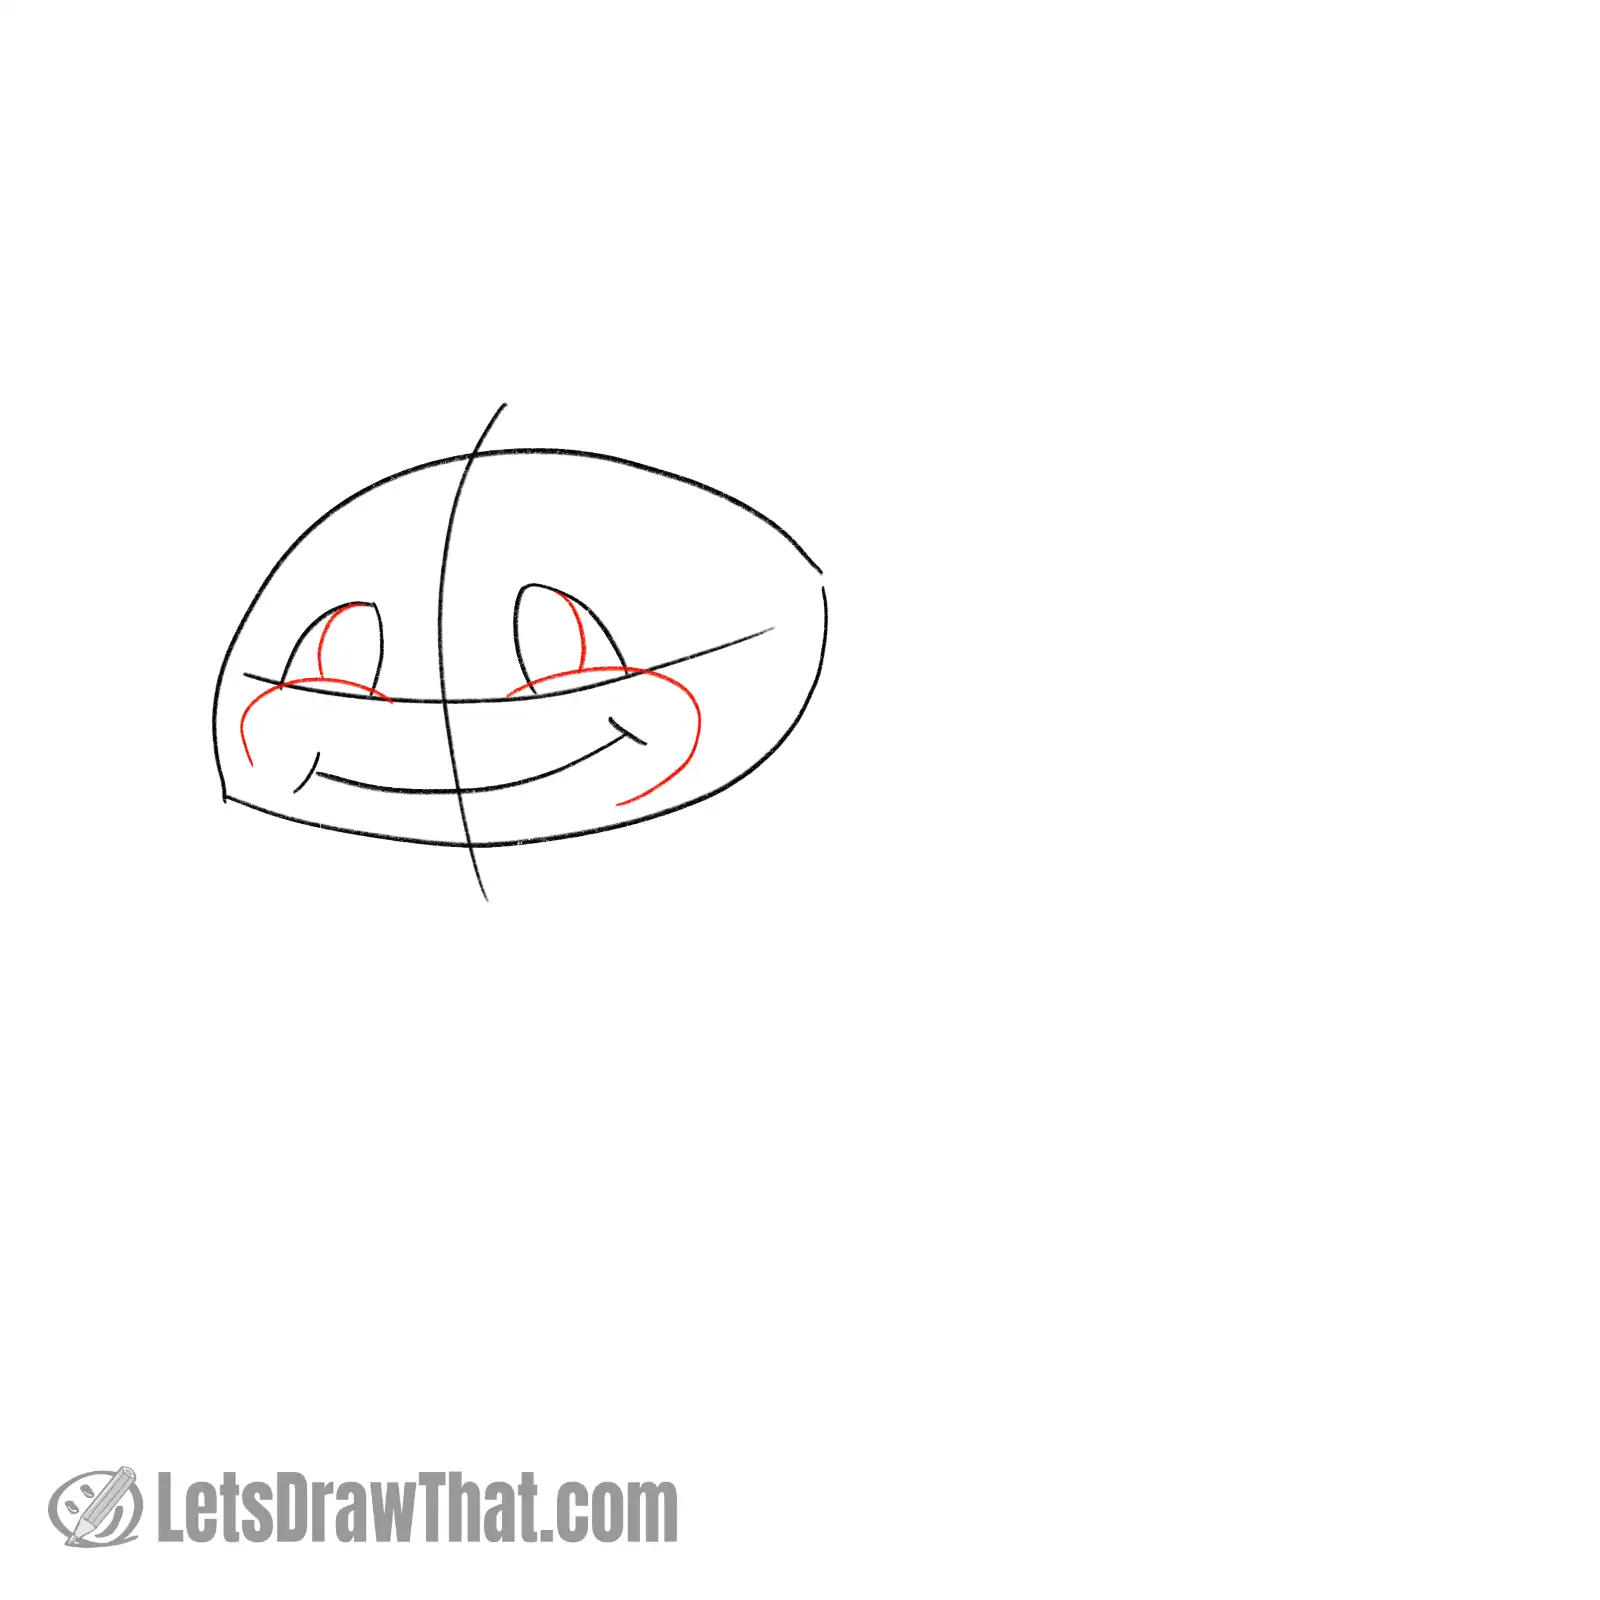
Next, we keep drawing the axolotl’s happy face.
Draw two cheek lines, one under each eye. These are just a small “C” shaped curves. The right one is slightly larger than the left one.
In fact, if you have a keen eye, you might have noticed that the whole face is slightly larger on the right side, which is closer to us, than on the left, which is further from us. That is a bit of a perspective.
Step 4: Draw the axolotl's gills
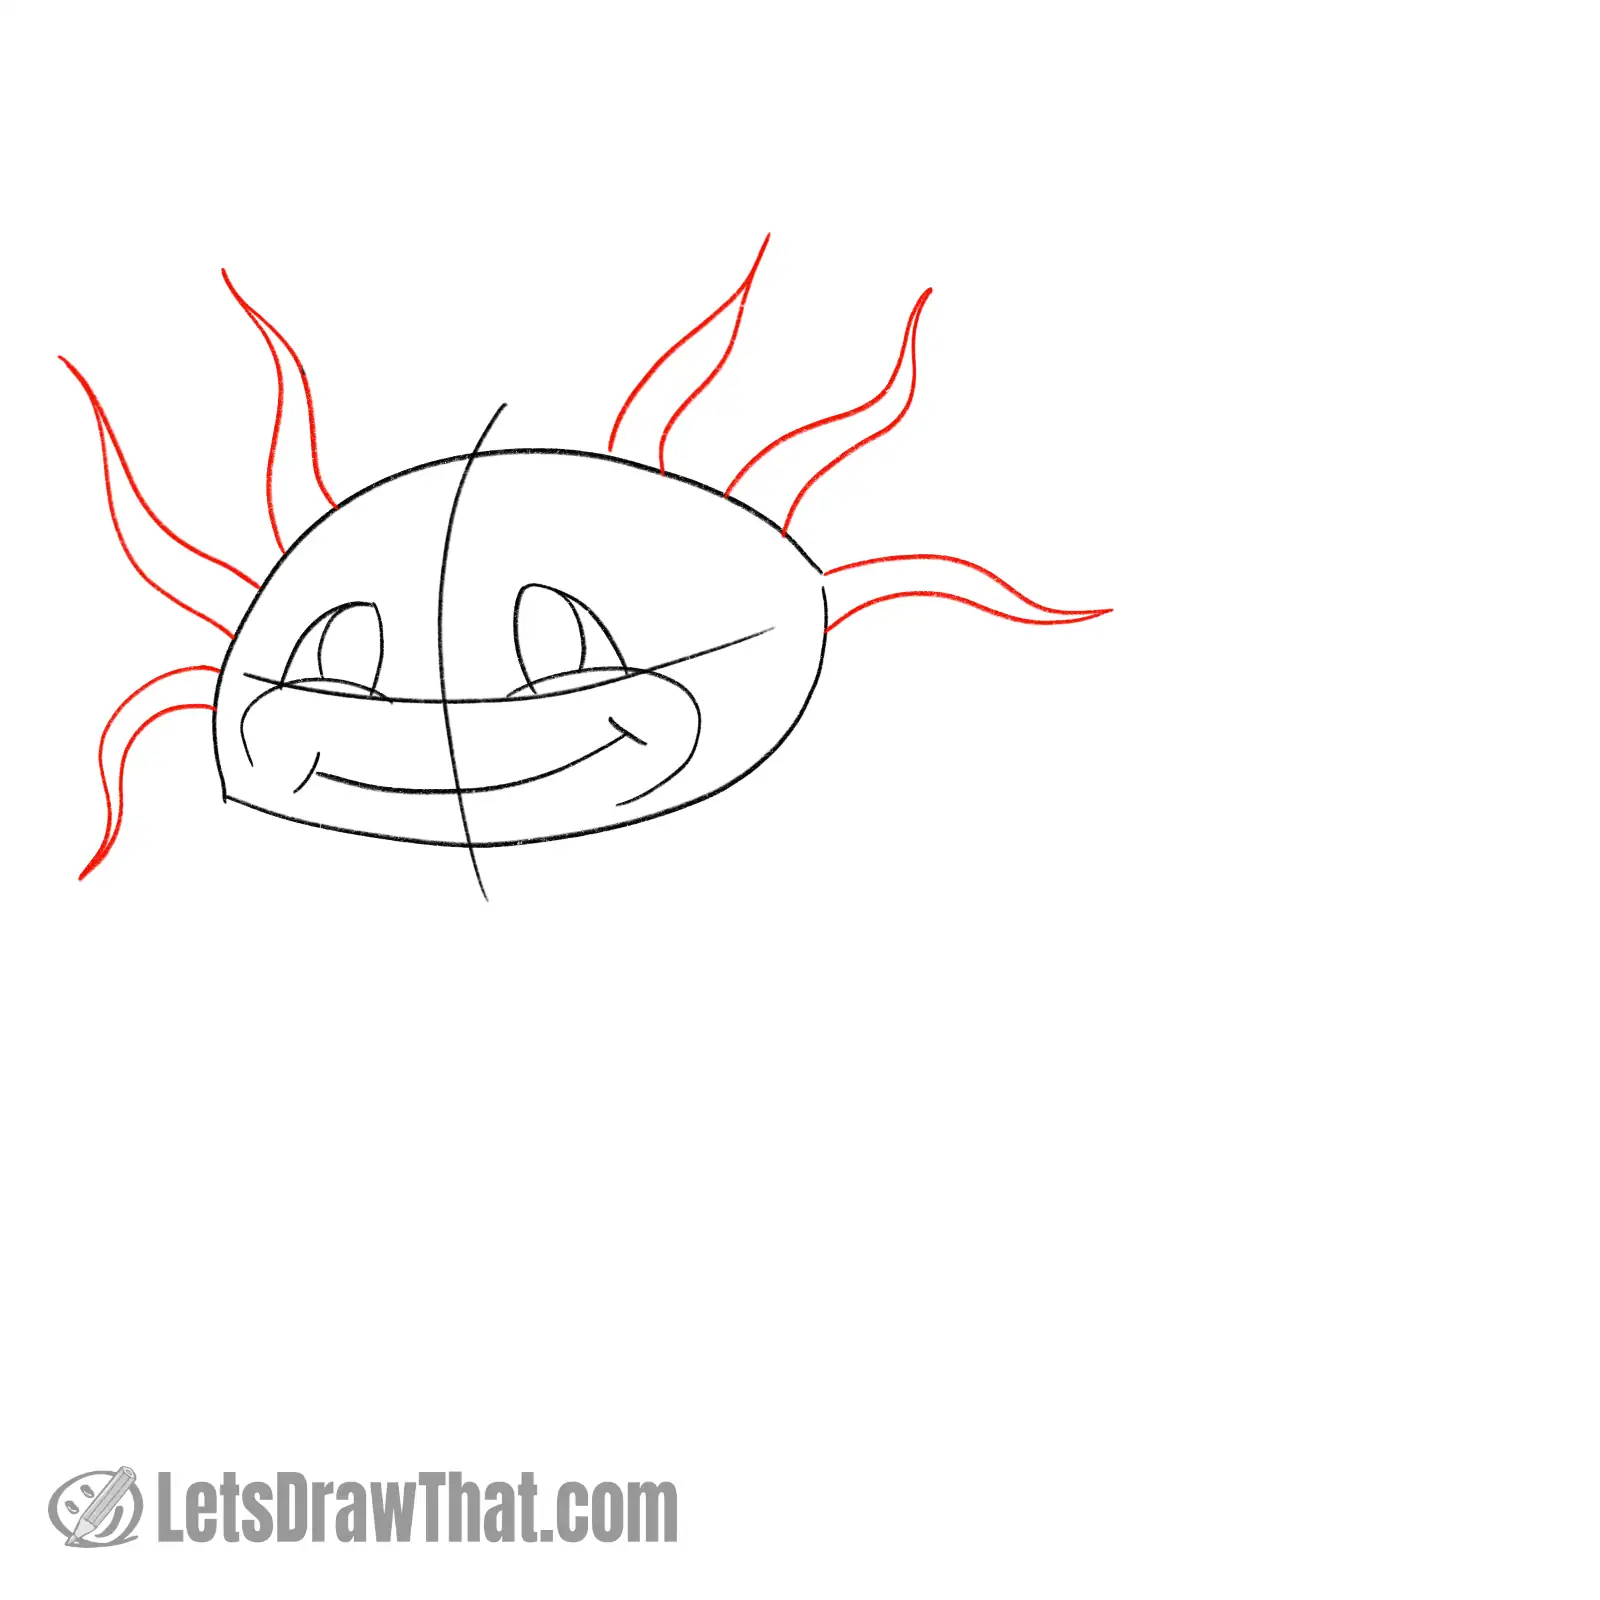
Next, let’s draw the axolotl’s gills.
There are three of them on each side of the head. Draw them as wobbly “V” lines – connected at the top and widening out towards the headline.
Start with the ones that attach level with the horizontal faceline, and then add two more on each side at the same spacing.
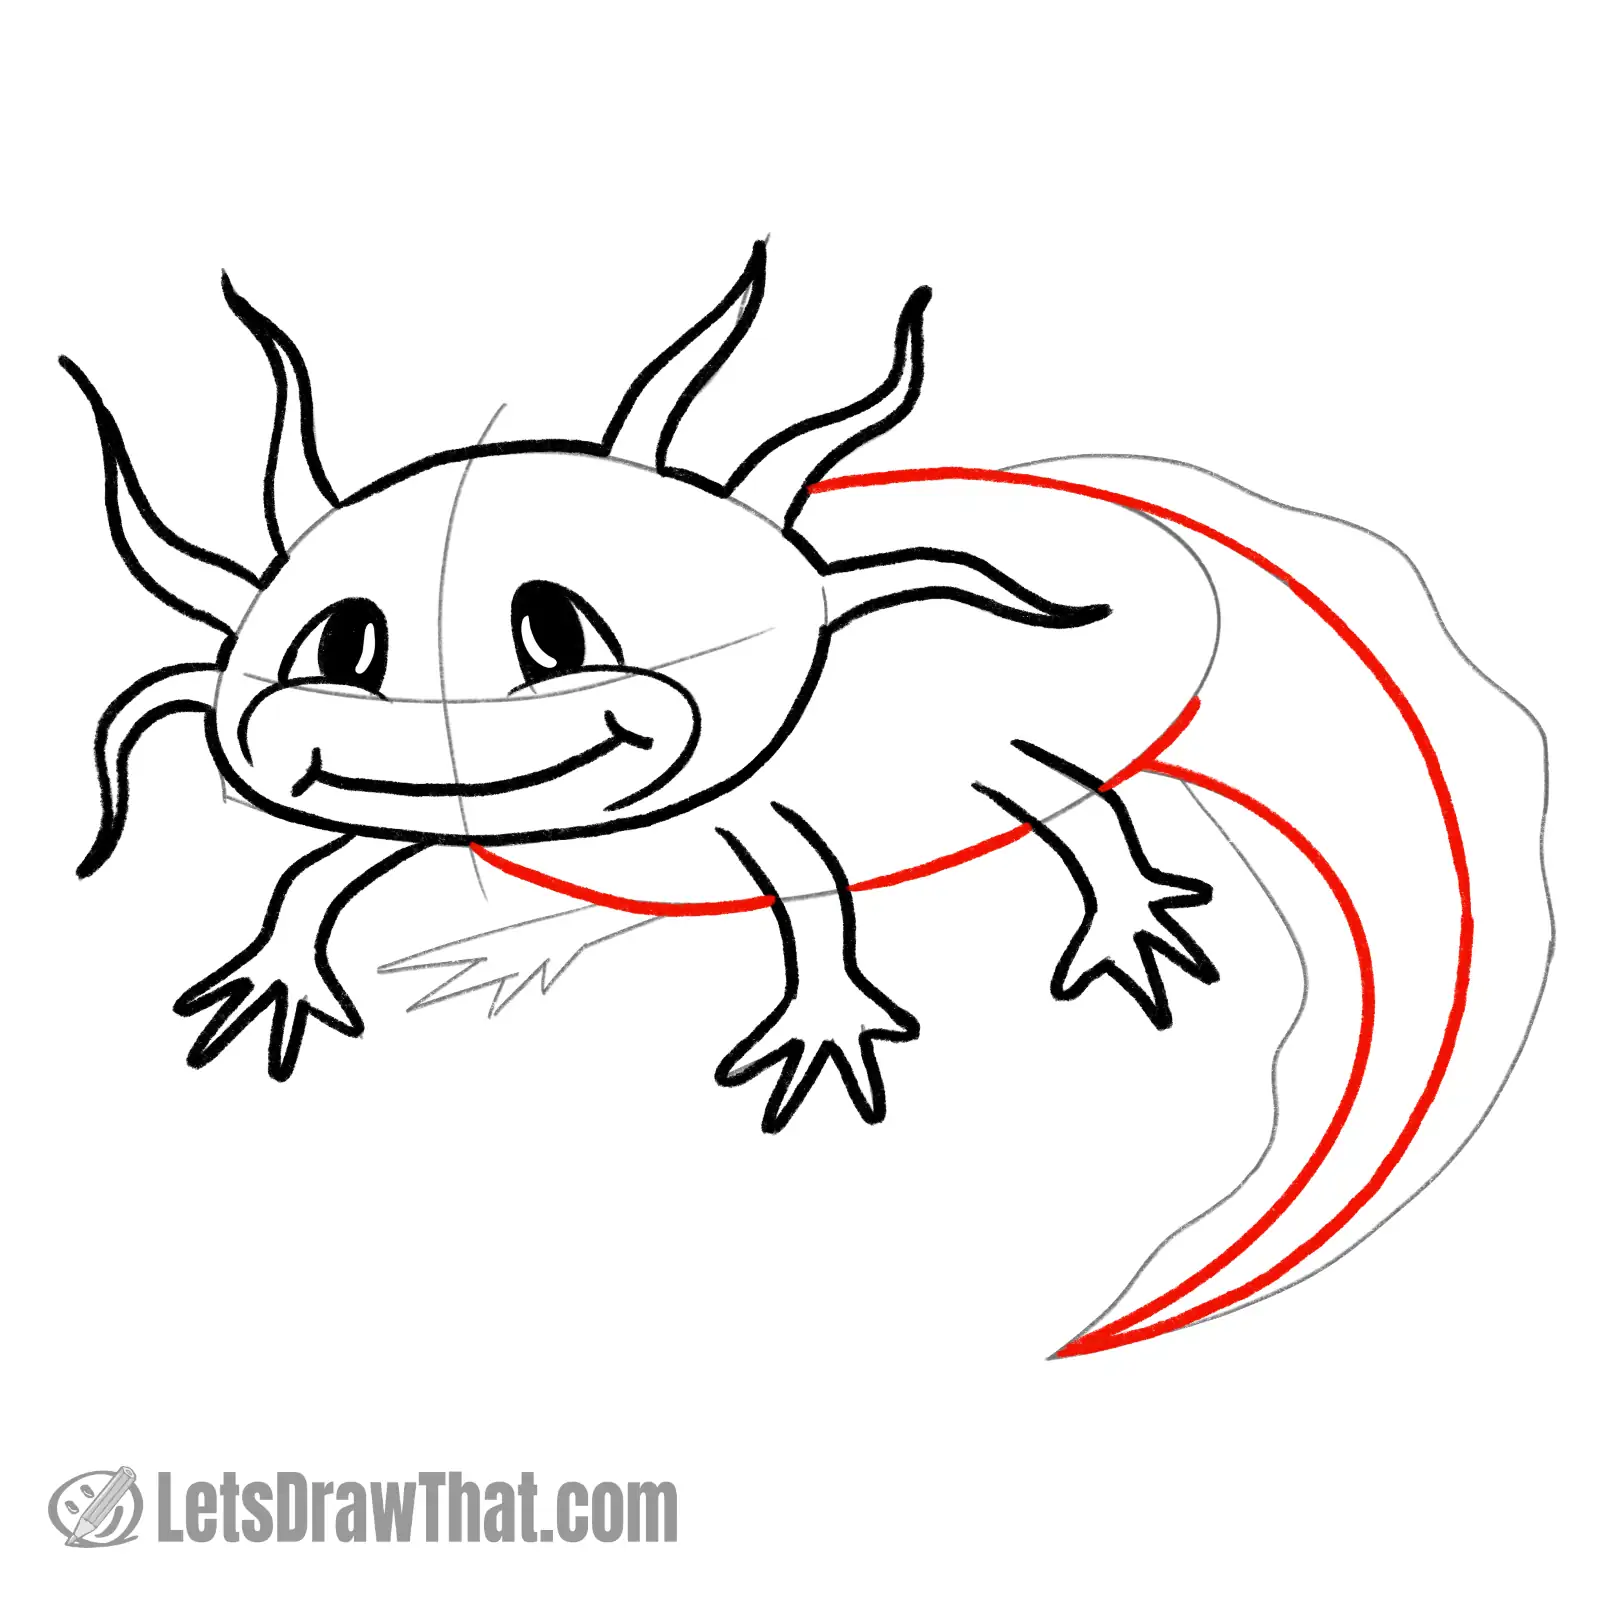
Step 5: Sketch the axolotl's body and tail
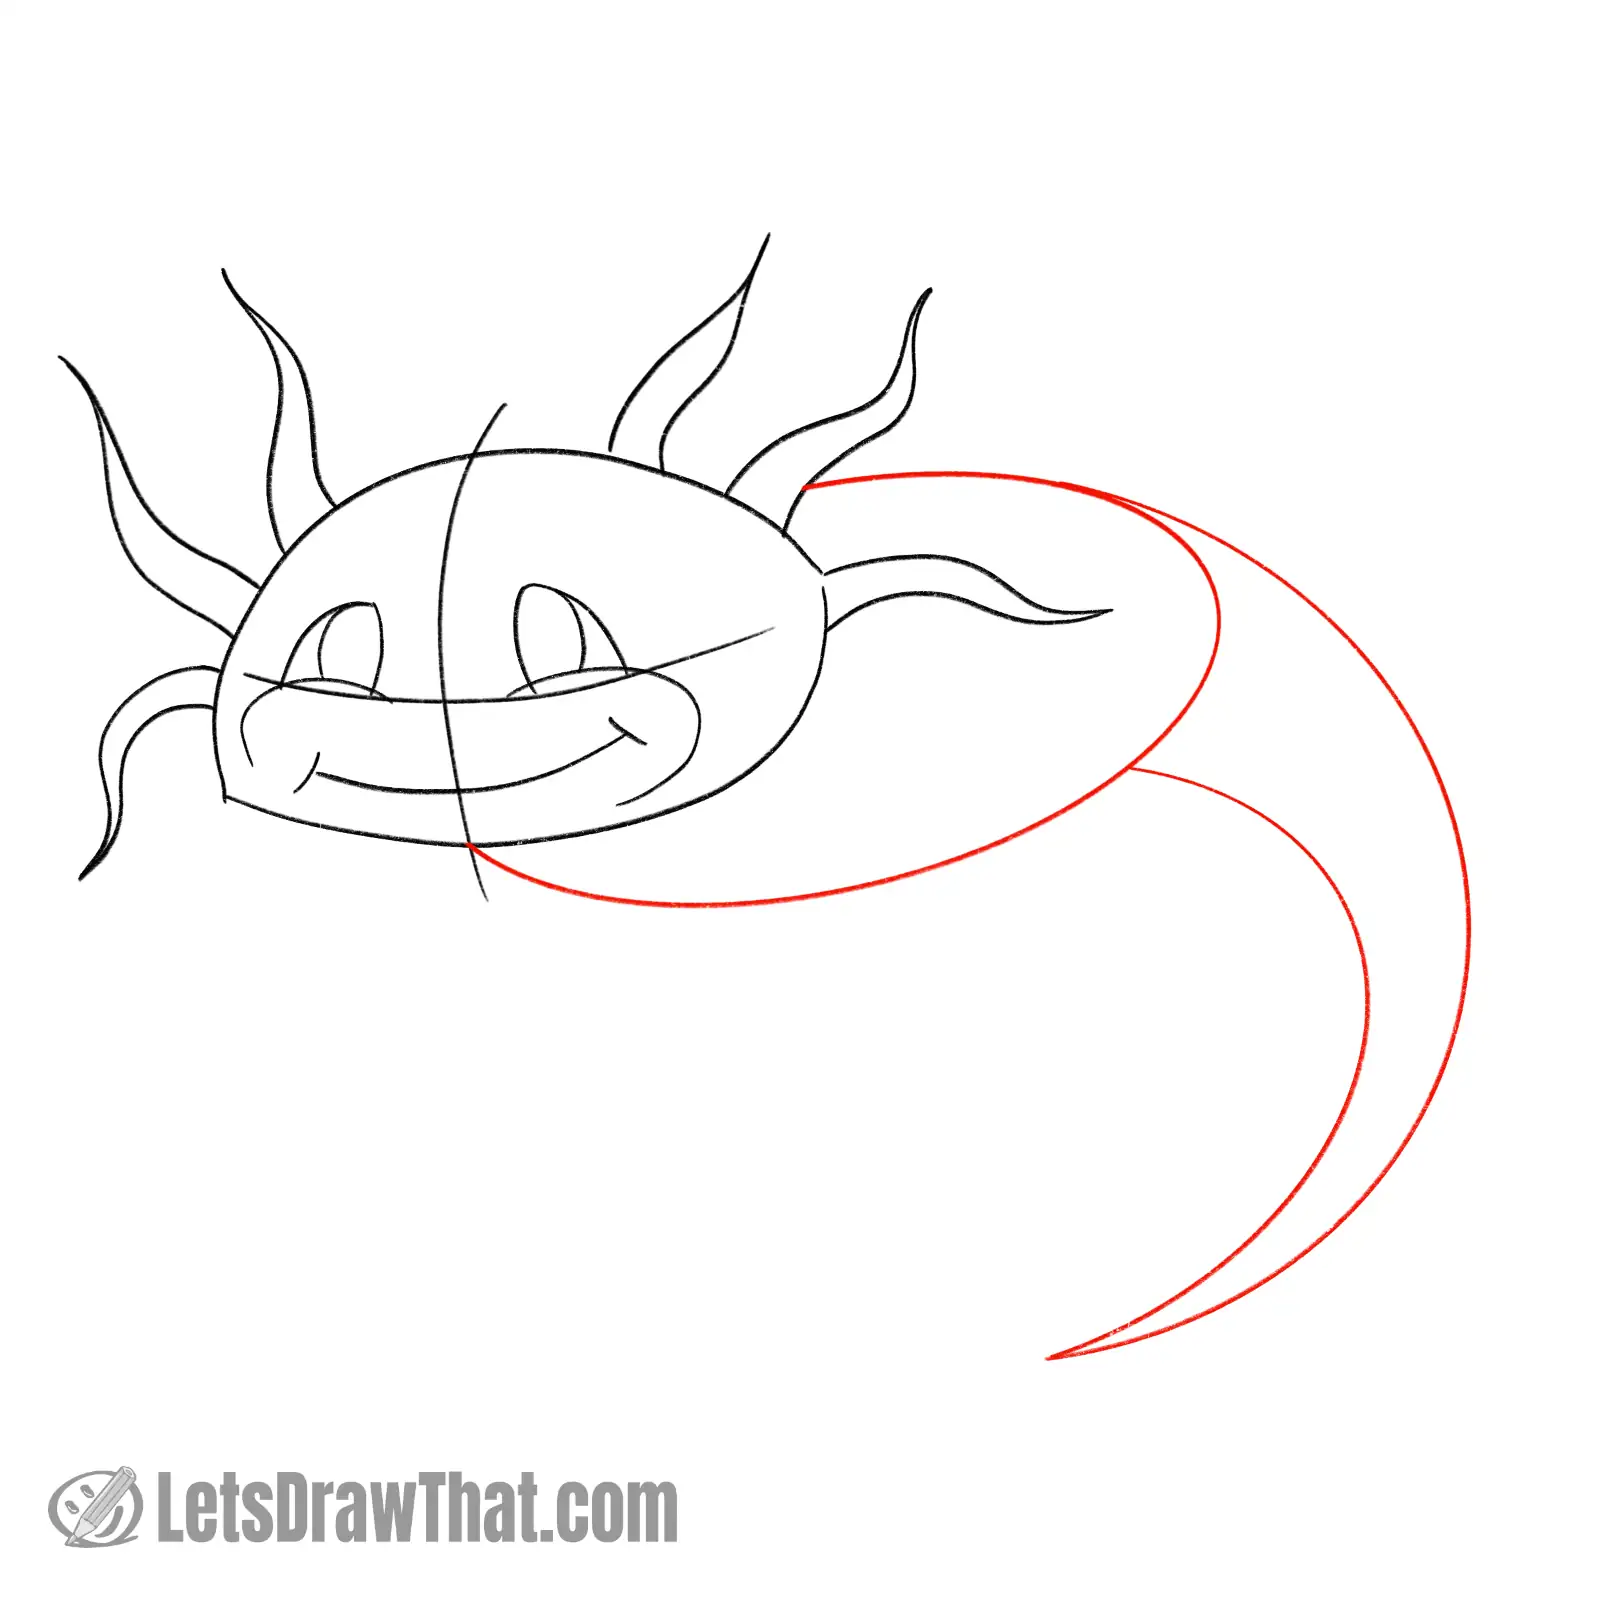
It is a time to give our axolotl a body.
Sketch it as a narrow, wide oval. Start from the middle of the chin, where the face-cross meets the head outline. Curve it back to the head somewhere between the first and second gill.
Then draw the tail. It is made of two “C” curves that meet at a pointy end. Feel free to curve it as much or as little as you want.
Step 6: Sketch the axolotl's front legs
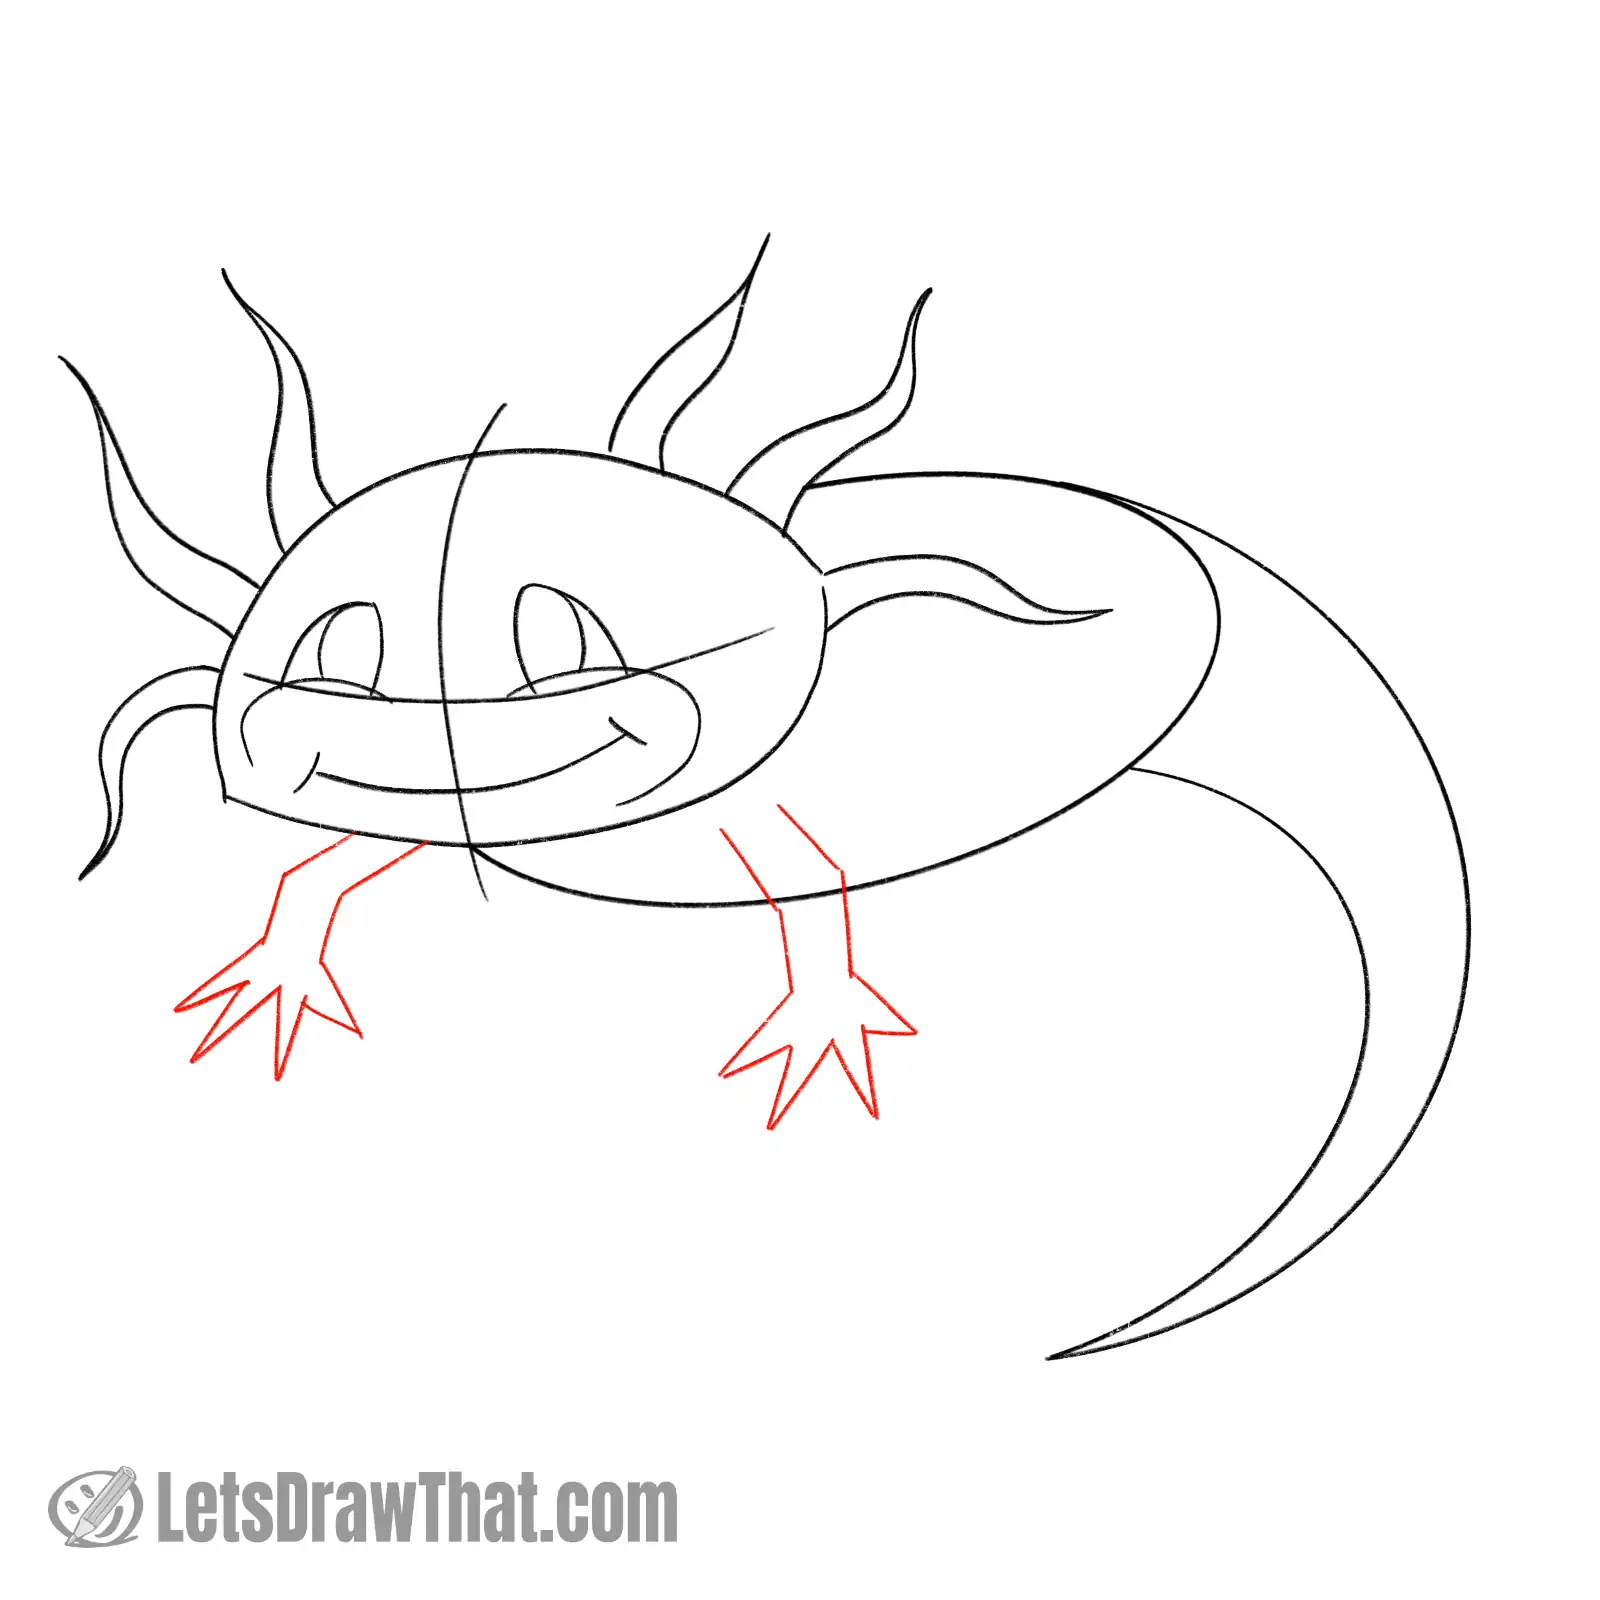
For now, we are sketching the axolotl’s front legs with simple straight lines.
Draw the upper leg as two lines slightly apart. Then draw the lower leg at a slight bend.
Add four fingers to each leg – just simple “V” shapes for now.
Step 7: Sketch the axolotl's rear legs
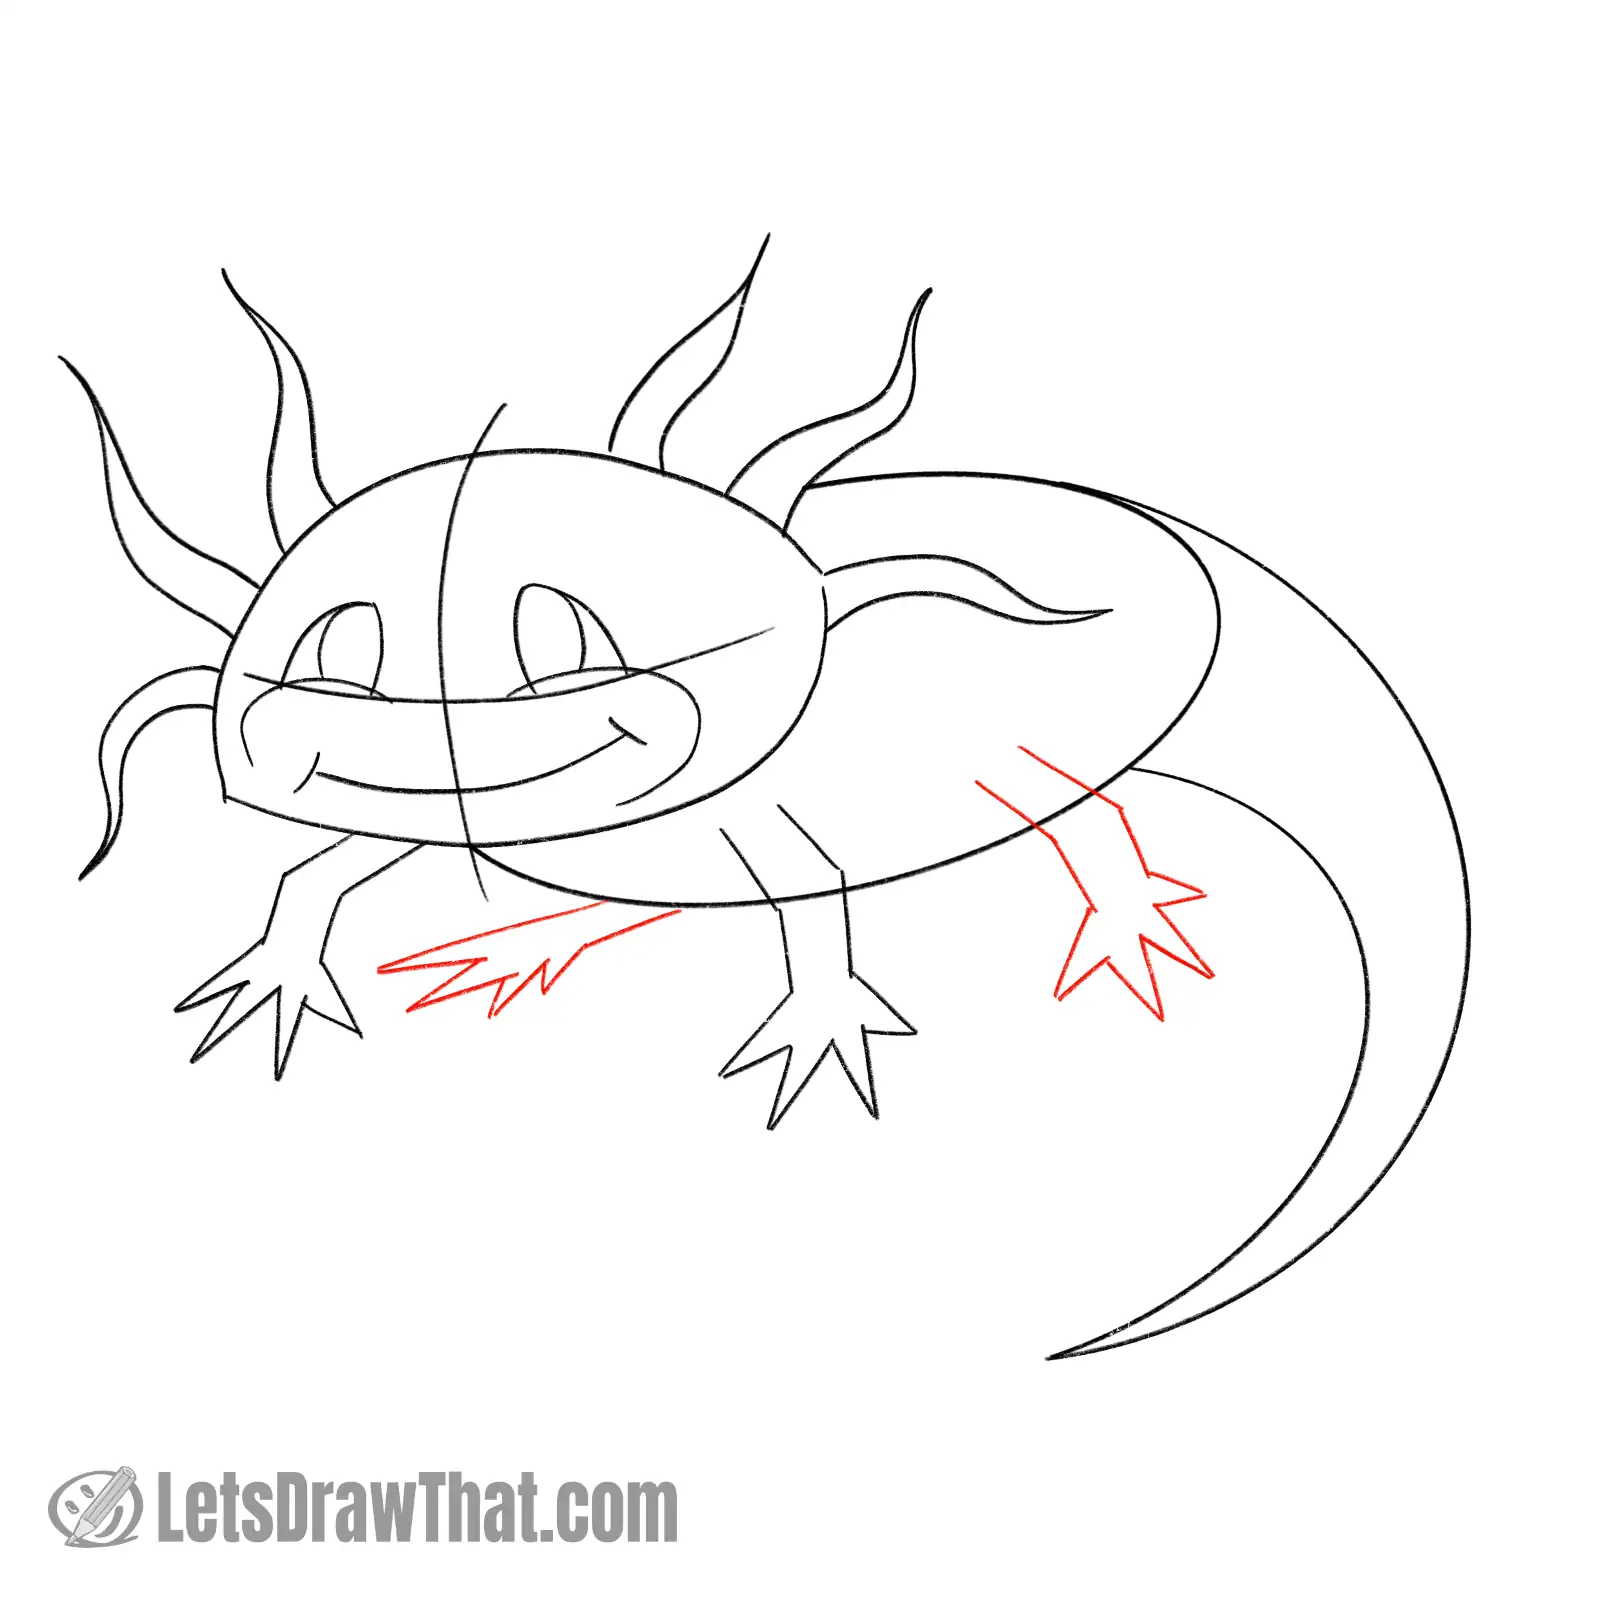
Next, draw the axolotl’s rear legs. The one on the right is slightly bent, the same as the front legs.
For the left rear leg, we have drawn it just straight, without the bend, for some variety.
Now, if you want to be scientifically correct, axolotls have five fingers on the rear legs, but only four on the front ones. So feel free to add the extra finger on the rear legs.
We feel our cartoon axolotl drawing does not need to be precise…
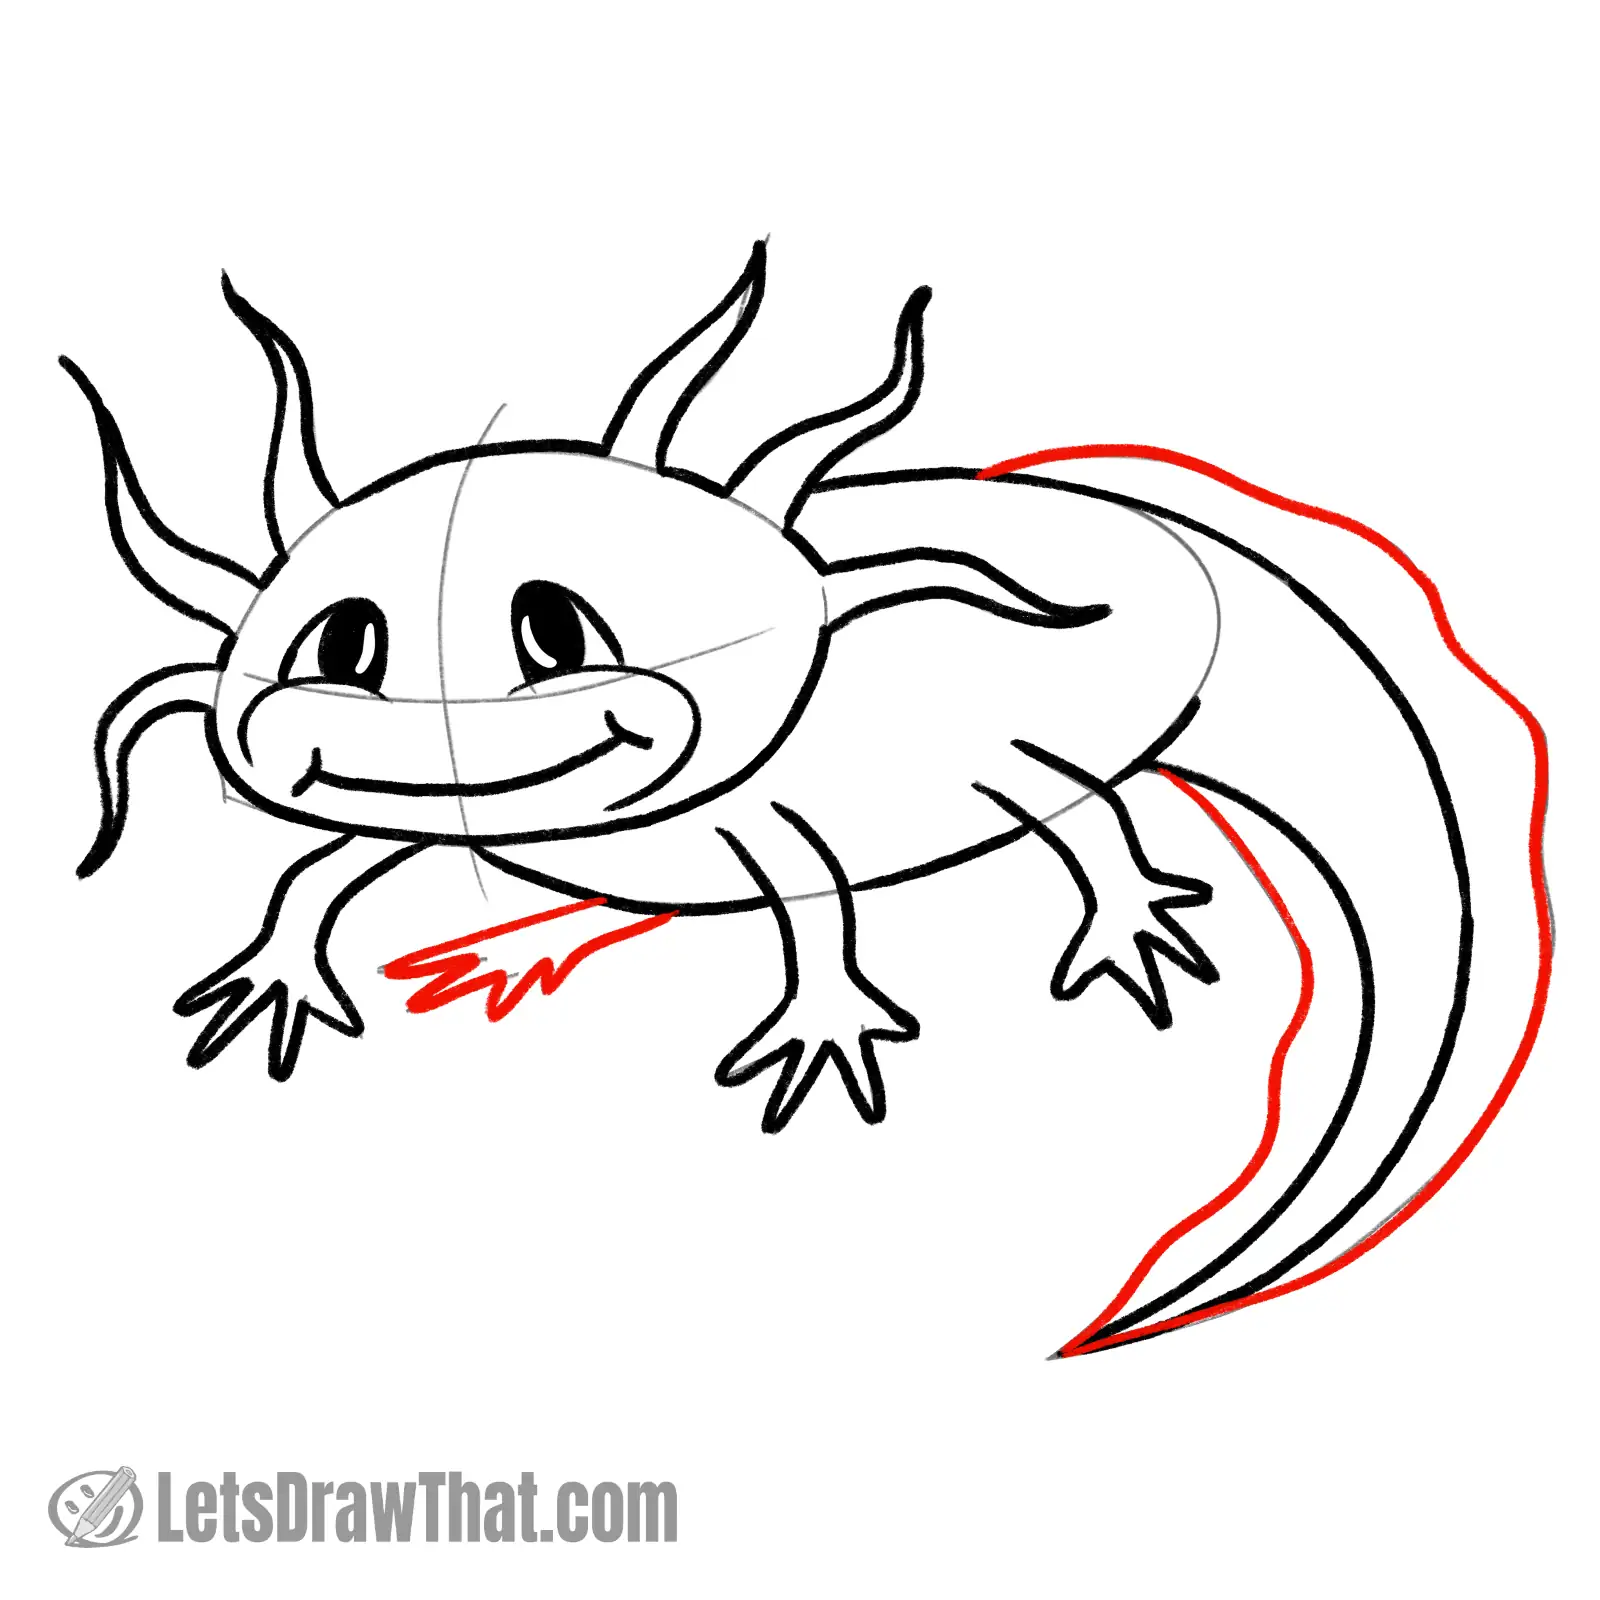
Step 8: Sketch the dorsal fin
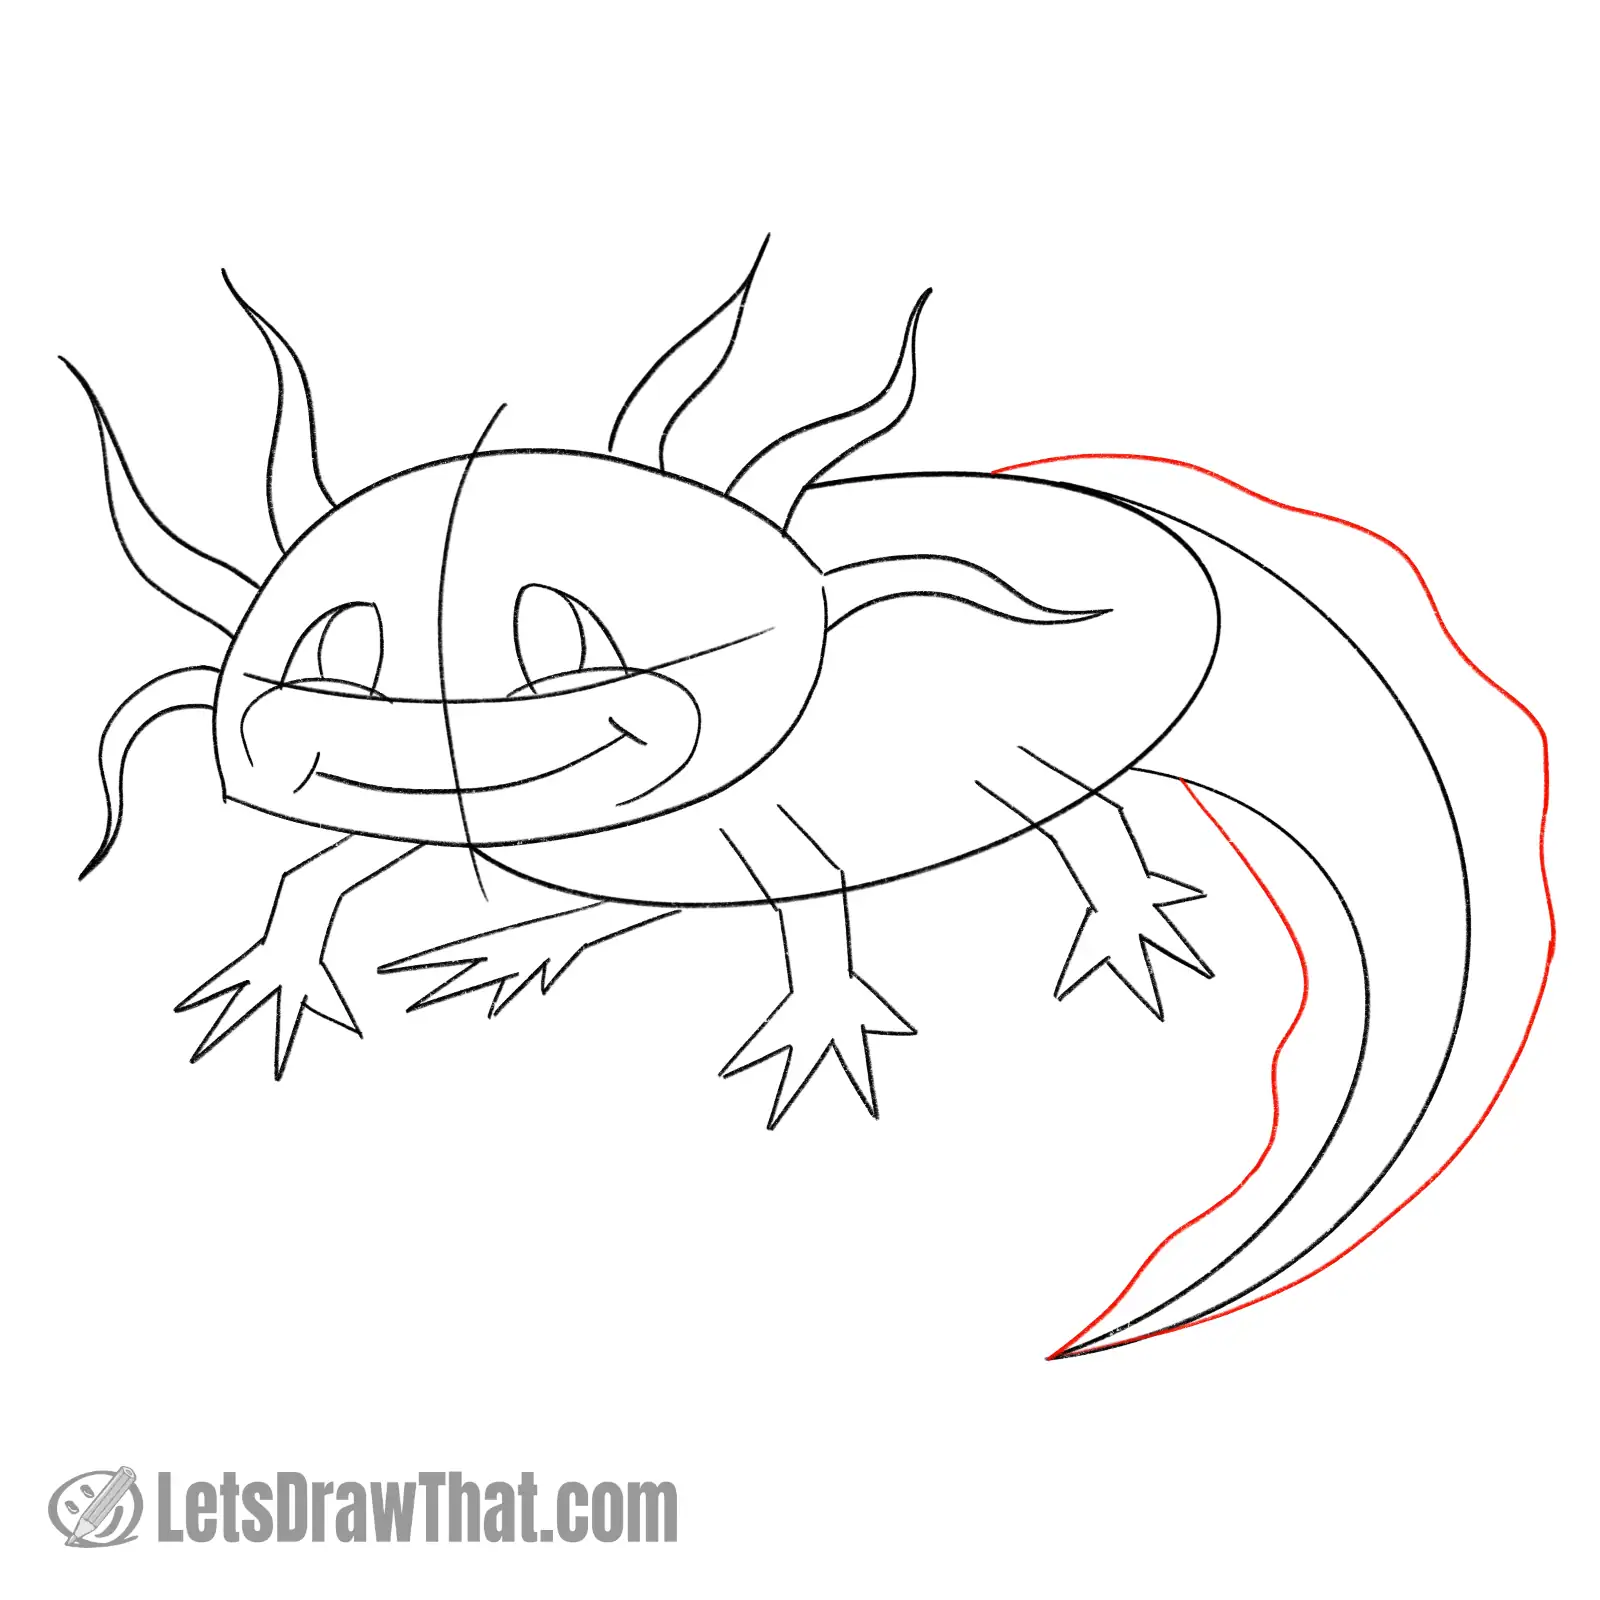
To sketch the dorsal fin on the axolotl’s tail, we are doubling up the tail outline with a wobbly line. Again, the fin is widest near the body and narrows into the pointed tail end.
The wobbly line suggests the fin is waving around as the axolotl swims in the water, so feel free to draw in any shape you like.
How to draw an axolotl: outline the drawing step by step
Step 1: Draw axolotl's eyes and face
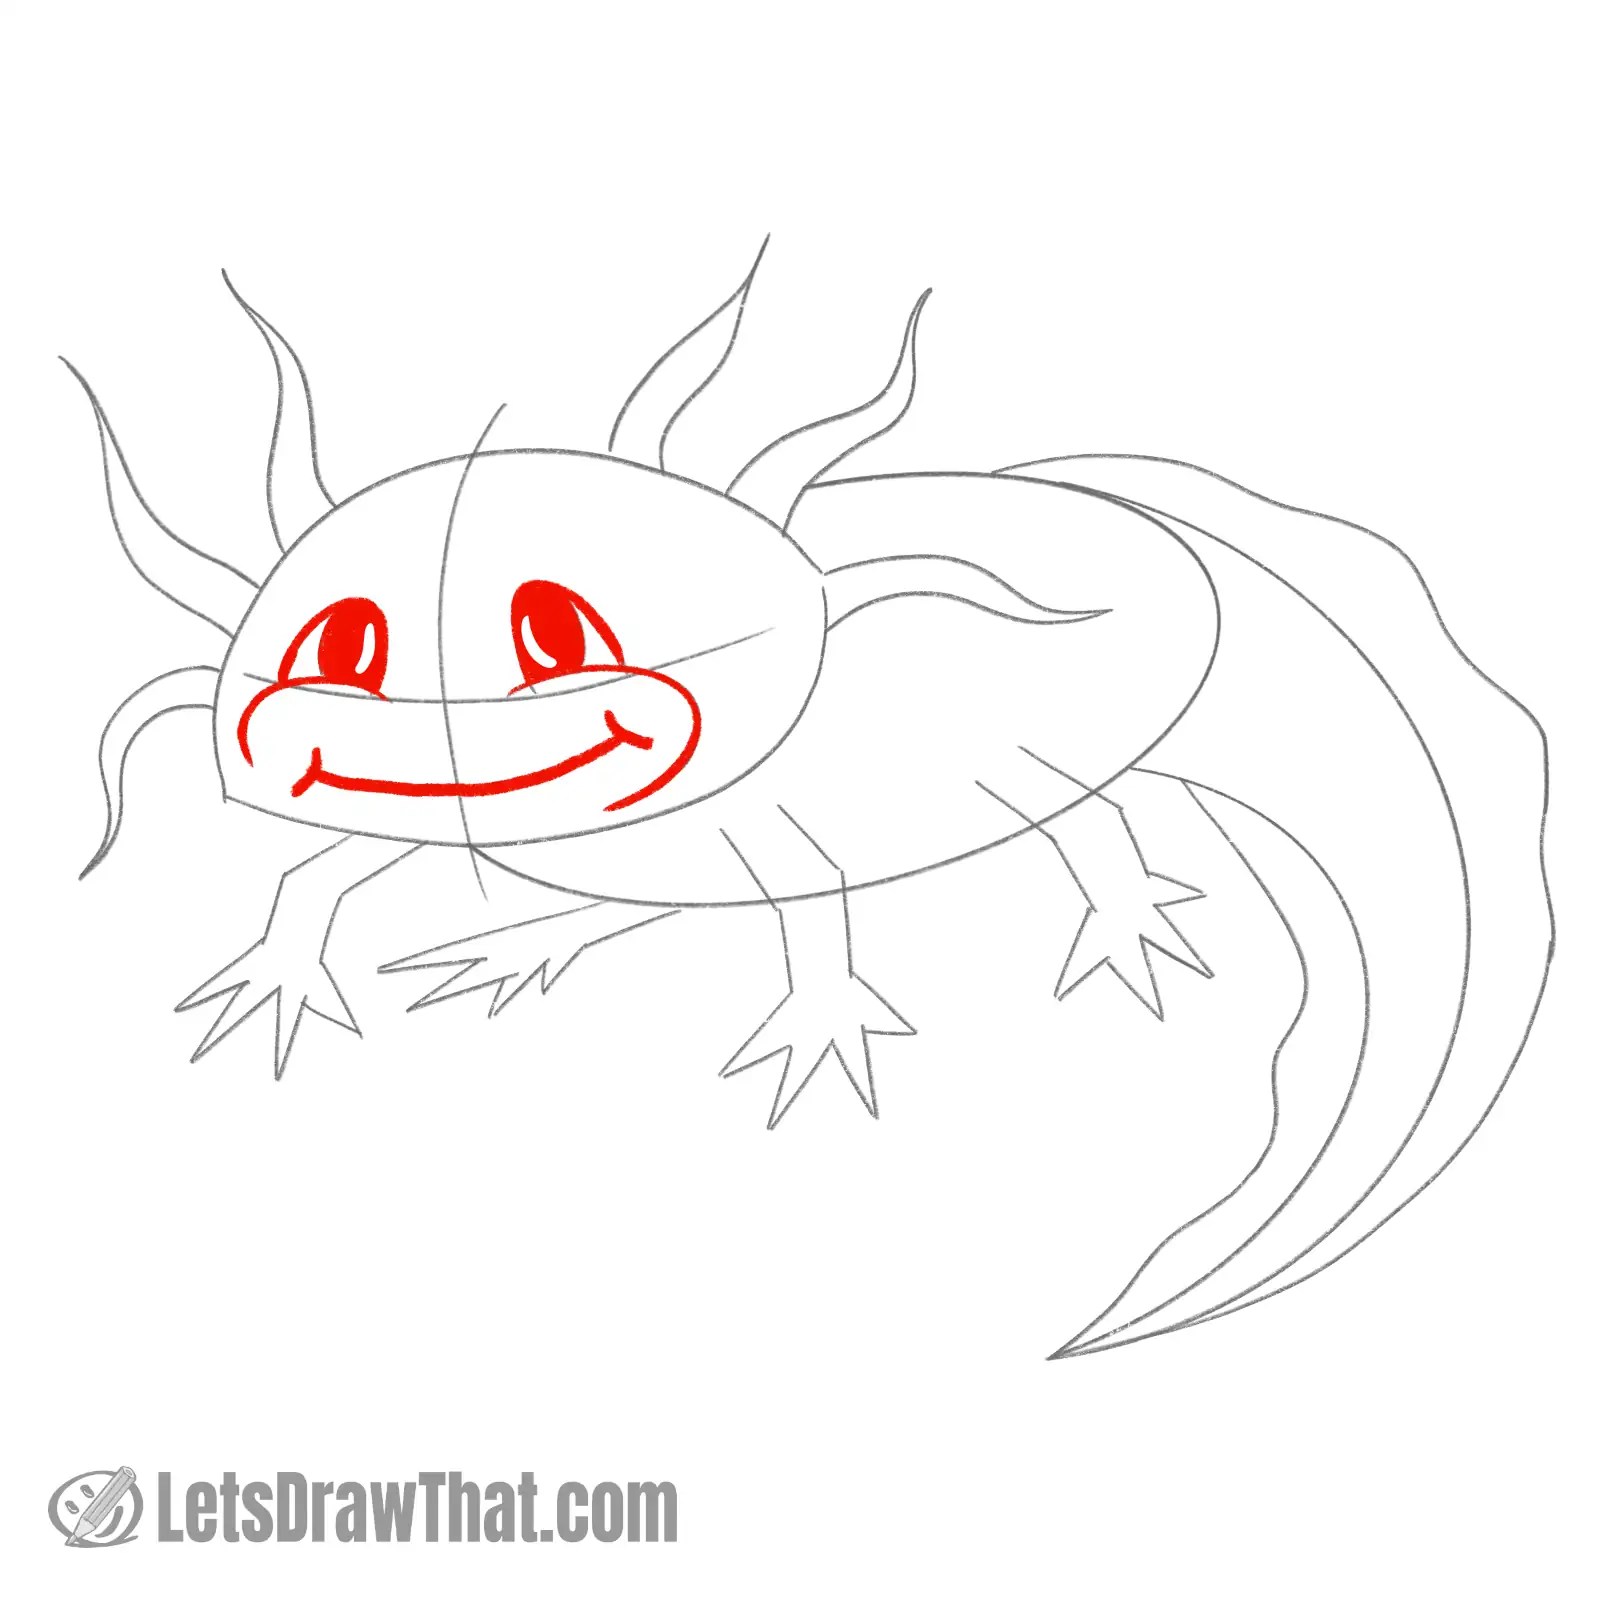
With the sketch completed, you know how to draw an axolotl. All we need to do is outline the drawing and add a few details and small improvements.
Let’s start with the axolotl’s face. Outline the eyes, rounding of the top corner. Color in the eye pupils, leaving out a little white shine.
Then draw the mouth and cheeks – these are a straight outline from the sketch.
Step 2: Outline the head and gills
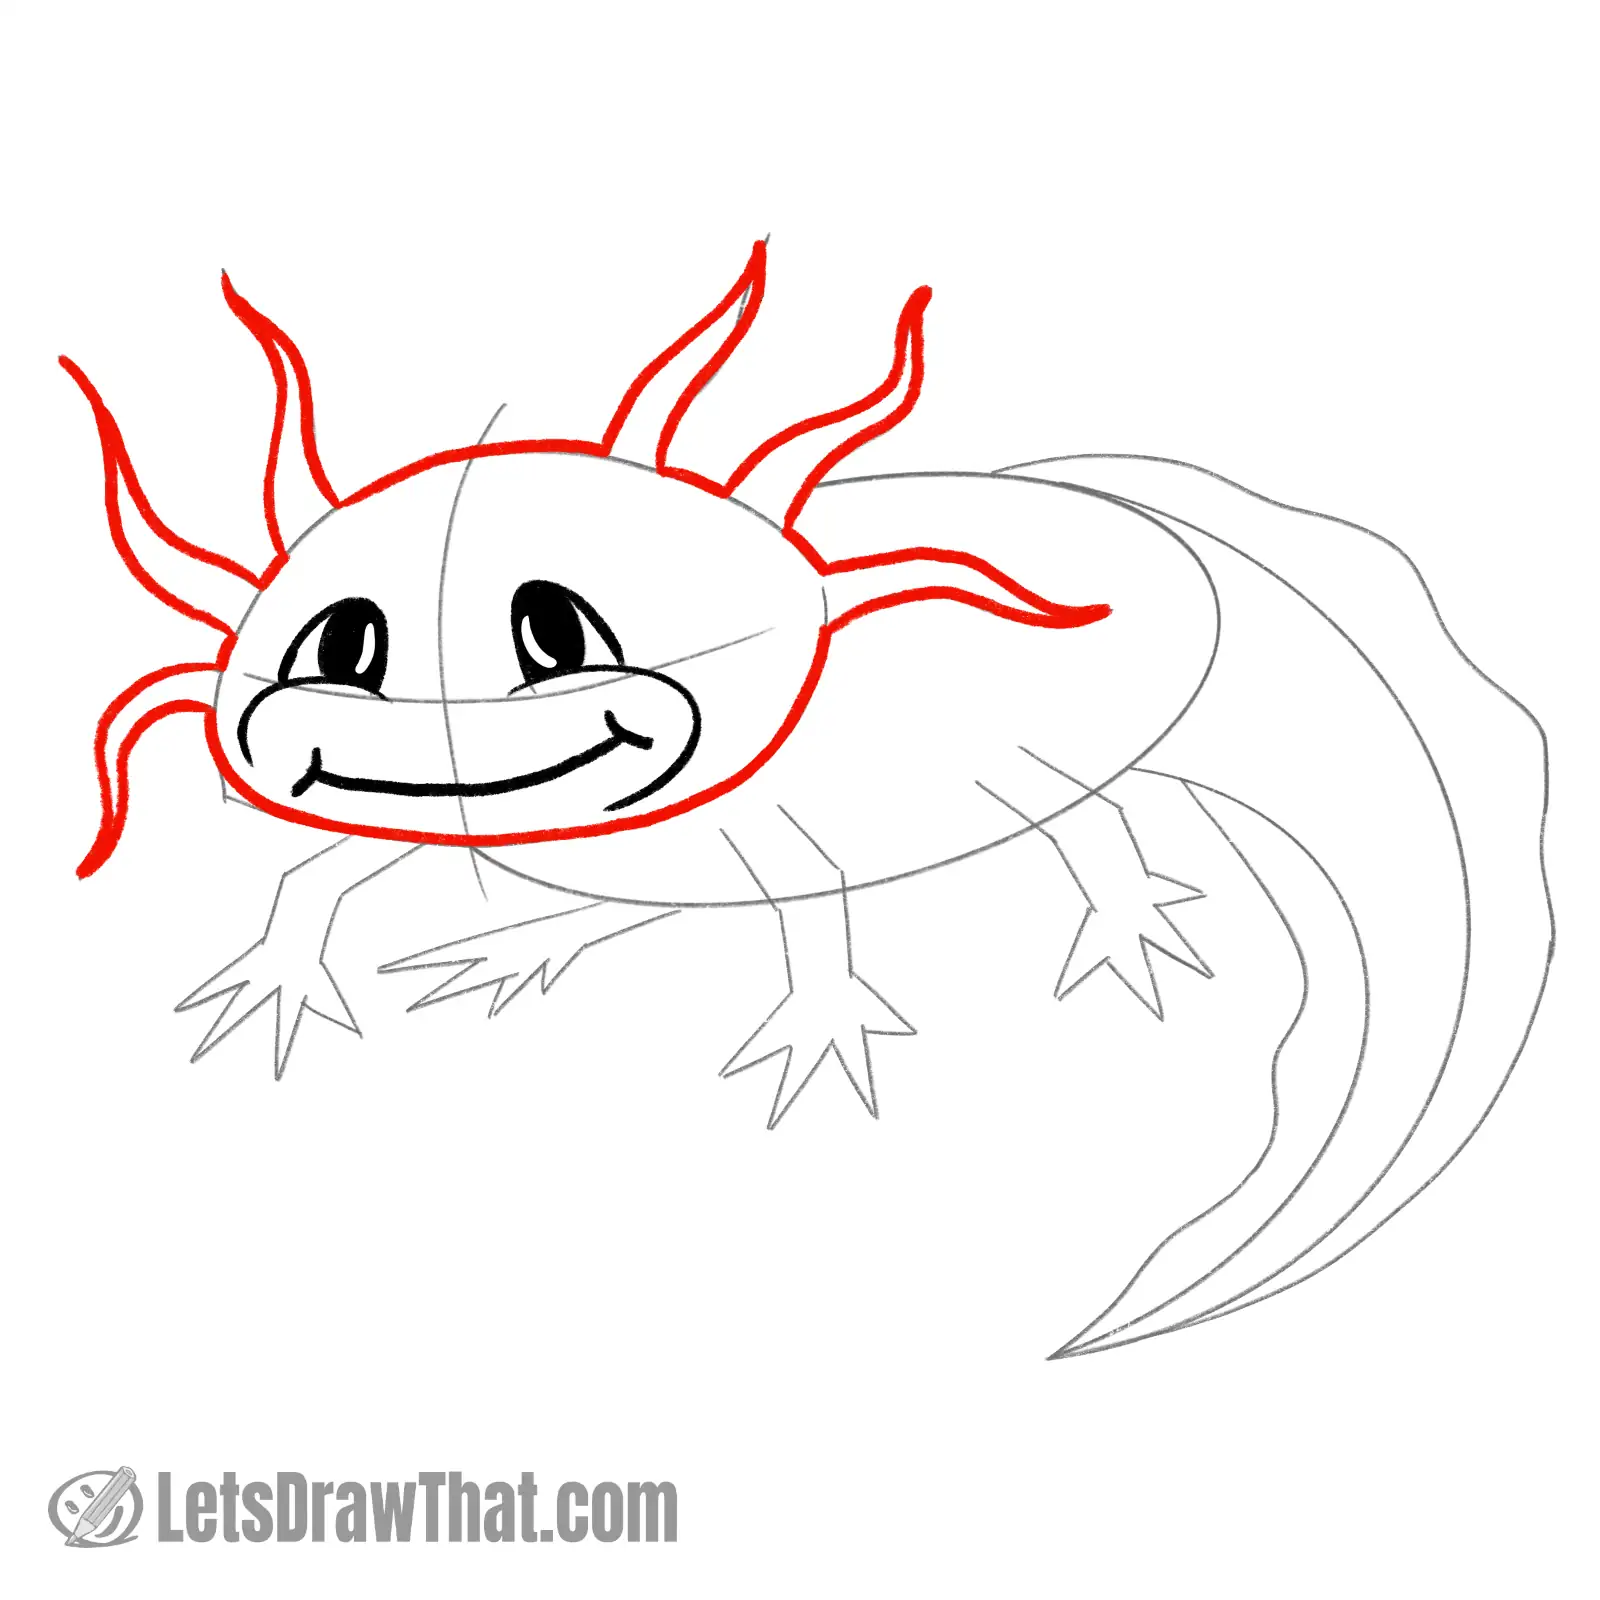
Another easy step – outline the axolotl’s head and gills.
The only small trick here is leaving out the short parts where the gills attach to the head – we want them to be one piece with the head.
Also, notice we have smoothed out the bottom corner from the head sketch on the left cheek a bit.
Step 3: Draw the axolotl's legs
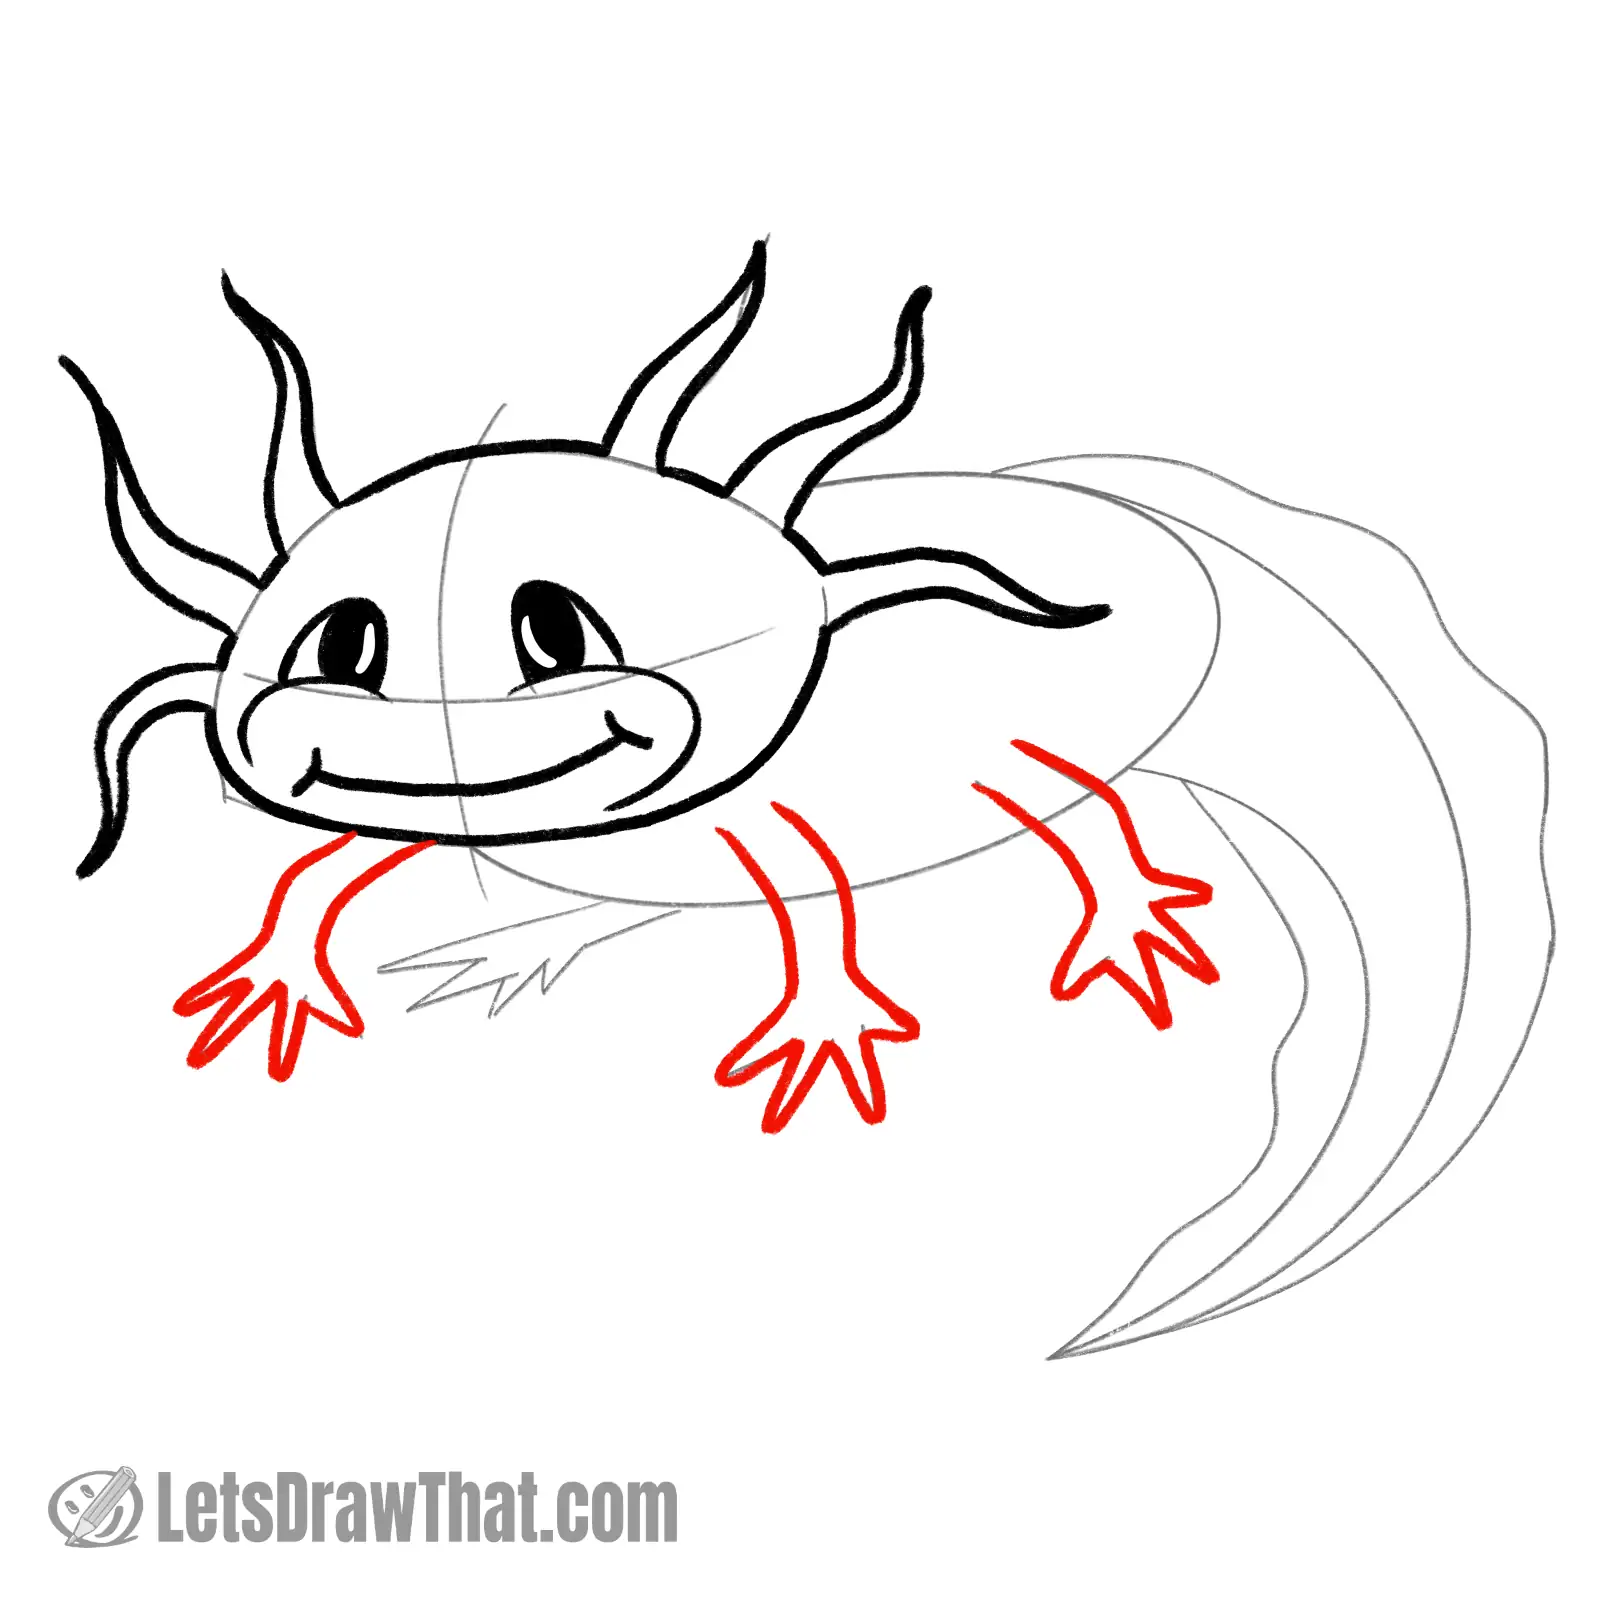
Next, draw out the axolotl’s legs from the sketch.
Again, the only small improvement is smoothing out the sharp corners on the sketch at elbows and fingertips.
We are leaving out the rear leg. We will draw it once we have defined the body outline.
Step 4: Draw the axolot's body and tail
Another simple step. Outline the body and the tail from the sketch.
Join the axolotl’s back – the top of the body line – straight to the outer tail edge, in a one smooth curve.
Then draw the belly, leaving out the bits where the legs hide the edge line. Also, stop the belly line shortly after it passes the inner tail edge line. That way, it looks like the tail folds from behind the body.
Finally, draw the inner tail curve straight from the outline.
Step 5: Draw the the dorsal fin
Here are a few final lines to finish the axolotl drawing.
Outline the dorsal fin straight from the sketch.
And with the body line complete, we can draw out the last rear leg.
Step 6: Draw the gill "floofs"
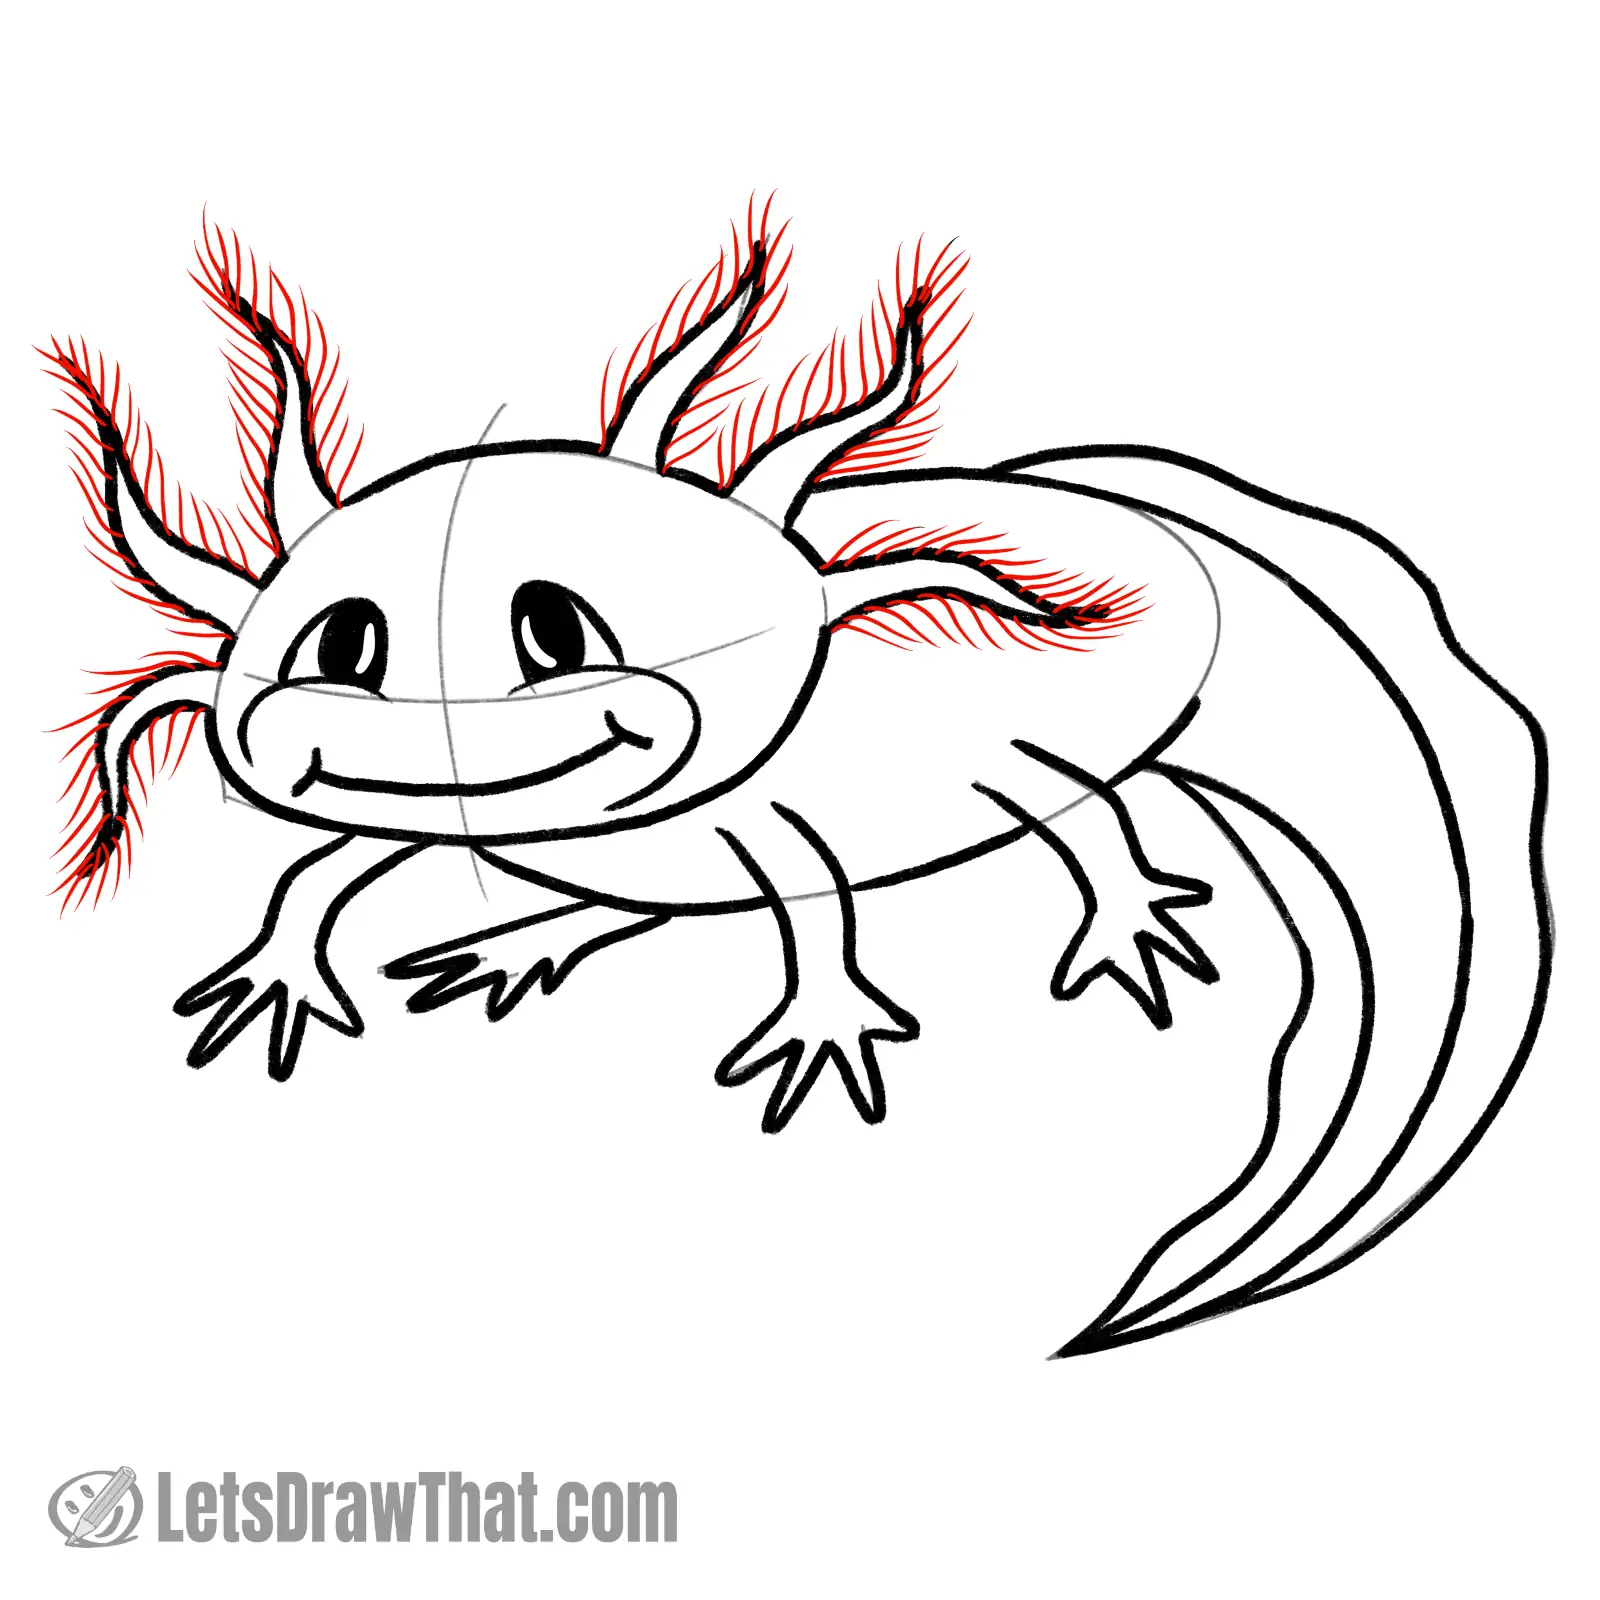
The final small but important detail is to draw the “floor hair” on the gills. Now, officially, the thin “hairs” are called “gill fimbriae”, and they help the axolotl with breathing oxygen.
Take a thinner pen or a sharp pencil to draw many short, slightly curved lines on both sides along the length of each gill.
Step 7: Draw more of the gill fimbriae...
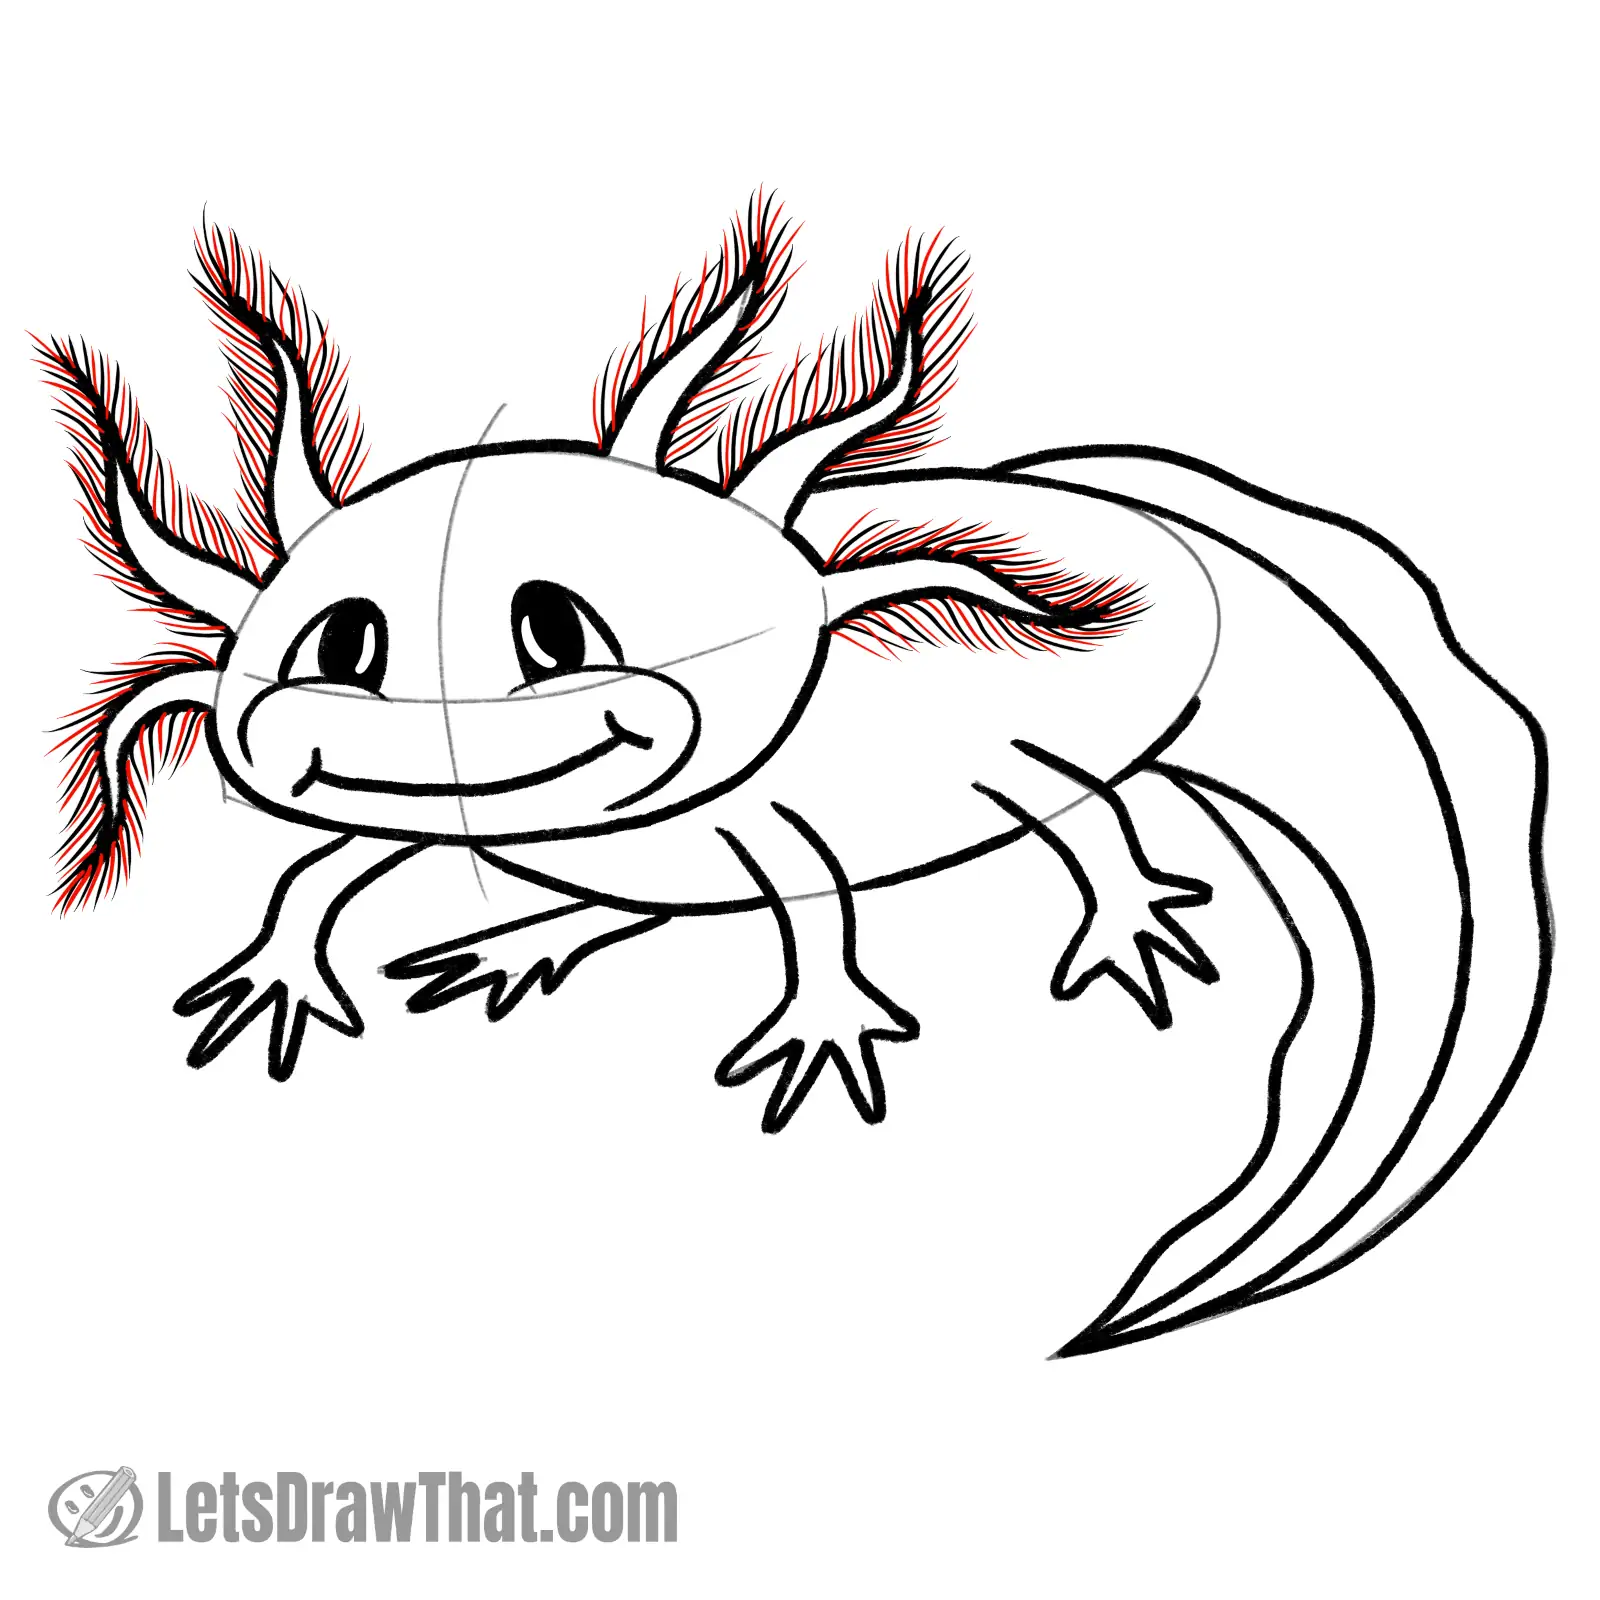
Now, this is an option, but if you have a thin enough pen, you can double up your fimbriae lines.
Your axolotl will look much cuter and fluffier with a nice thick floof.
The thin lines also nicely contrast with the thick body outline and add interest to our axolotl drawing.
How to draw an axolotl: finished drawing
Finished axolotl drawing outline
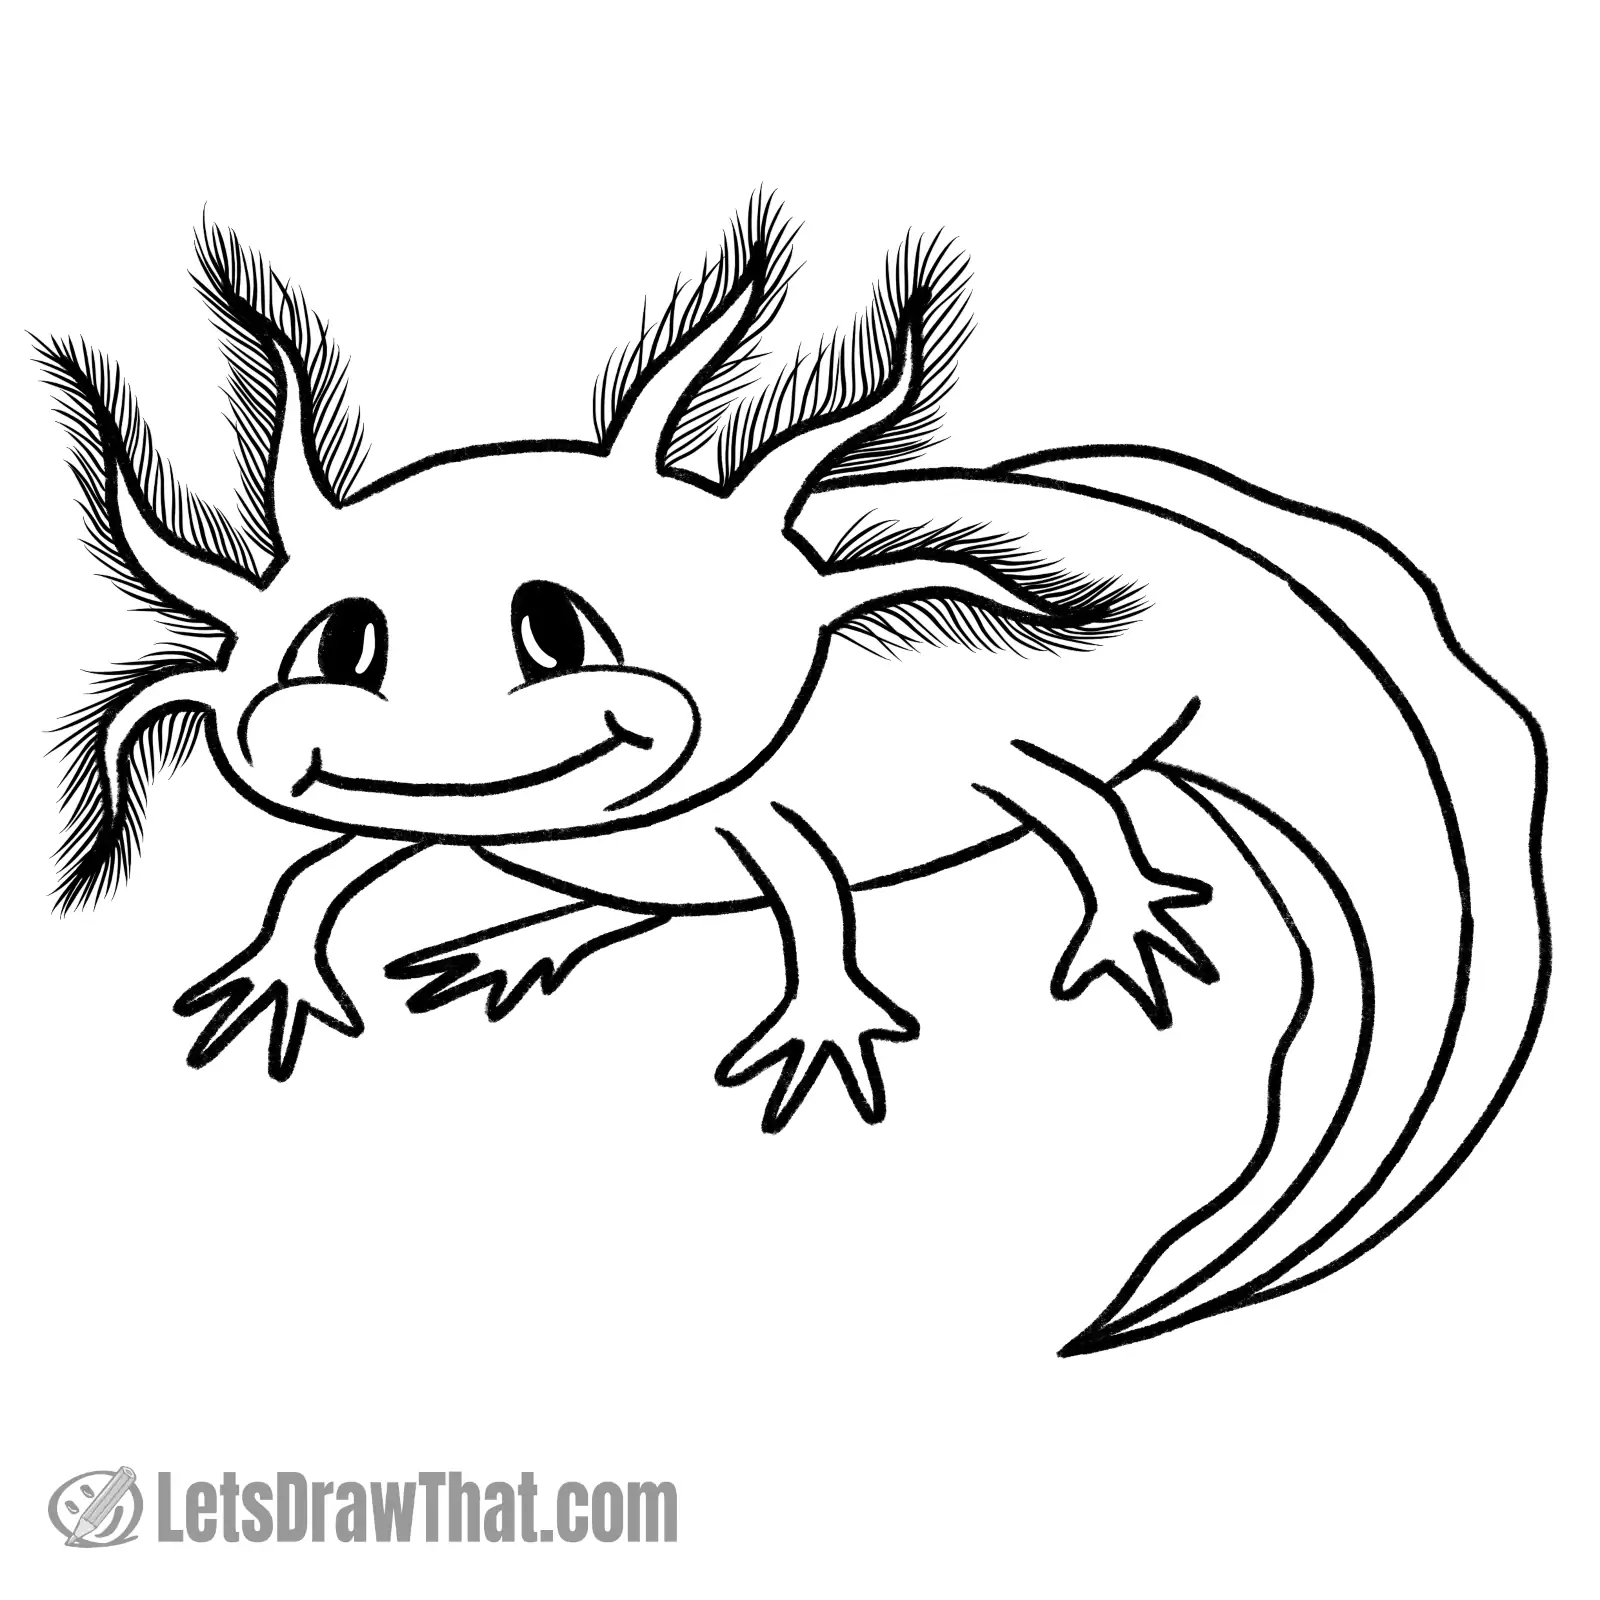
And here is the finished axolotl drawing – the final result of our “how to draw an axolotl” tutorial, once we have erased the sketch lines.
We believe our axolotl turned out well and cute enough. It certainly has that great smile and positive vibe that axolotls are famous and loved for.
Axolotl drawing colored-in

All that is left is to color in the axolotl drawing. Now, axolotls come in several different colors.
Here we like the pink, or “leucistic”, axolotl with purple gills. I guess we have him pinkier than in real life, but that just makes for a cuter drawing.
Feel free to color yours any way you like.
And that’s it – now you know how to draw an axolotl. Hope you had fun!