How to draw an egg plus six Easter egg drawing patterns, from simple geometric designs through flowers and hearts up to fun carrot egg drawing.

With Easter around the corner, we have for you six Easter egg drawings with some great patterns to use on your Easter cards or as inspiration for drawing Easter eggs.
Let’s learn how to draw an egg shape and decorate it with nice patterns. Take these as an inspiration to create many more variations for your own Easter egg drawings.
This tutorial is part of our Easter drawings collection.
min
You will need: pencil, fineliner pen, colored pencils, eraser and drawing paper or sketchbook
Disclaimer: LetsDrawThat.com participates in the Amazon Associates Program. If you purchase a product using a link on our website, we earn a small commission, at no extra cost to you. This is one way how you can support this website.
How to draw an egg
Let’s start by learning how to draw an egg. Now, the egg is a simple egg-shaped oval.
But drawing a nice, gradually widening egg-shaped oval is certainly tricky. You can make it easier for yourself by drawing some guiding circles first.
How to draw an egg step by step
Step 1: Draw two circles
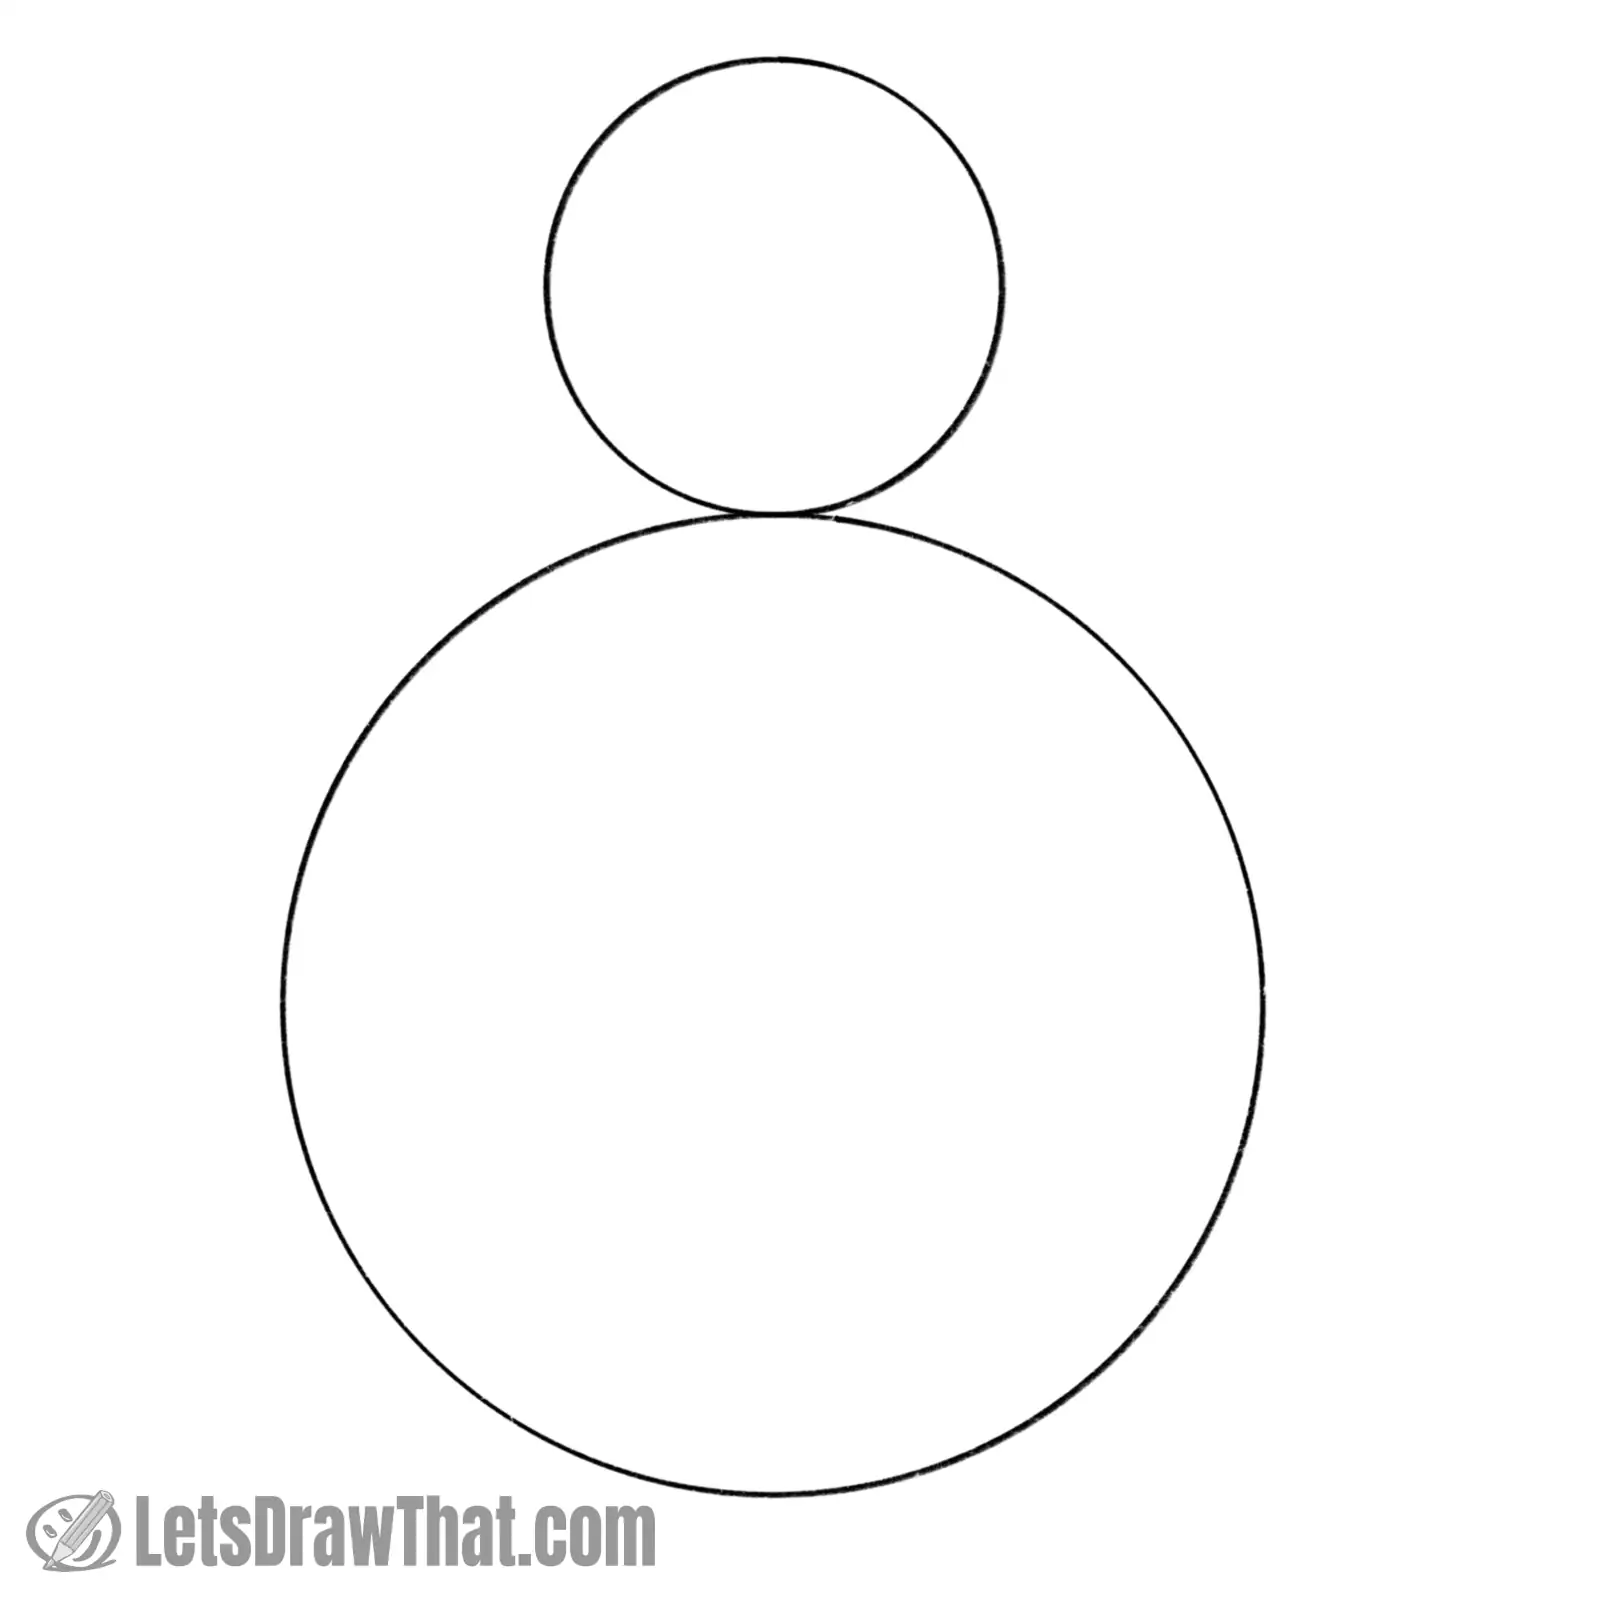
If you find drawing a nice rounded egg shape challenging, here is an easier way to do it.
Start by drawing two guiding circles. The bottom one is about twice as big as the small one on the top.
You can use a drawing compass to draw the circles. Or find a right size glass and a smaller bottle lid to trace around.
Step 2: Join the two circles into the egg-shaped oval
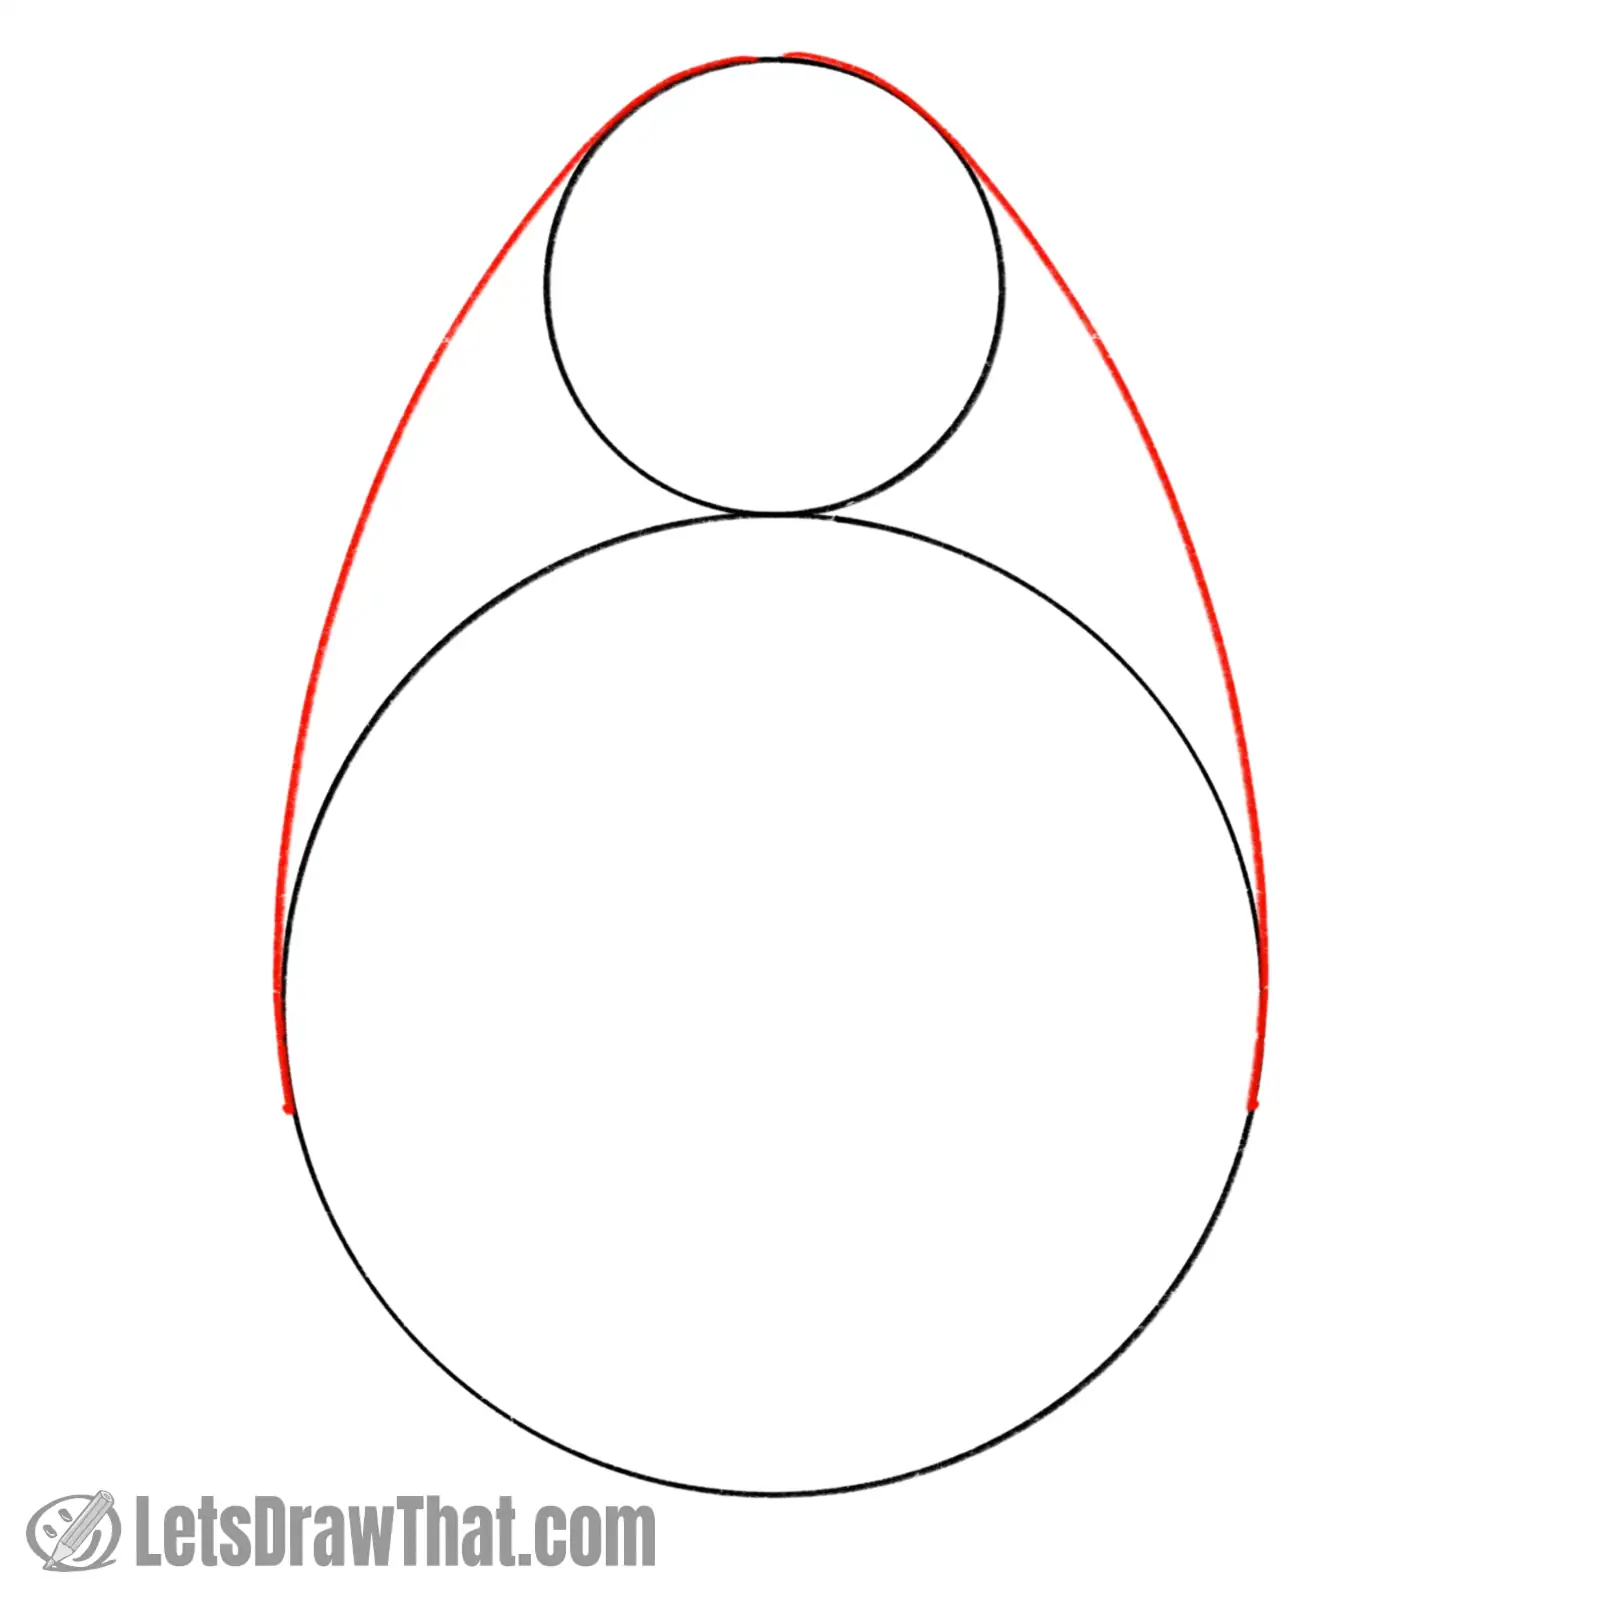
Next, join the two circles with a nice smooth curve.
Now, these should be fairly easy to do by hand.
But if you still need something to guide you for a perfect line, one of the curve-drawing rulers might come in handy.
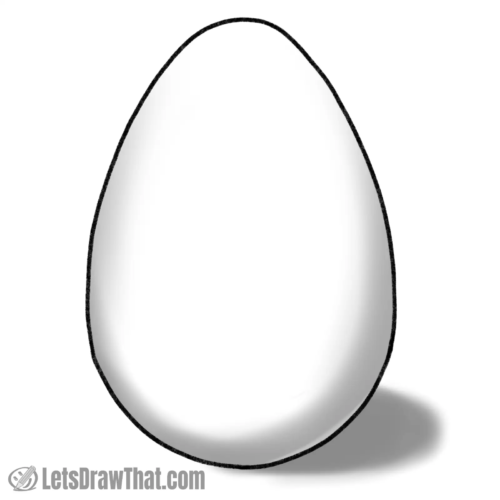
Step 3: Outline the egg
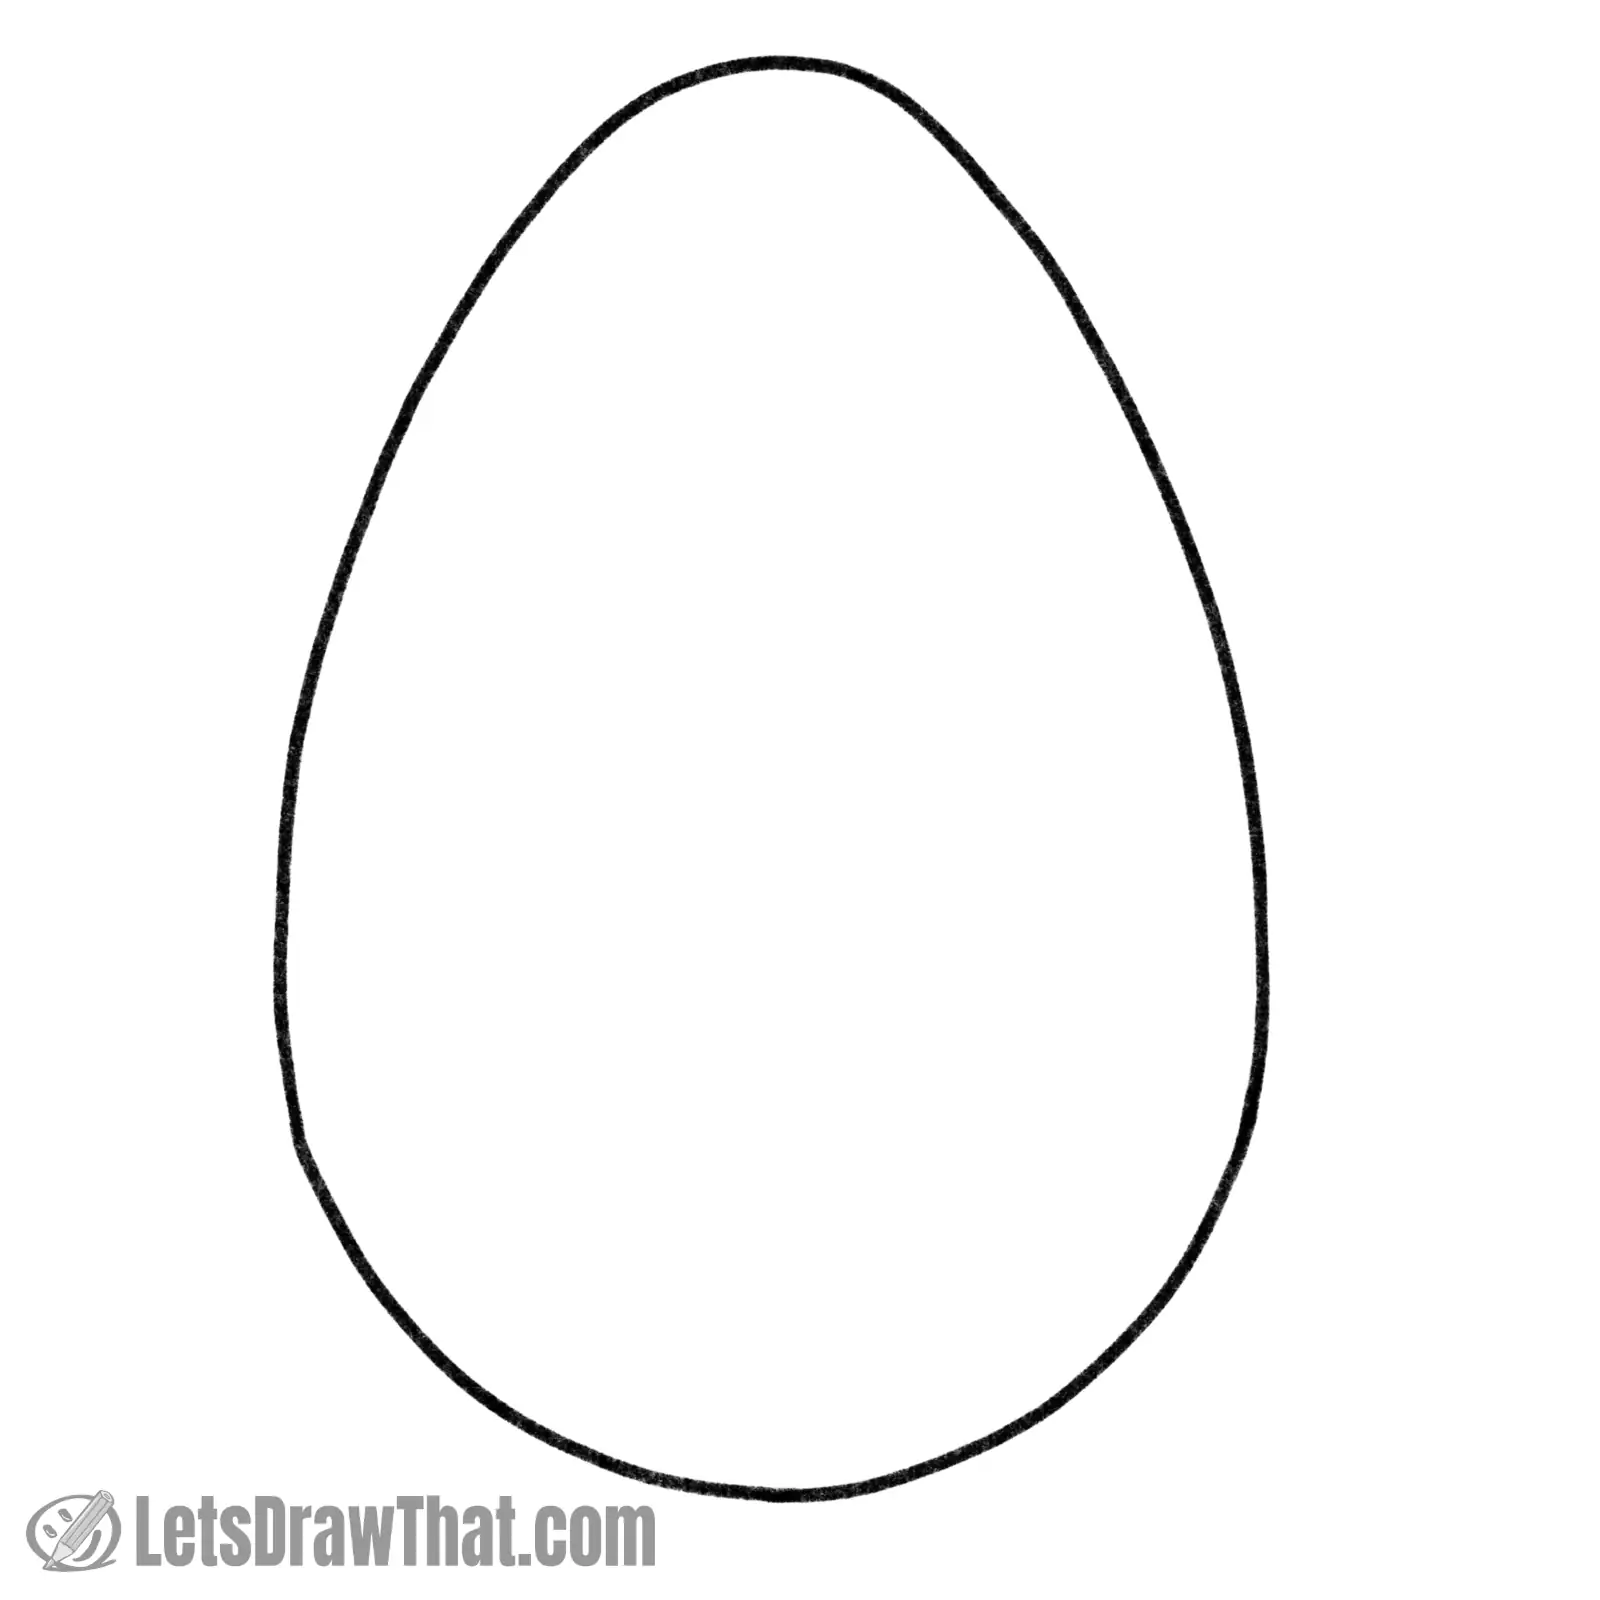
No matter how you got there, here is the finished egg outline once we have erased those guiding circles.
Drawing a nice, gradually widening egg-shaped oval is certainly trickier than it seems.
Step 4: Egg drawing shading

Here is a final tip before we dive into drawing Easter egg patterns.
If you add some shading to your egg, it will look much nicer and less flat. Here is the shading done with a simple light gray color since we are shading a white egg. In the following colored patterns, you would use a darker shade of the color in the pattern.
With the light coming from the top left, the shade is kind of “U” shaped along the bottom of the egg. It is narrower on the left than on the right. Also, notice the thin “reflected light” strip on the bottom right.
And if you add a nice half-oval shade on the “floor”, the egg will not float in space anymore.
Draw an Easter chick jumping out of an eggshell:
How to Draw a Chick – A Cute Cartoon Baby Chick Drawing
Learn how to draw a chick. An easy step by step instructions for a cute cartoon baby chick drawing made from two simple circles.Easter egg drawing: A simple geometric pattern

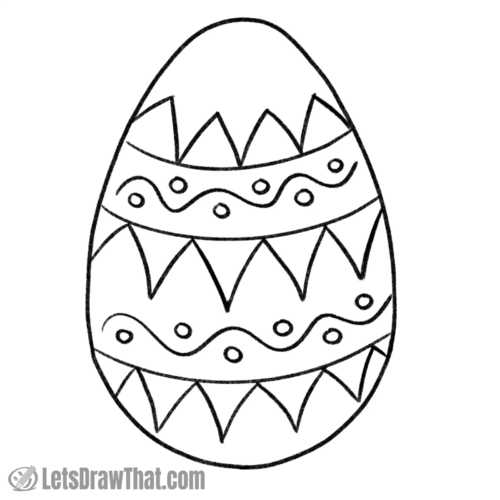
Our first Easter egg drawing is decorated with a pattern of simple geometric shapes – triangles and dots.
A simple pattern Easter egg drawing
Step 1: Outline drawing

Our first Easter egg pattern is drawn with simple strips of dots and triangles.
Start by drawing the dividing lines roughly the same distance apart. There are six of them, and each is curved down to suggest a rounded egg shape.
Then, draw dots into the top, middle, and bottom bands. Next, fill the two bands in between with triangles – just a leaning line up and down.
Notice that on the edges, your pattern is running behind the edges – so some of the edge dots or triangles are not complete.
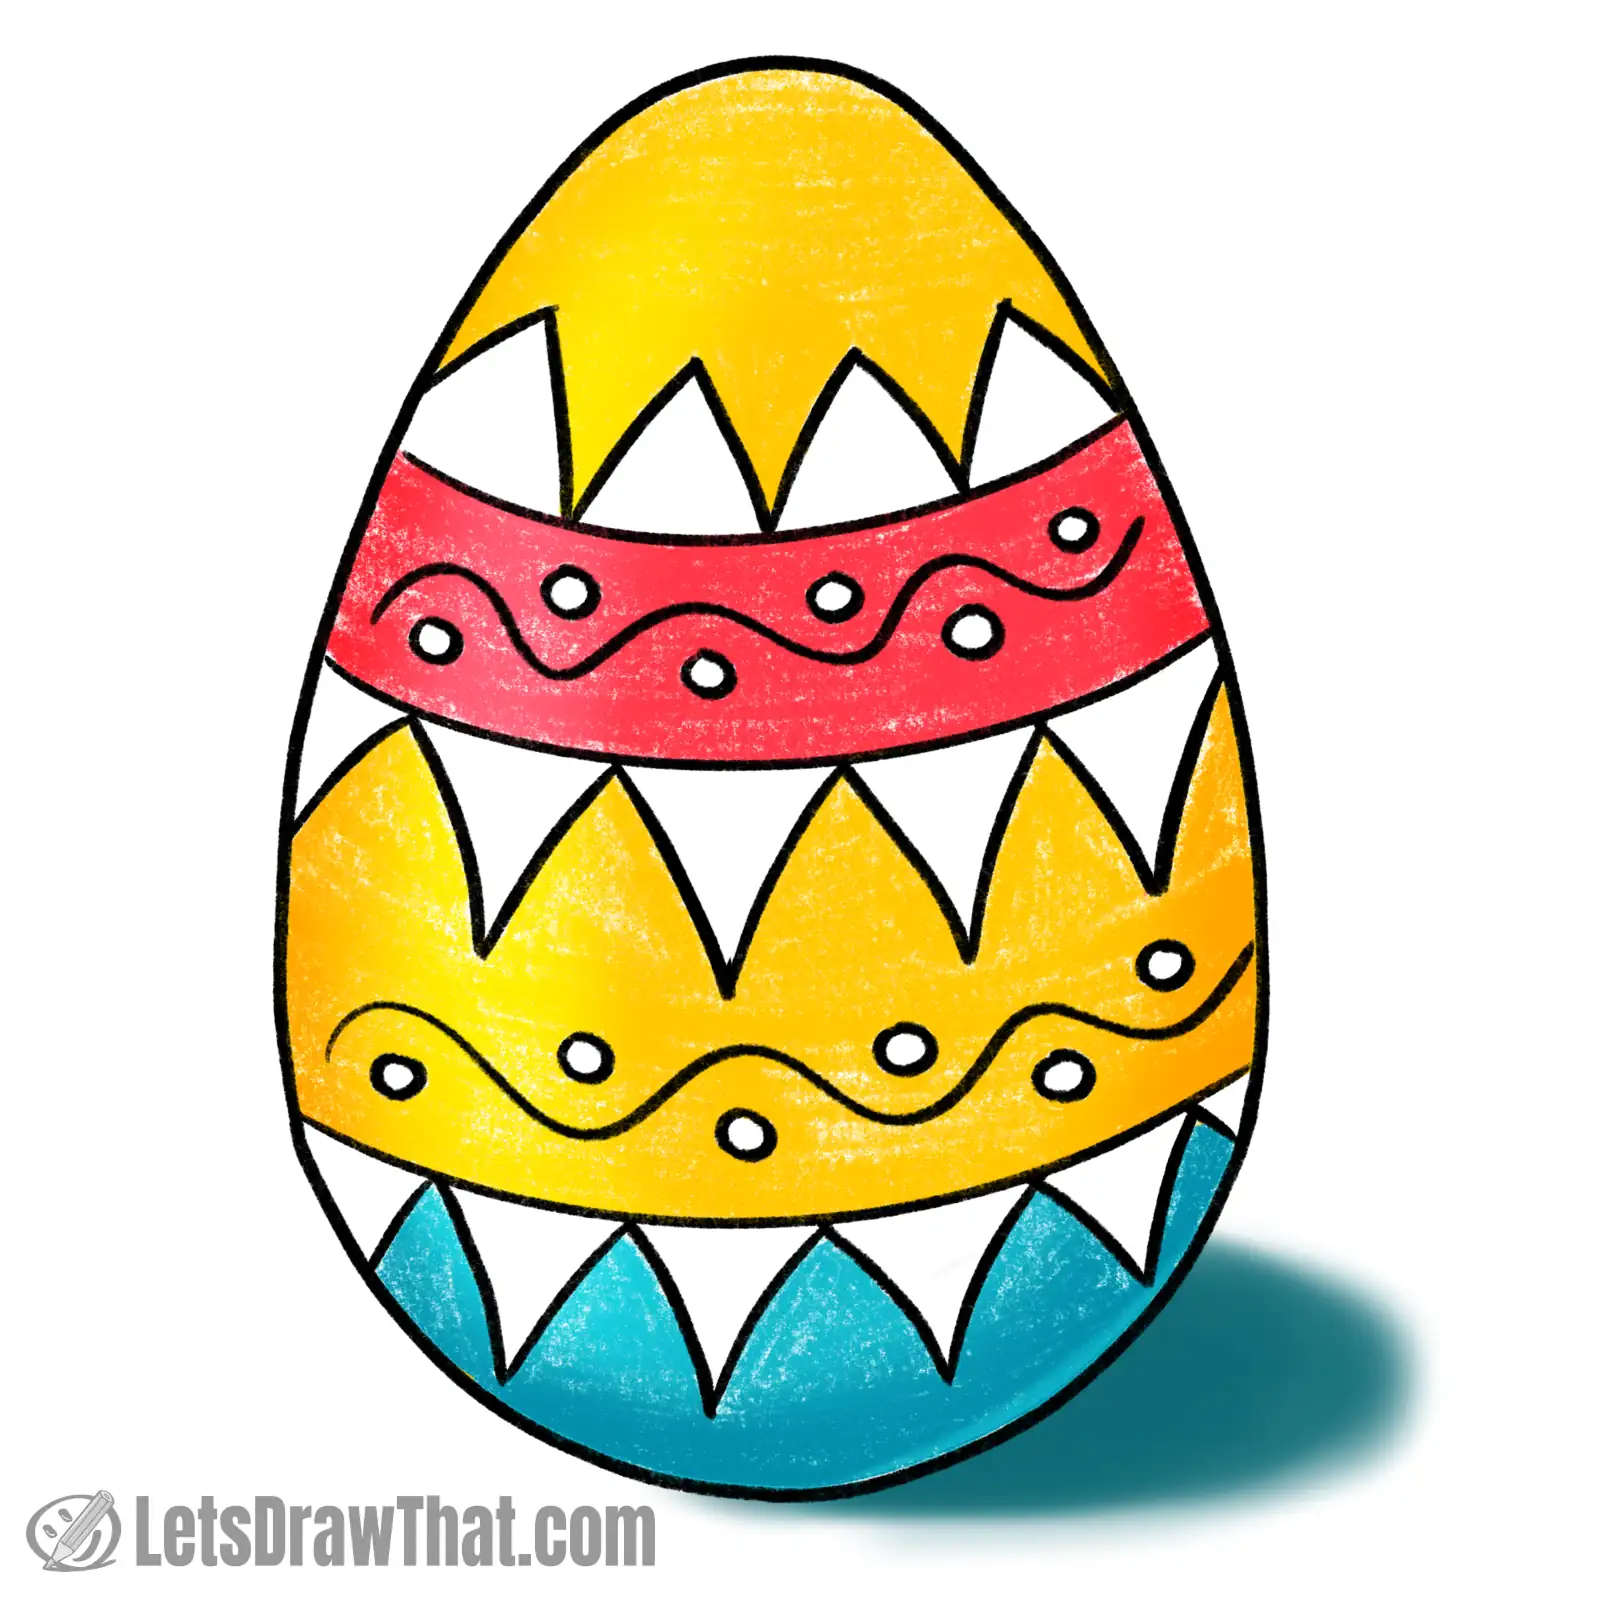
Step 2: Color drawing
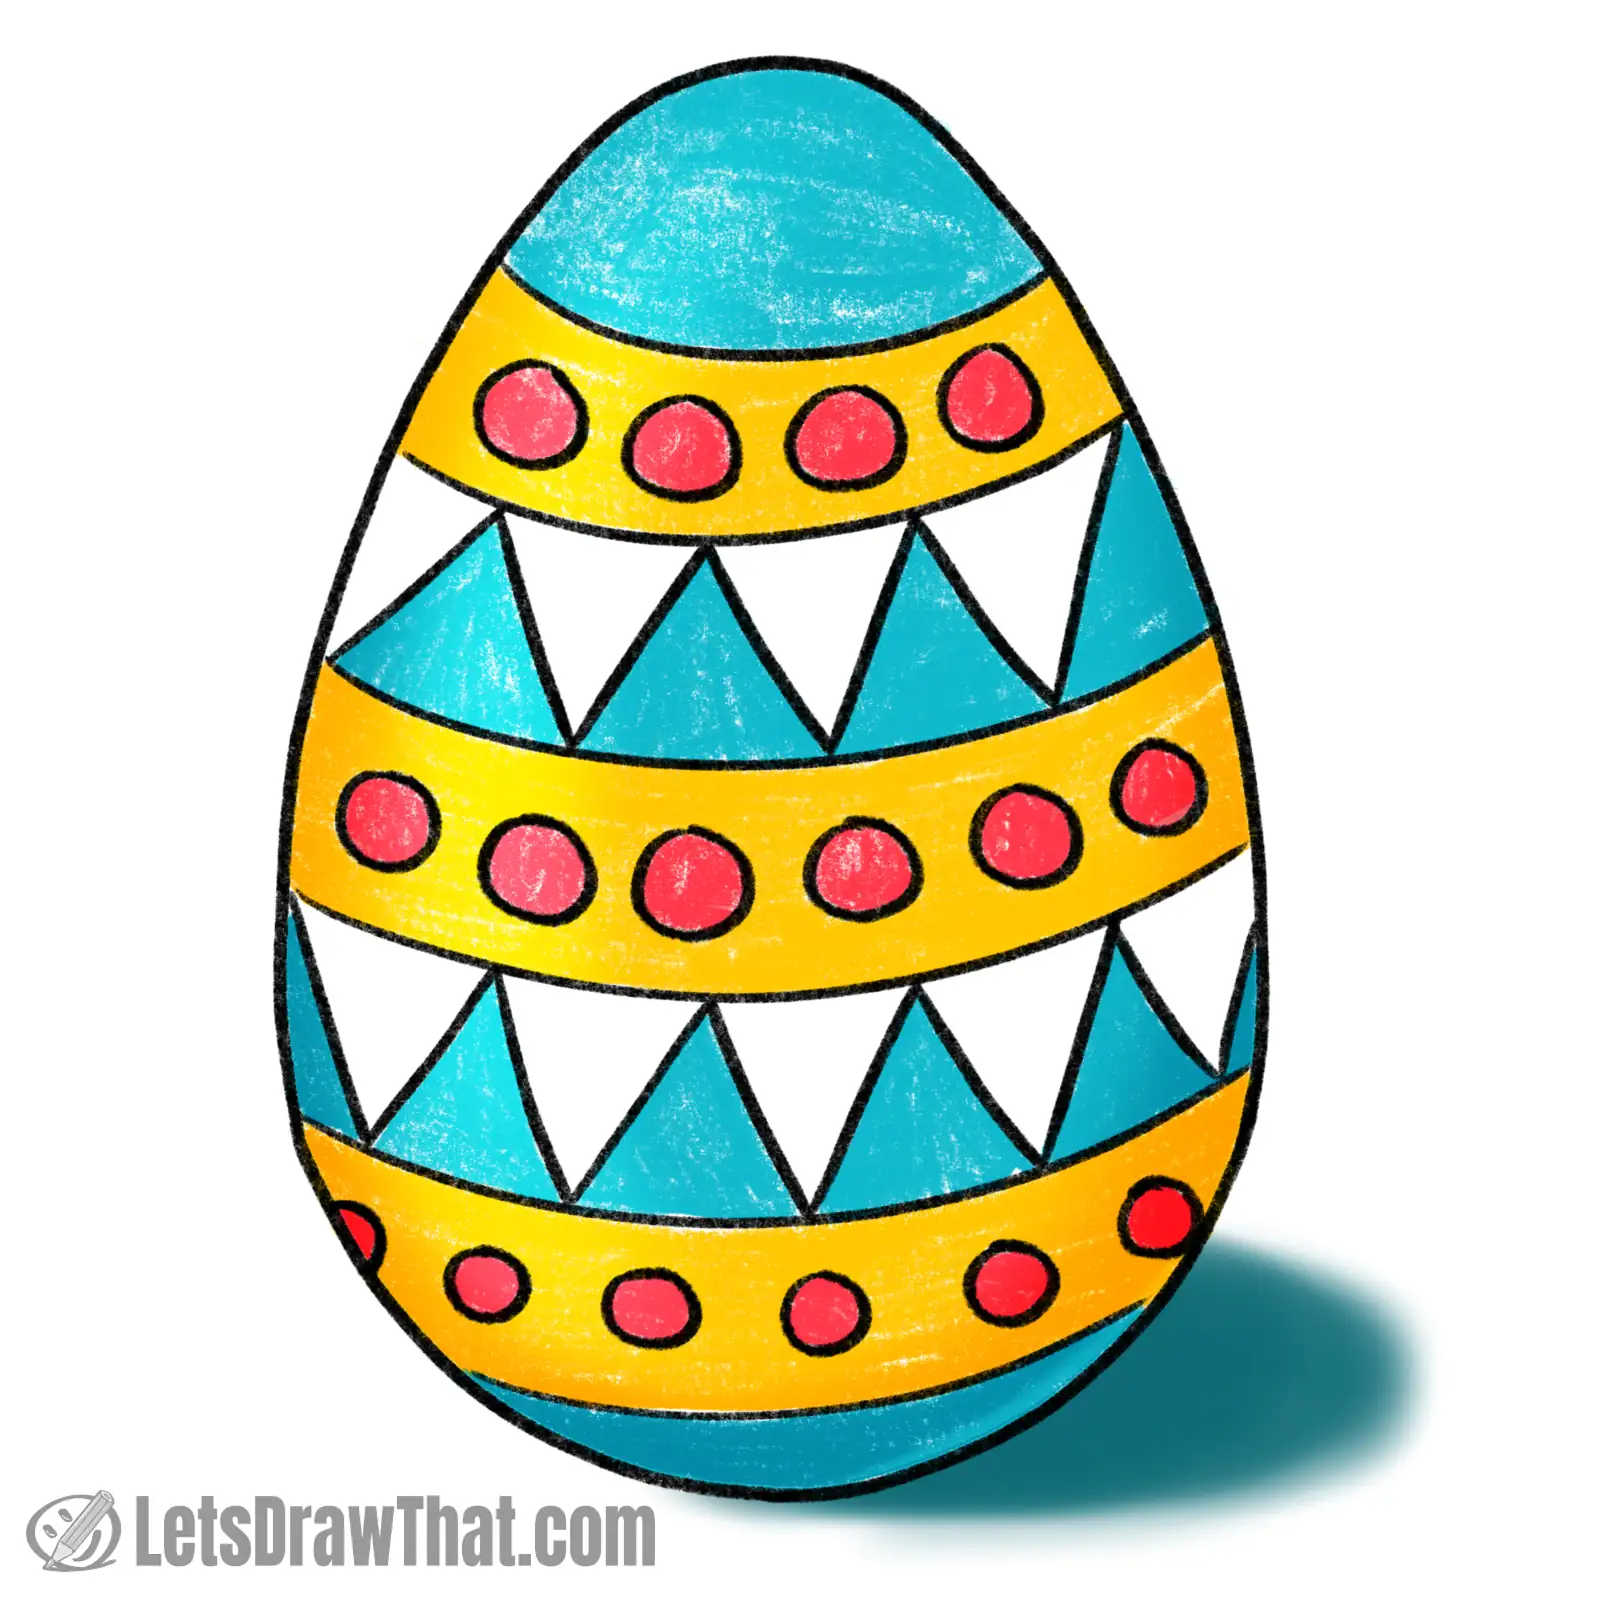
Here is our first Easter egg drawing, colored in. Like the pattern, we keep the colors simple.
The dots are dark pink on a golden yellow band background.
The top and bottom tips of the egg, as well as the lower triangles, are turquoise blue. Notice the shade on the ground is also in the “reflected” blue color.
Of course, feel free to color in your egg with any color you like. Also, try swapping around the colors in the same pattern – there are quite a few interesting variations possible.
Draw an Easter bunny to hold your egg:
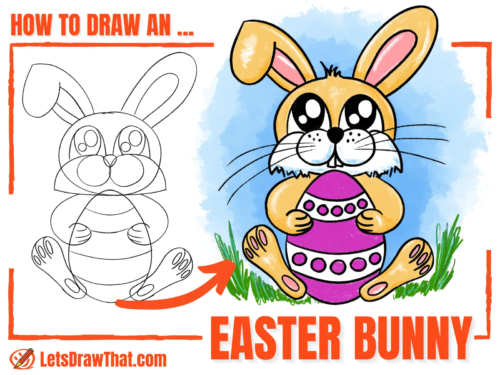
Easter Bunny Drawing – How to Draw an Easter Bunny Step by Step
A cute Easter bunny drawing: Learn how to draw an Easter bunny, as cute as a button baby bunny rabbit holding an Easter egg. Step-by-step guide.Easter egg drawing: Geometric pattern variation
While looking very different, our second Easter egg drawing is a simple variation of the previous pattern.
We have swapped the decorations around and left out some of the dividing lines. Et voilà, we get another nice decoration for our Easter egg.
A combined pattern Easter egg drawing
Step 1: Outline drawing

To draw this pattern, you start with the same six dividing lines as above. Draw them in pencil, as you will need only three of those for the final outline.
Draw the triangle pattern in the top, middle, and bottom stripe (where the dots were in the previous pattern). This time, we are slightly curving out the triangle sides to make them look like flower petals.
Draw the dots, with a nice wavy line between them, into the two middle bands.
When you are outlining the pattern, leave out the dividing line at the top of the egg and the lines at the bottom of the two rows of triangles. Simple and neat trick, hey?
Step 2: Color drawing
Here is the egg drawing colored in. For simplicity, we are using the same colors. The top of the egg and the middle patterned band are golden yellow.
The top band with the dots is hot pink. The bottom of the egg is green-blue.
Since we have joined some of the previous bands together, the pattern is very different from the previous one – almost like flower petals or grass blades wrapping around the egg.
Easter egg drawing: Simple flower pattern

Our next Easter egg drawing goes back to simple basics.
As Easter is also a celebration of springtime (in most parts of the world, anyway), some simple flowers make up for perfect Easter egg decoration as well.
Simple flower pattern Easter egg drawing
Step 1: Outline drawing
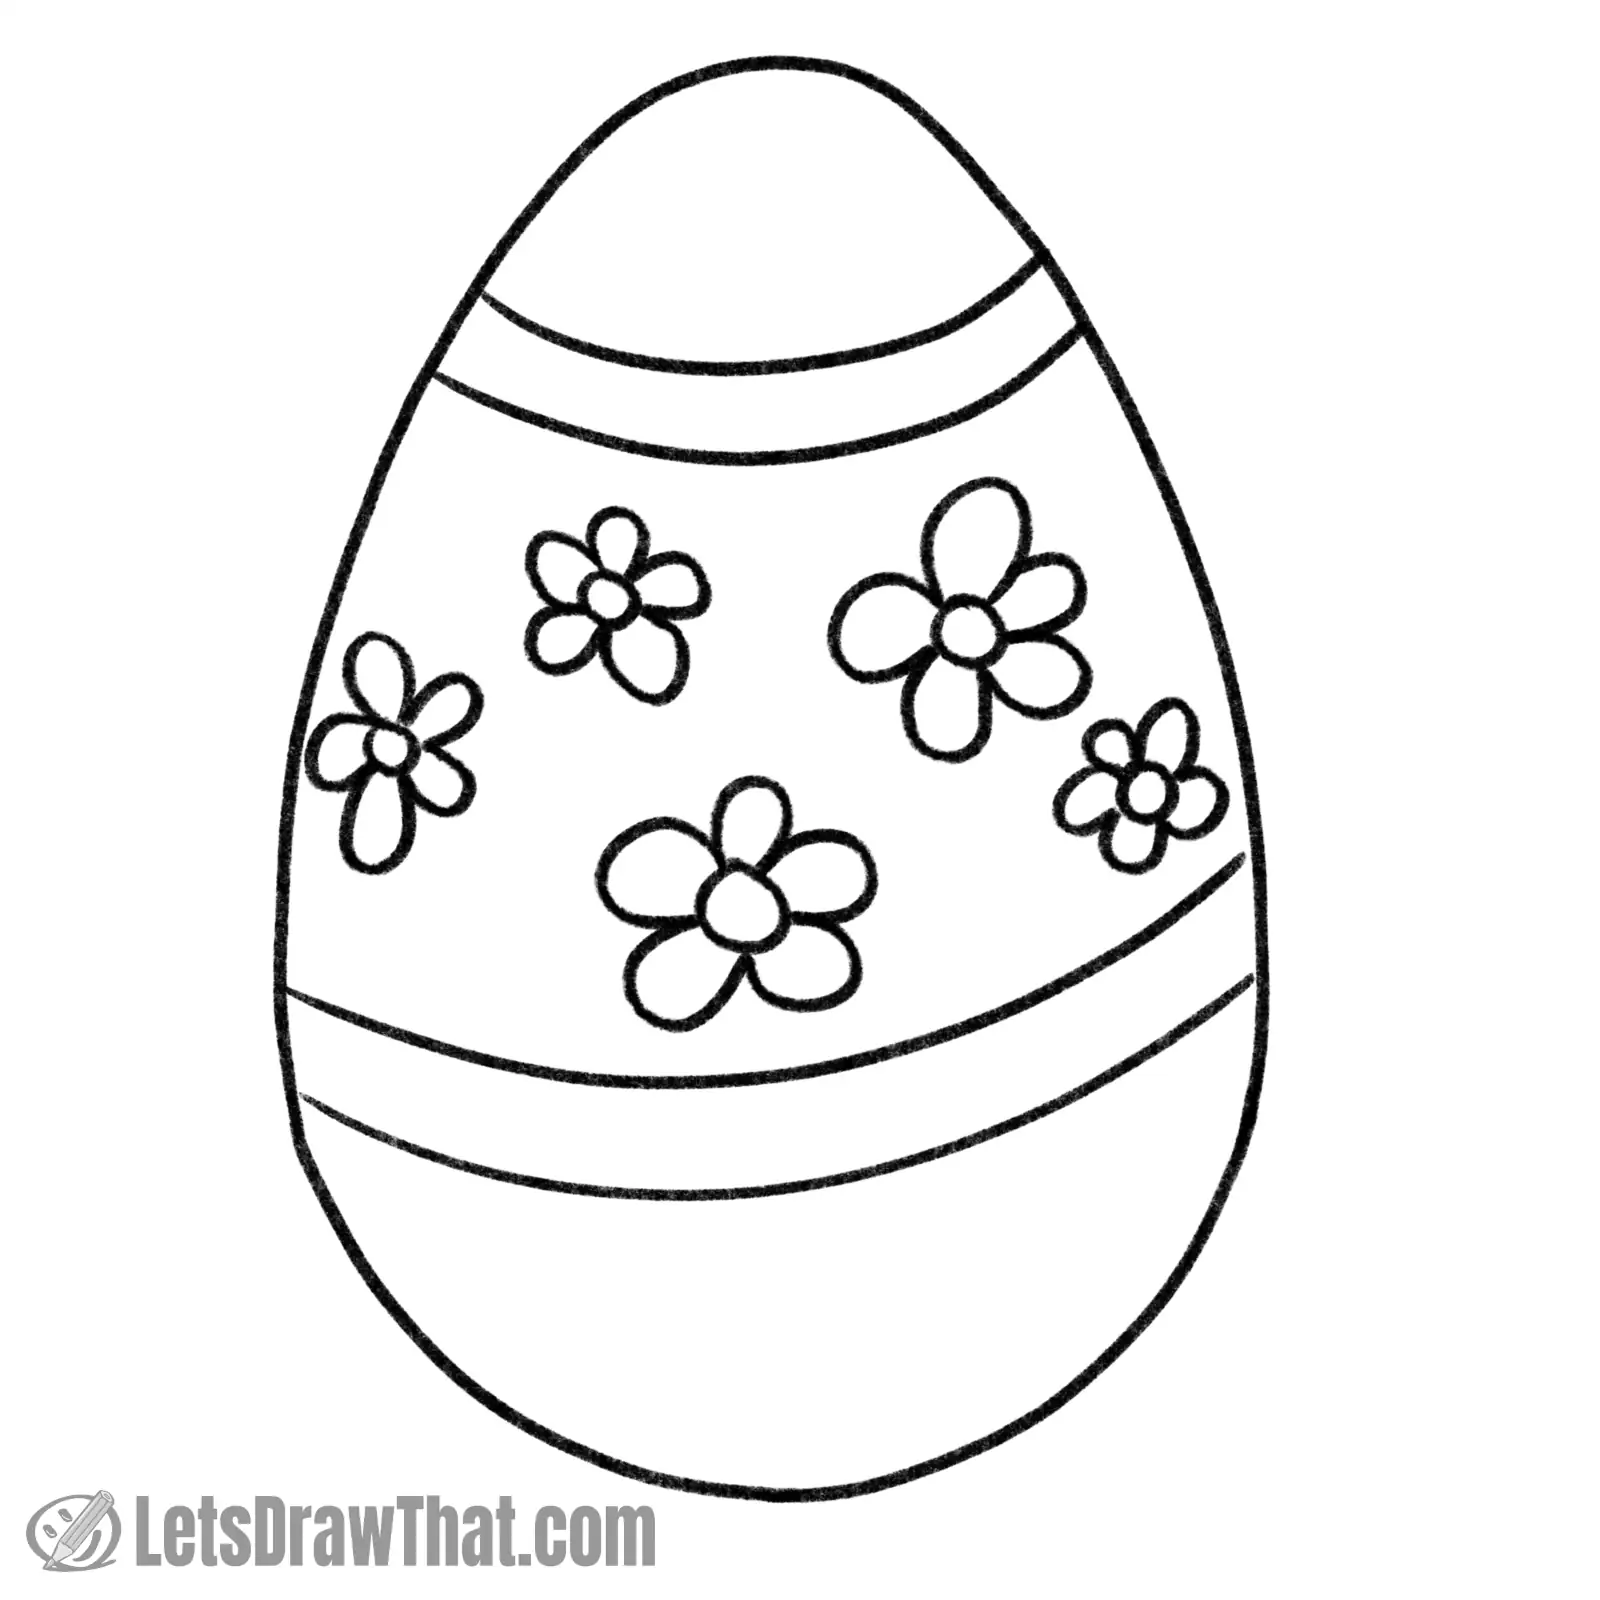
Draw two narrow bands, one in the upper part and one in the lower part of the egg.
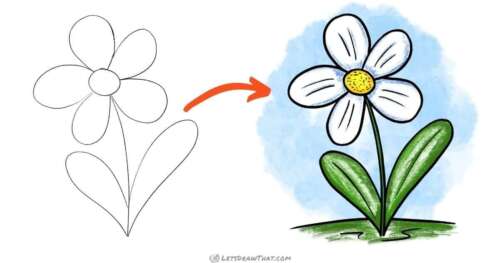
Then, draw some simple flowers in between. These are just circles with five “U”-shaped petals around them. If you need some help, we have a step-by-step simple flower drawing tutorial as well. Check it out.
Draw the flowers in different sizes for some variety.
Step 2: Color drawing
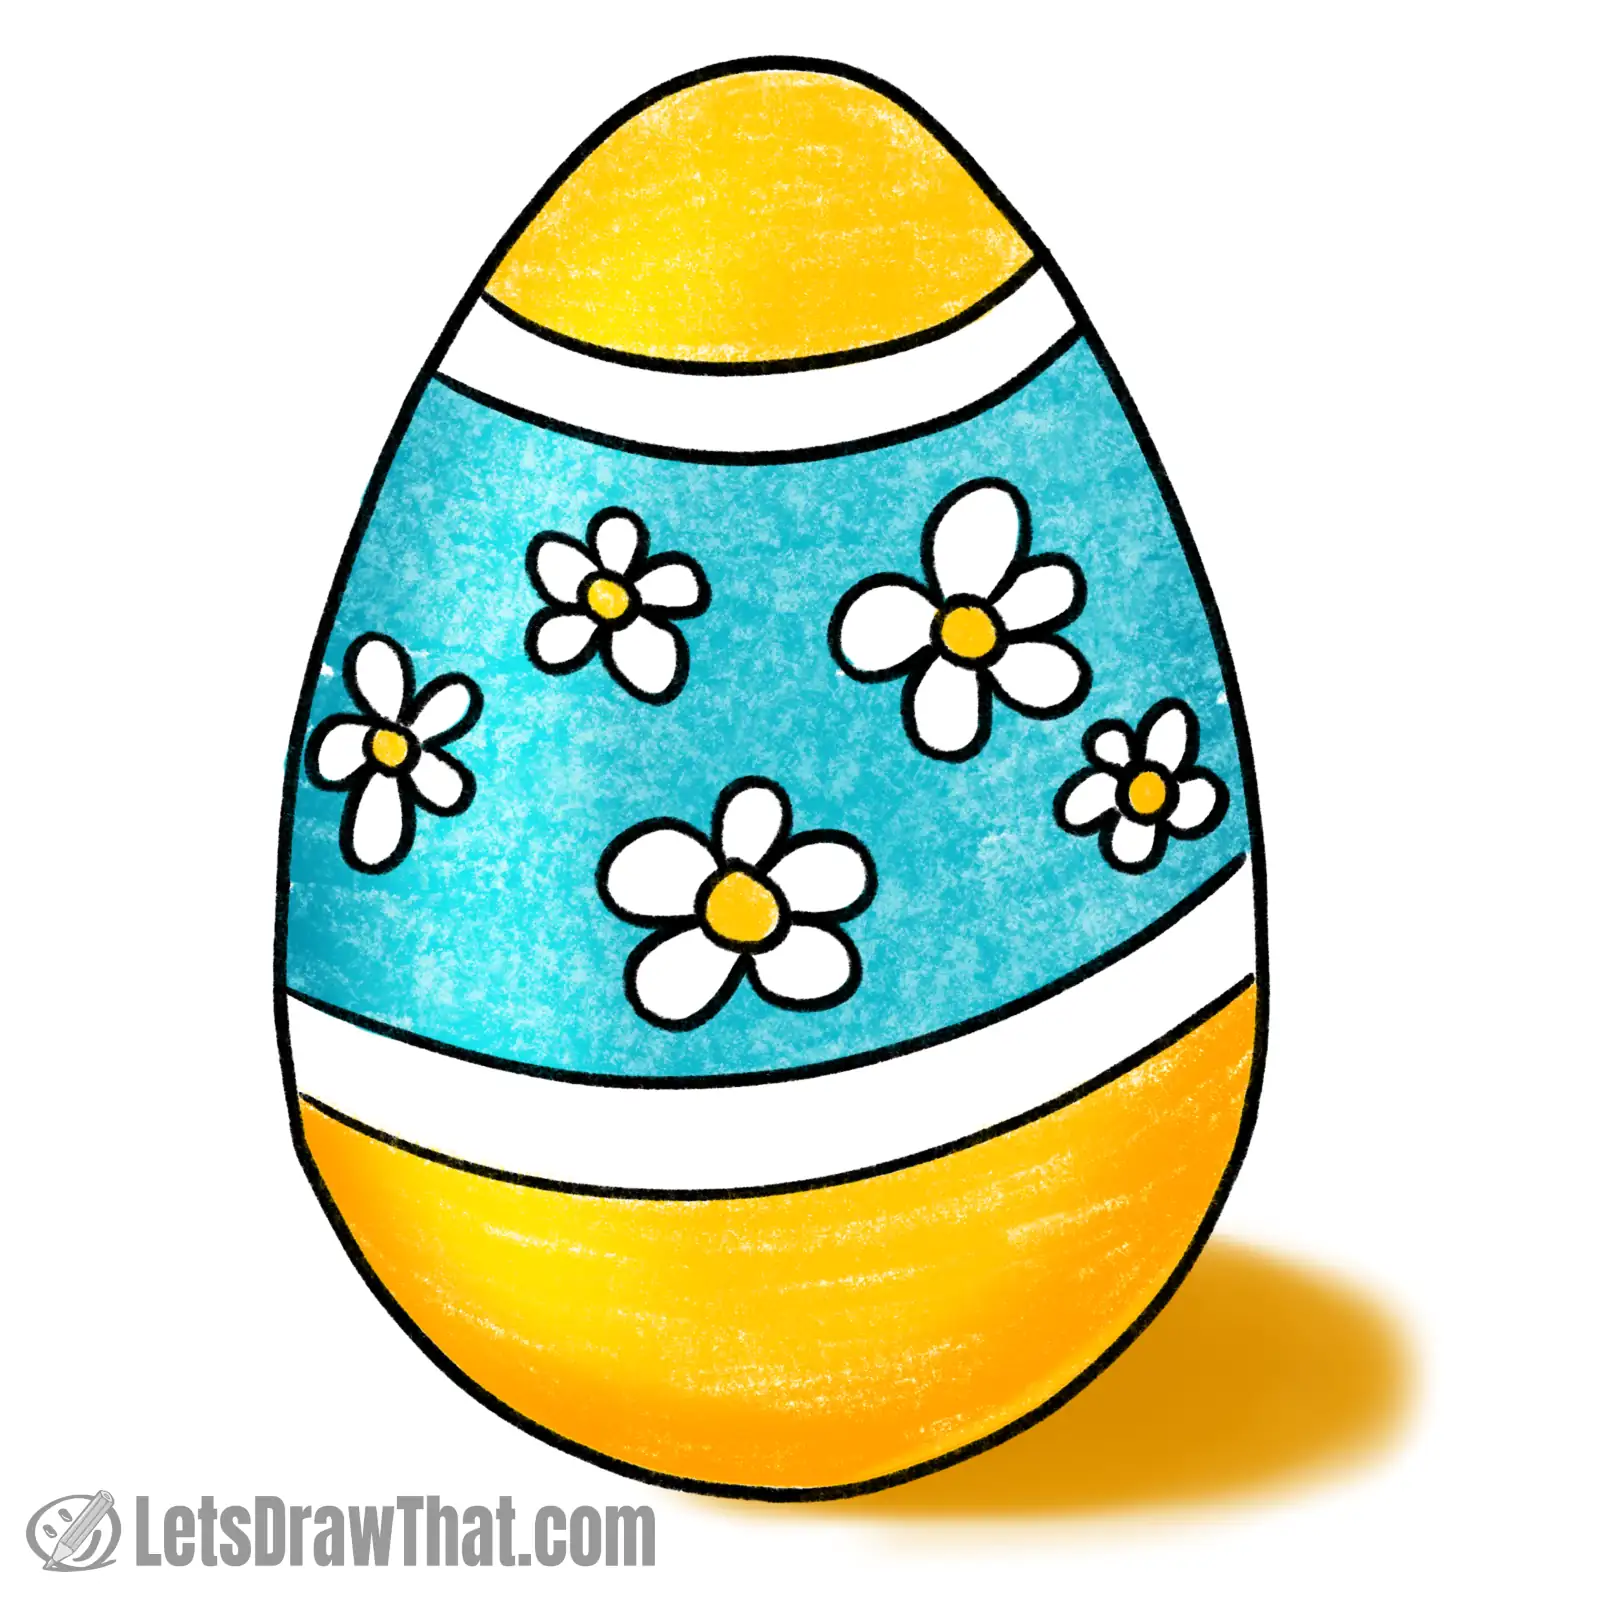
A simple coloring for a simple design: Again, we are sticking with the same colors.
We have used golden yellow for the top and bottom egg tips. We have colored the background on the middle wide band blue.
We are leaving the flower petals and then narrow bands just white – it makes the flowers look very subtle and clean.
But as usual, feel free to play around with your own color variations, there is no right or wrong.
Draw a simple flower:
Simple Flower Drawing: A Beautiful Flower in a Few Easy Steps
A really simple flower drawing tutorial just in time for mother's day! Just a few easy steps to draw a beautiful five-petal flower.Easter egg drawing: Geometrical flower patterns
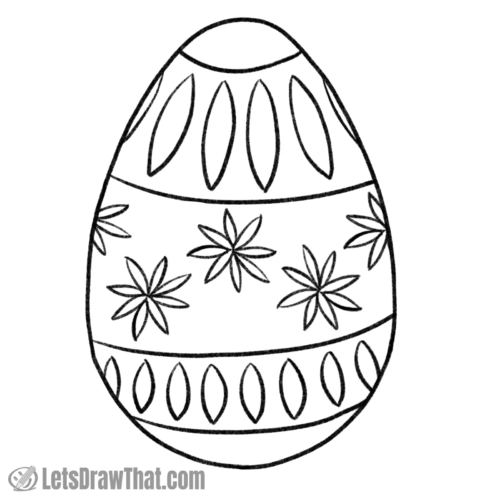
For our fourth Easter egg drawing, we will again combine some of the previous ideas.
We will continue with the flower motif but add some of the more geometric and repeating patterns.
Geometrical flower pattern Easter egg drawing
Step 1: Outline drawing

Again, we will divide the Easter egg into horizontal bands. This time we are drawing two wider bands at the top and one narrower at the bottom.
We will fill the top band with repeating lens shapes – just two narrow curves meeting at the pointy tip. These will look like flower petals around the tip of the egg, creating a 3D flower drawing.
Next, we will draw a few flowers with the same narrow lens shape petals. We have drawn eight petals for each flower, as these are simple to place. Draw the first four petals in the cross first (90 deg. apart), then add another petal in each of the four gaps in between (45 deg. apart).
For the final narrow band at the bottom, we are using the same lens shape as a repeating geometric motif.
Step 2: Color drawing
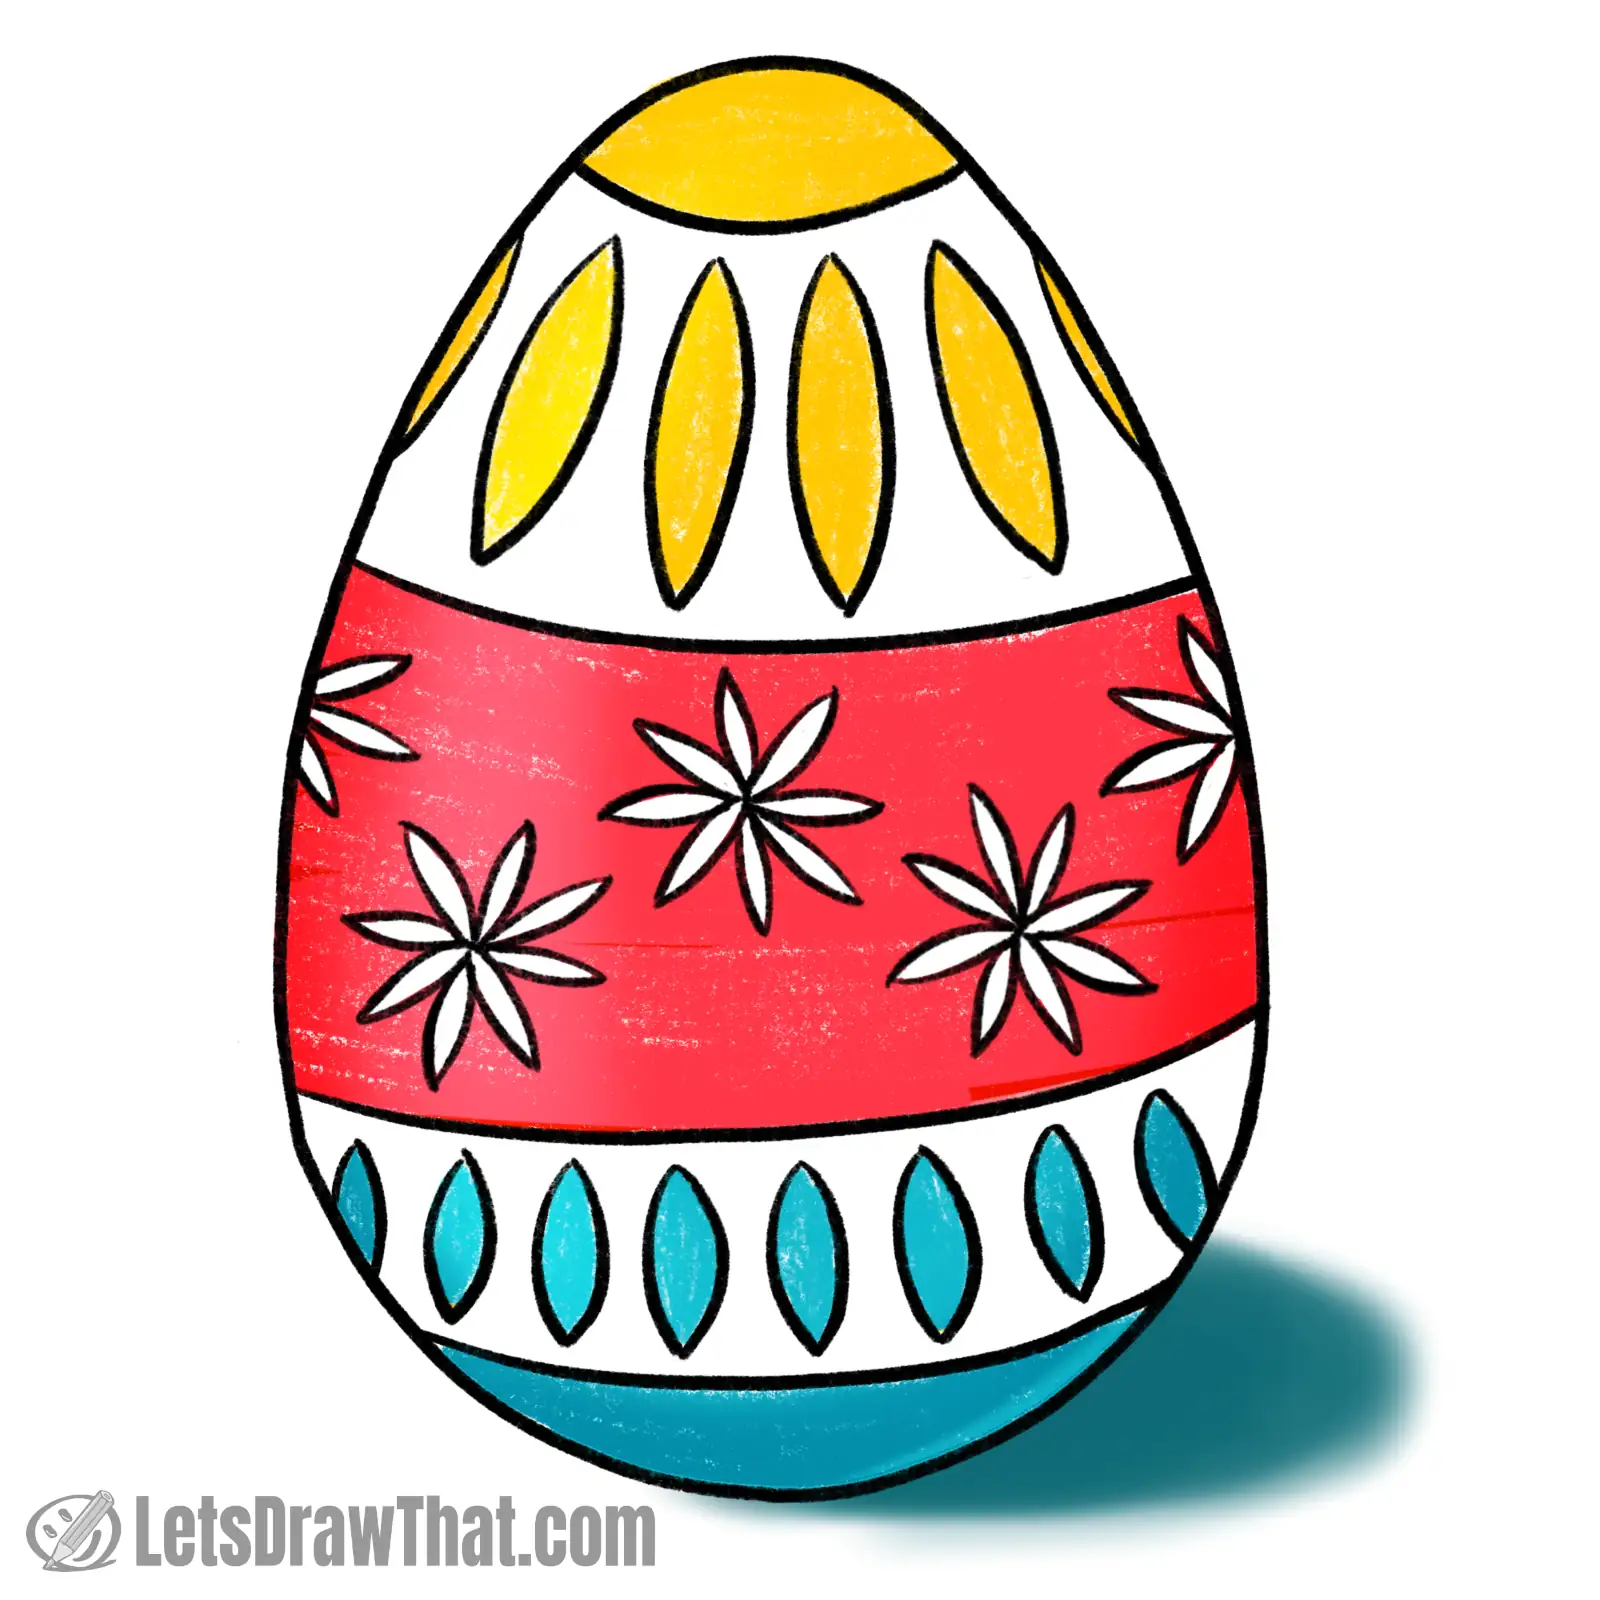
And here is the colored-in Easter egg drawing, which better shows the patterns we were creating. Again, we are using the same colors for simplicity and to match the other designs.
To create the top flower, we have colored the tip of the egg and the “petals” in the top strip yellow.
Then, we colored the background in the middle strip pink-red, leaving the flowers white.
Finally, the bottom tip and the shapes in the lower band are blue – again, this creates a sort of geometric grass or sepal leaves around our egg drawing.
Again, feel free to play around. What would it look like if those “leaves” would actually touch or even overlap the colored tips of the egg? Would that be more interesting?
Easter egg drawing: Love heart pattern

Easter and springtime are also times for love. So, let’s have another Easter egg drawing with some love heart patterns!
Love heart patterns Easter egg drawing
Step 1: Outline drawing
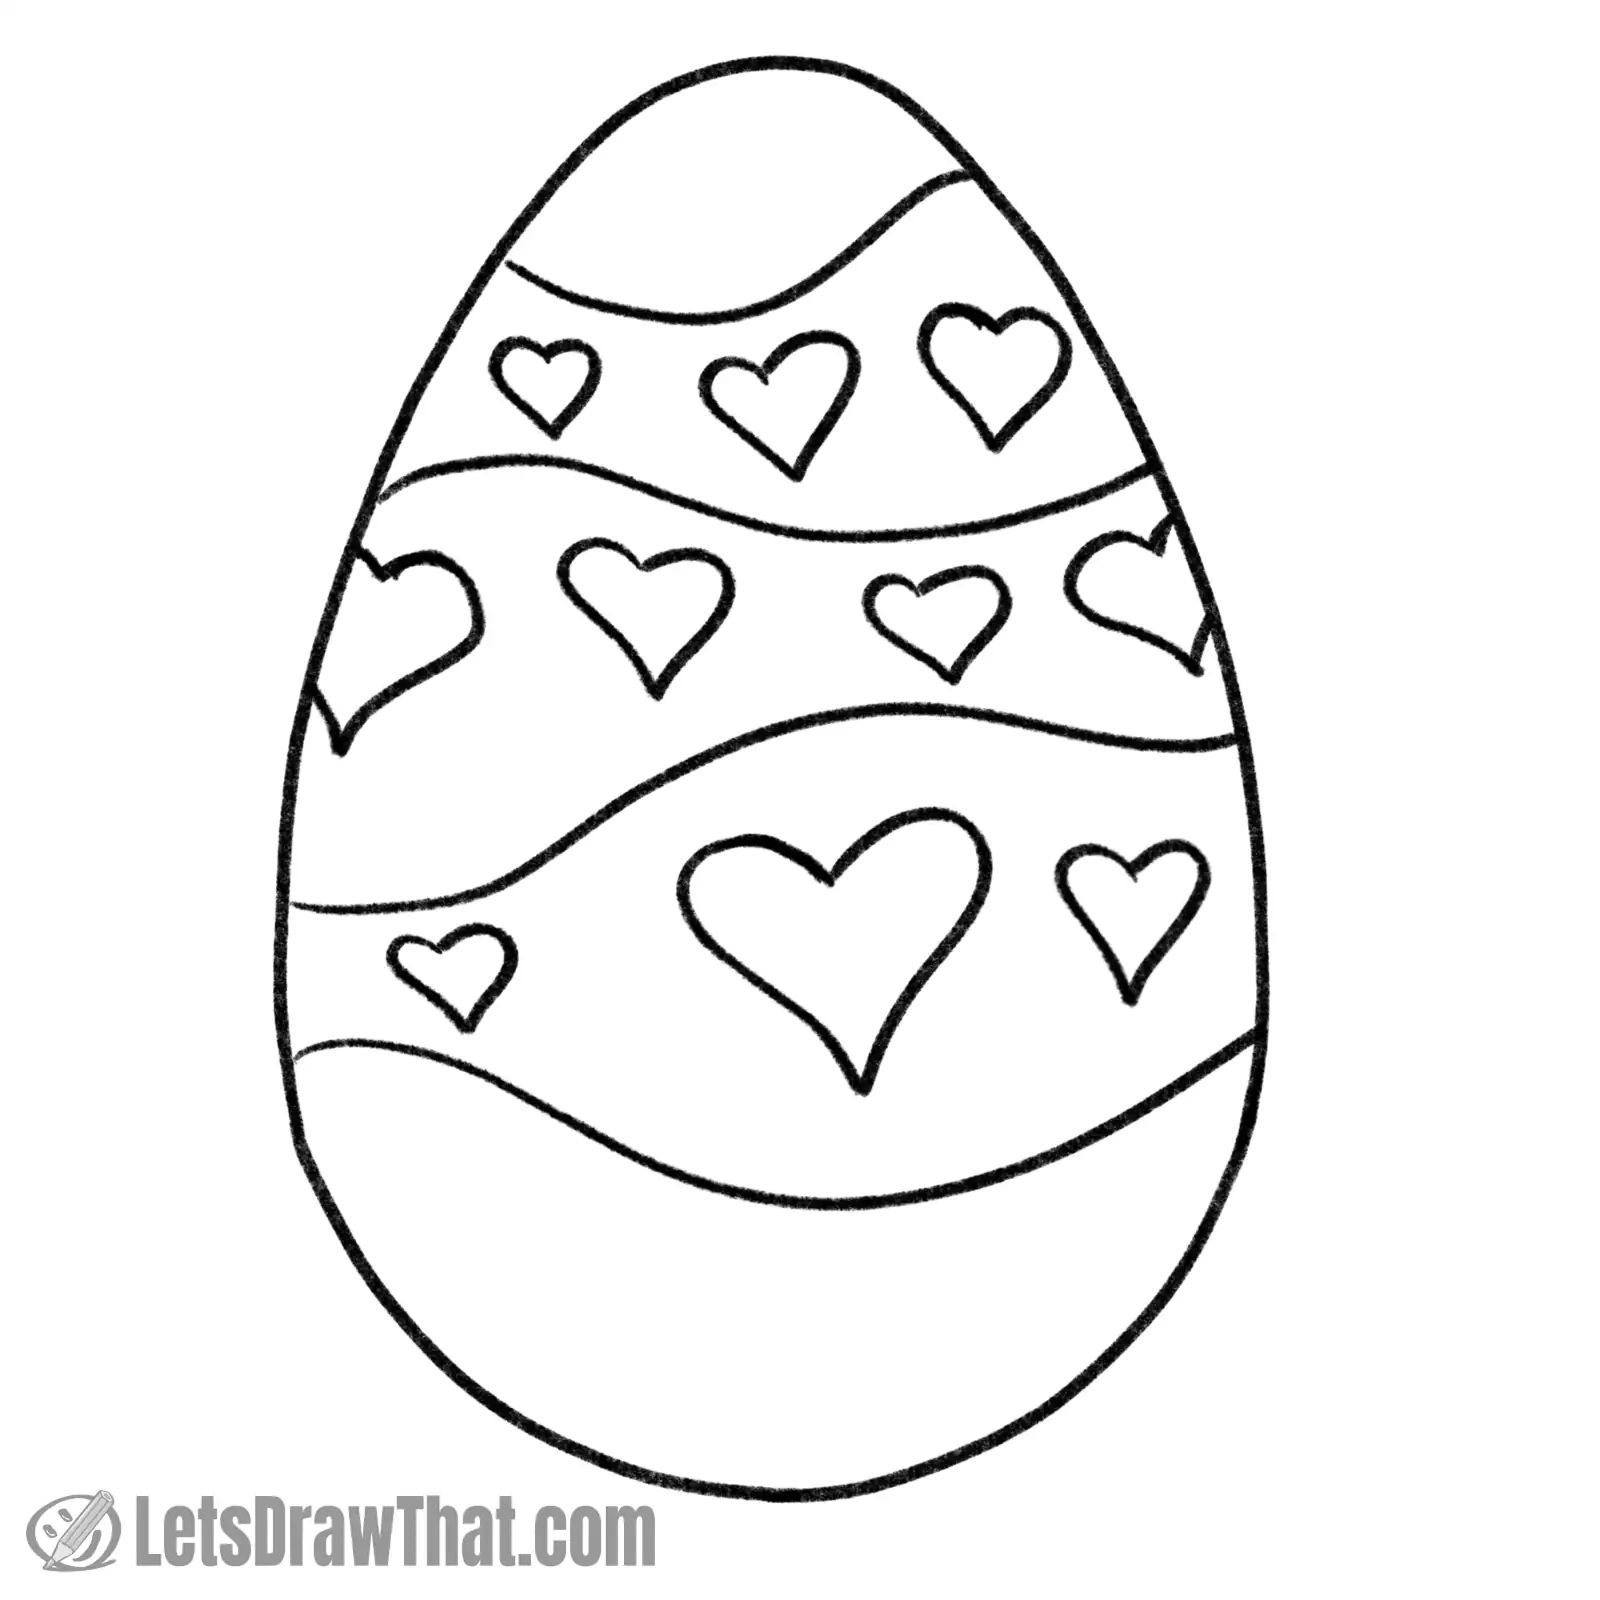
Here are a few more new ideas for your Easter egg drawings.
How about making the stripe bands on our egg wavy and irregular? Well, this is what they look like.
Then, fill the middle three rows with love hearts. For added interest and variety, draw the hearts in different sizes to match the widths of the wavy band.
Need some help drawing hearts? Check out our heart drawing tutorial!
Step 2: Color drawing
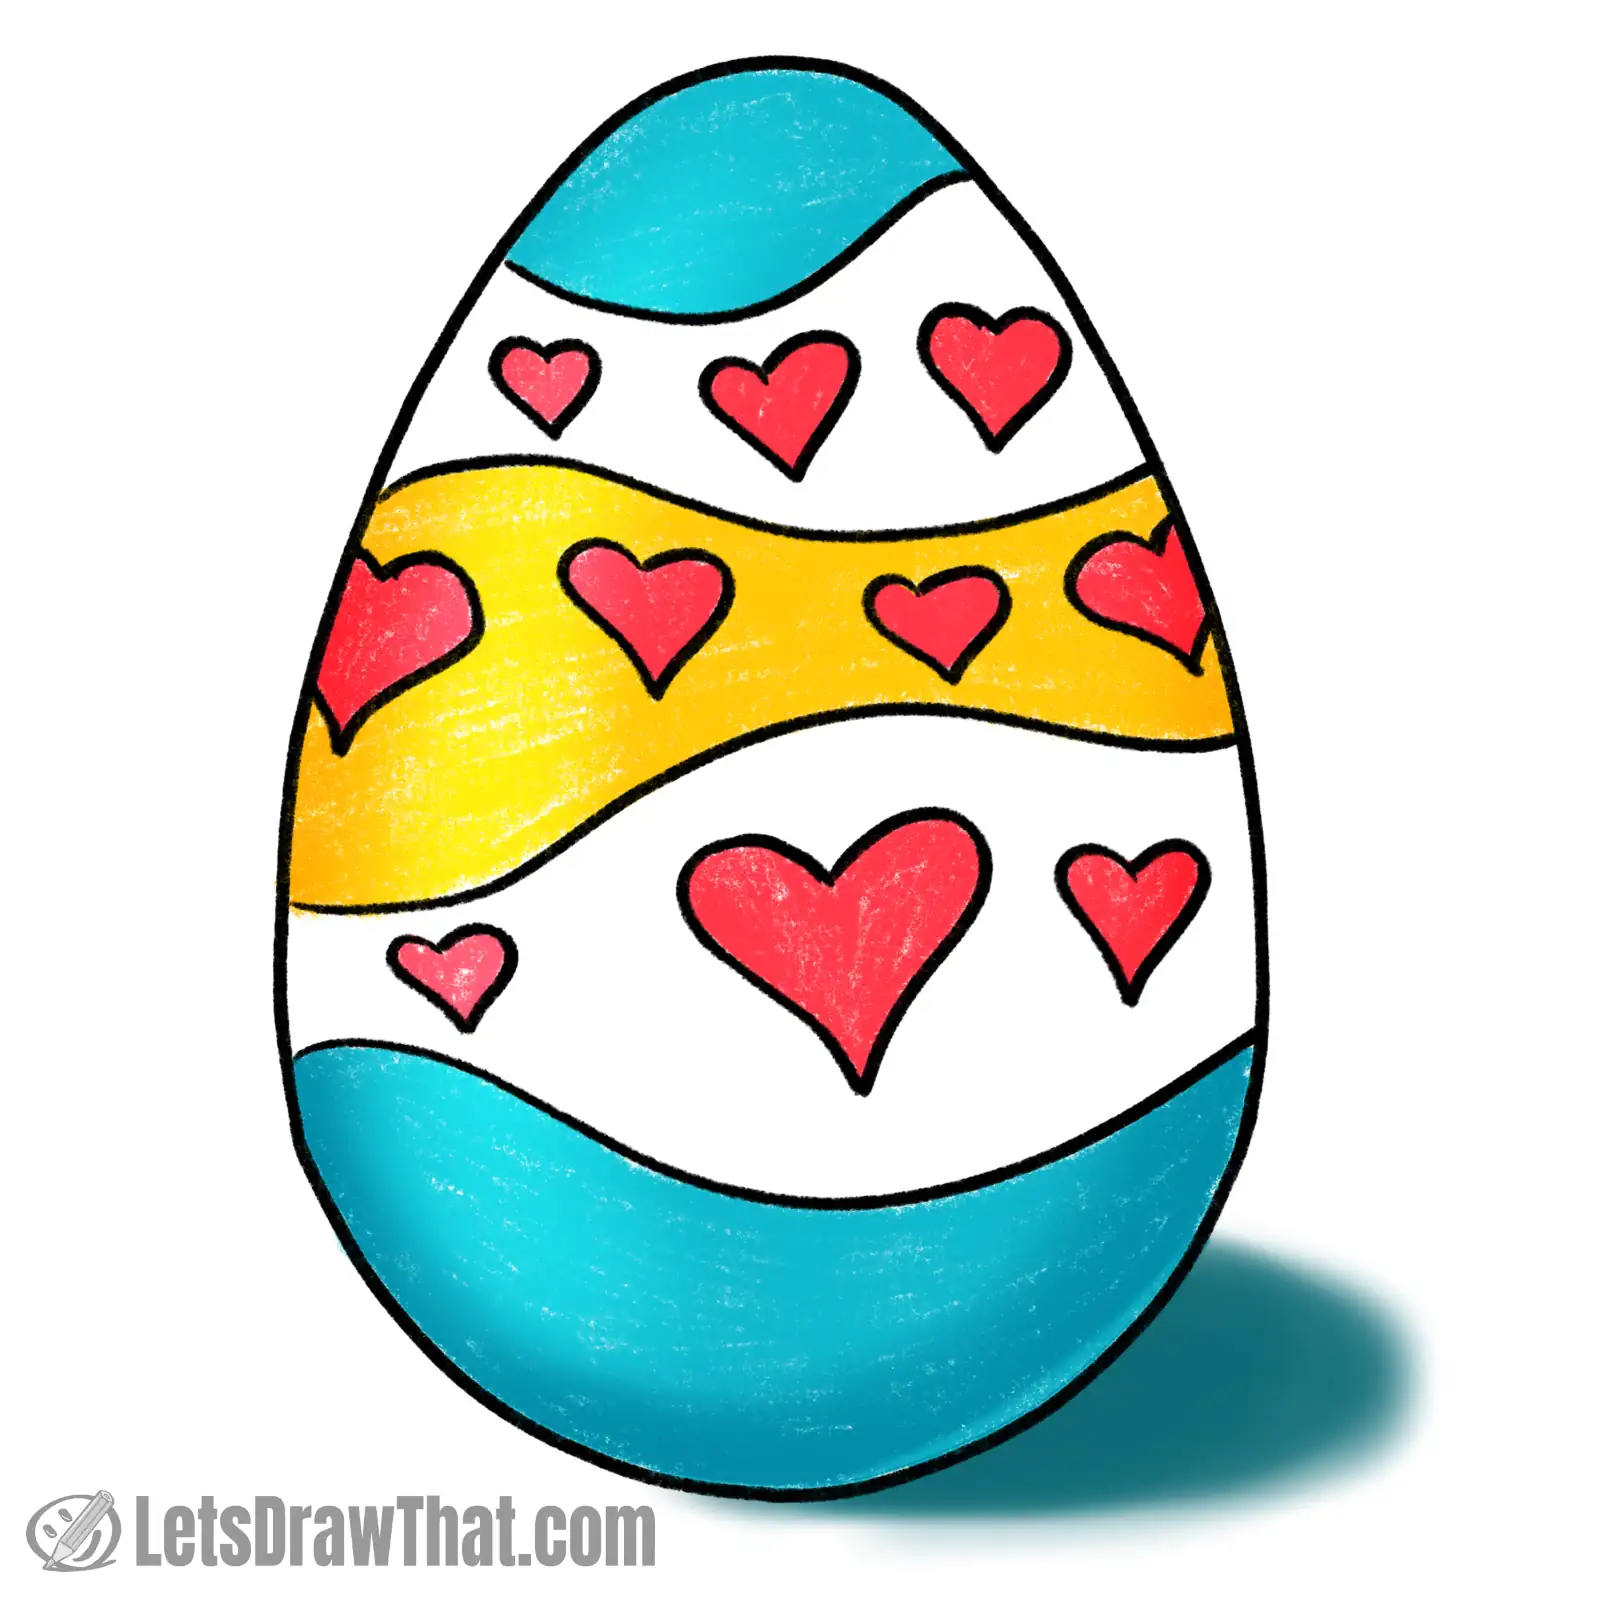
Again, we’re staying with the same colors since they work well:
The love hearts are hot pink, and the top and bottom tips of the egg are blue. To separate the middle band, we are coloring it golden yellow.
We love this pattern – it is simple but yet unlike the rest in the tutorial. The wavy bands make for some funky, dynamic drawing.
Learn to draw hearts:
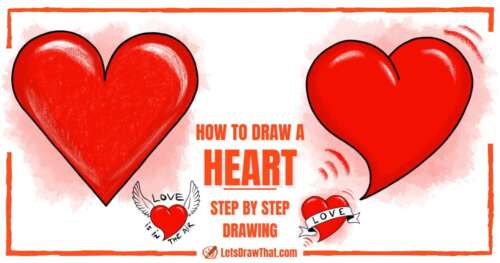
How to Draw a Heart: 2 Simple Ways Plus Bonus
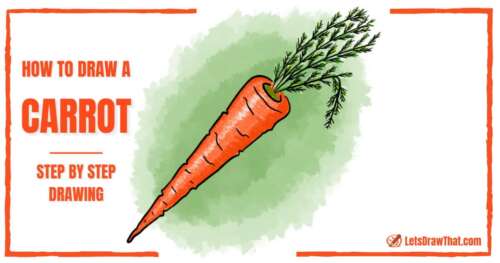
Learn two easy ways how to draw a heart: a classic simple heart icon and a nice curved heart. Includes bonus Valentine's day heart drawings!Easter egg drawing: Carrot pattern

Well, here is one unusual pattern we found online and could not resist adding since it is so much fun.
How about some carrot Easter egg drawing?
Carrot Easter egg drawing
Step 1: Outline drawing

Unlike our carrot drawing tutorial, this is a very simplified and stylized “carrot” to fit on an Easter egg.
Draw the carrot leaves first. Start with the one in the middle – that is a simple upside down “U” shape. Then, add the leaves on the side, slightly overlapping. Then, draw some midribs and veins on the leaves.
Then, add some texture to the upper part of the egg. Those are just a bunch of short squiggle lines that suggest the carrot root scars and cracks.
Step 2: Color drawing
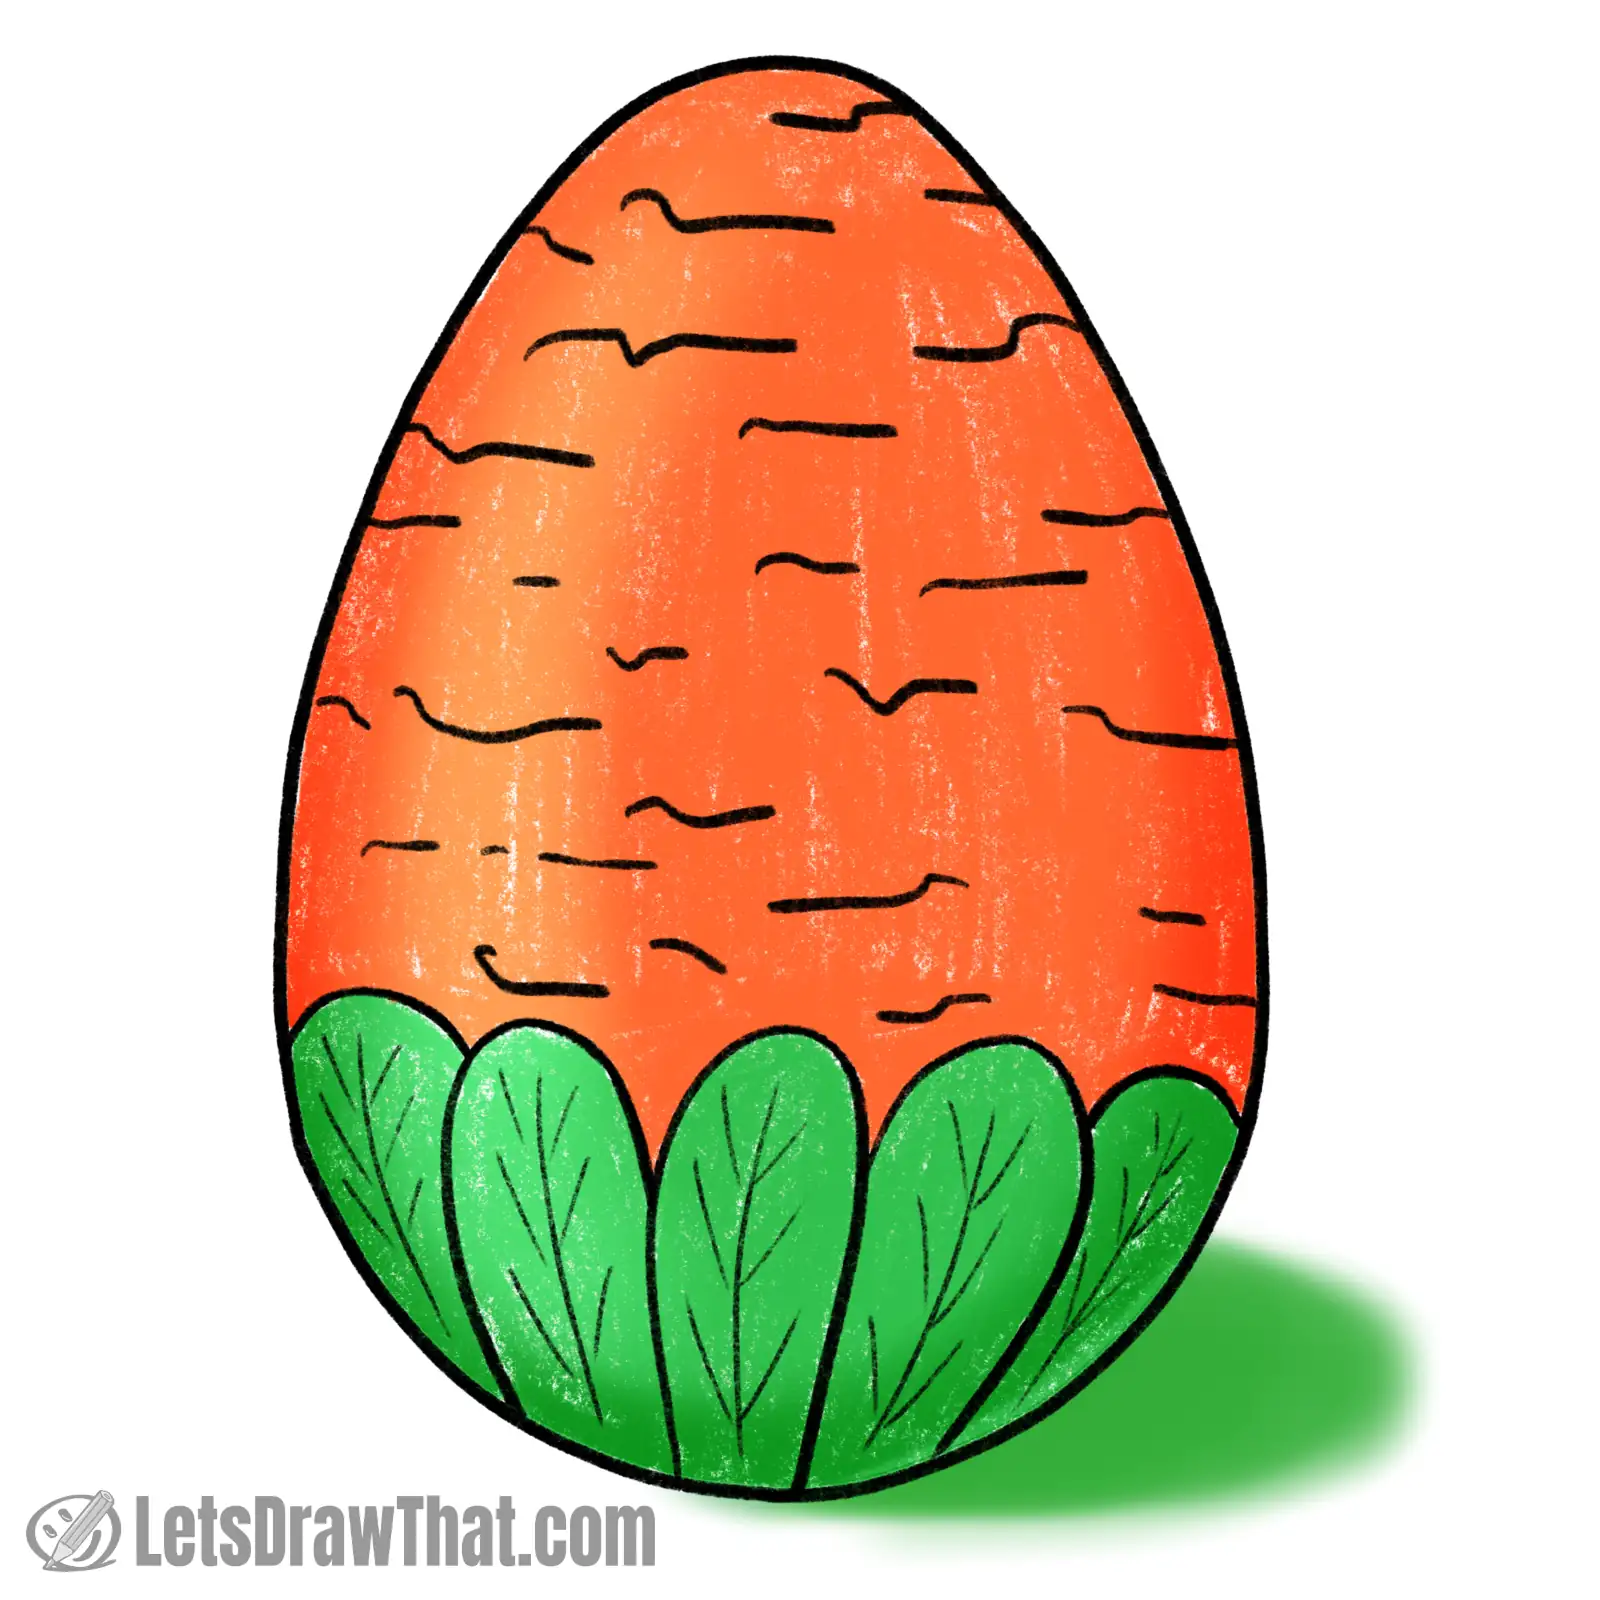
Oh, here are some new colors, finally.
The carrot, of course, needs to be orange. The leaves are bright green.
And what can you do with a carrot Easter egg? How about swapping it into our Easter bunny drawing tutorial? It would match the cute Easter bunny perfectly.
Want to draw a real carrot?